3DXchange5 Pipeline Test series 6: MMD Special Model
2012. 8. 1 Rev.8.15 by Hirospot (Personal Site)
|
How to bring a MMD special model to iClone5 as Non-Standard Character. |
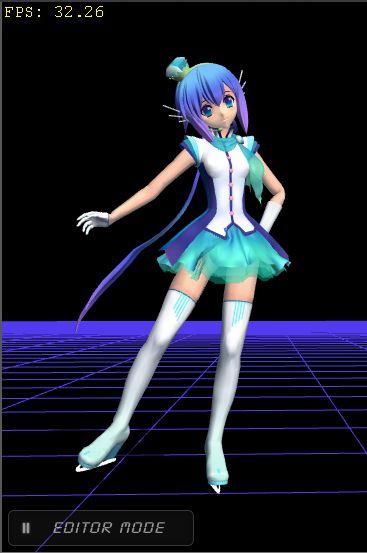
AOKI LAPIS(蒼姫ラピス)
in iClone DEMO
(wmv: 2.8M) |
|
|
|
|
 印は日本語でのレポートです 印は日本語でのレポートです |
|
|
iClone5 Preview: LAPIS |
|
AOKI LAPIS |
(C) i-style
project 2011 |
Character Design |
CARNERIAN |
Modeling |
KAKOMIKI |
|
|
Basic steps to convert MMD(Miku Miku Dance) characters to iClone avatar have been tested in my previous report.
The character tested in the past was selected among the user character in the MMD program folder.
Not only these 3D characters for MMD having been created by many users, famous RPG, Professional Anime and VOCALOID characters are also available to MMD users.
Extreamely thankful to "MMD 3rd", Windows magazine in Japan, we can now play with such special characters; 13 characters are provided as "SPECIAL APPENDIX MODELS" in the DVD-ROM.
All these Models are so attractive that makes anyone inclined to transport to iClone world but they have many bones and special texture arrangement.
Conversion of the test character was almost succeeded as iClone Non-Standard Character (i.Avatar), remaining the need of method for accepting blinking eyes and group bone mapping around the skirt and soft bone for hair, twintails and scarf, etc. |
|
| AOKI LAPIS(蒼姫ラピス), designed by CARNELIAN, modeling by KAKOMIKI is told as elfin character of newest VOCALOID3. |
| |
Work Step |
Tools to be used |
Report |
1 |
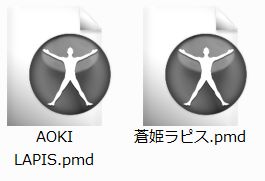
Prepare the test character from
MMD Chracter Models |
MMD 3rd SPECIAL APPENDIX MODELS
AOKI LAPIS |
(C) i-style project 2011 |
Character Design |
CARNERIAN |
Modeling |
KAKOMIKI |
|
2 |
Prepare Neccessary tools |
MMD, PMD Editor, colladaExport Plugin |
4 |
3 |
Character Data Conversion |
FBX Converter2011 |
4 |
4 |
(.sph)map material Mapping |
any 3D tool |
|
5 |
Chracterization for iClone use |
3DXchange5 Pipeline |
4 |
6 |
Motion Conversion (Optional) |
Live Animation |
5 |
7 |
Realtime Character Animation |
iClone5(Pro) |
4,5 |
8 |
Editing for Video making |
iClone5(Pro) |
|
|
1 |
Prepare the PMD model in the English path name to prevent unneccessary trouble. |
| |
|
| 1.1 |
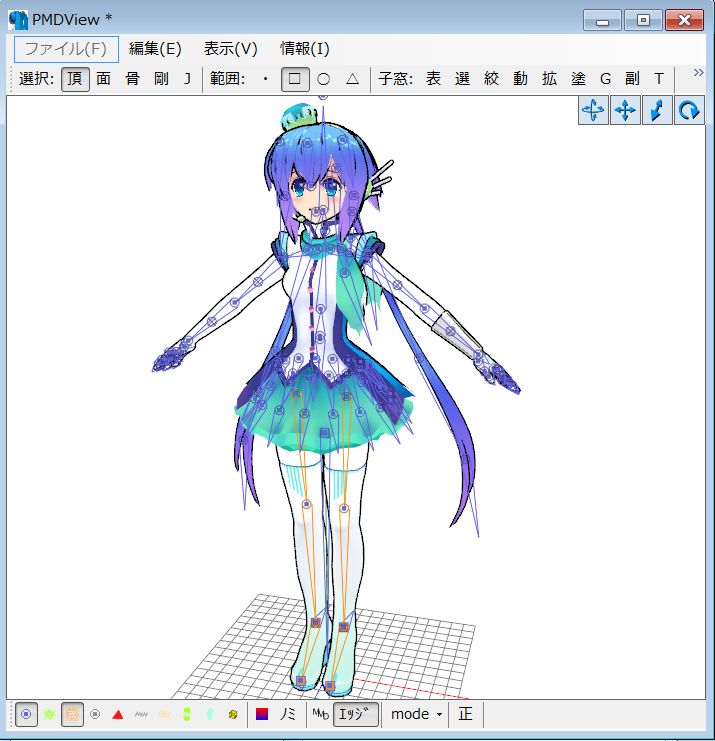
Open PMD editor, go to File/Import and open the character file in the PMDView. |
| |
|
1.2 |
Confirm the texture name and location on the character in the PMDView screen. |
| |
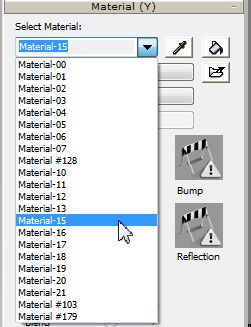
Sphere(.sph)map data is included in #8, #9 and #14.
These are not displayed in the 3DXchange. Rename to (xxx.bmp).
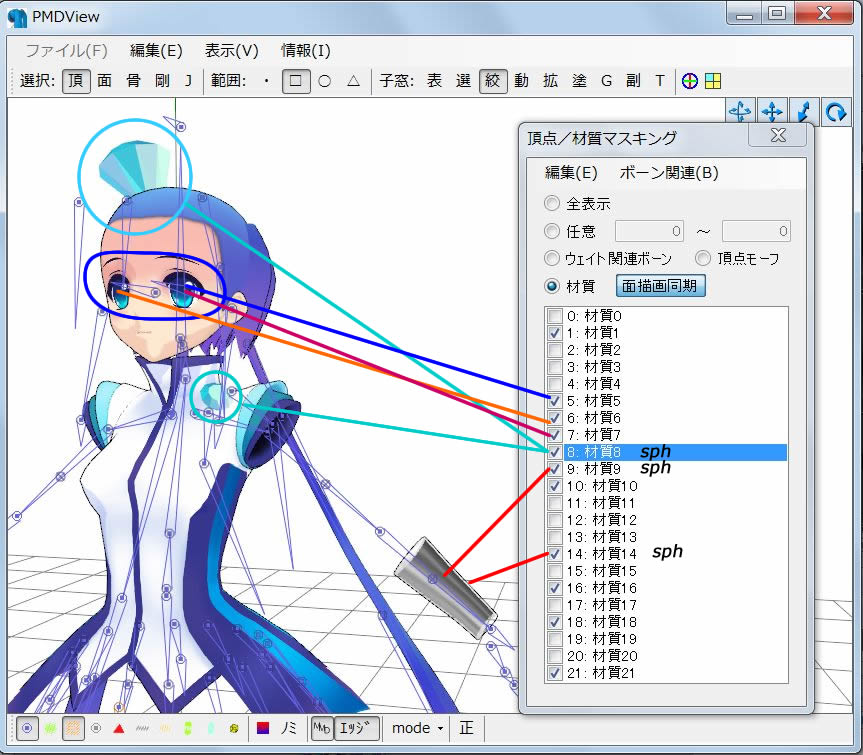 These 21 materials are transfered to iClone5 as Material-00 through 21 and #128, 109 and 179.
Better to make Material list with location name.
|
1.3 |
(Optional) Alter all Japanese names in textures for safety and furthe convenience. |
|
|
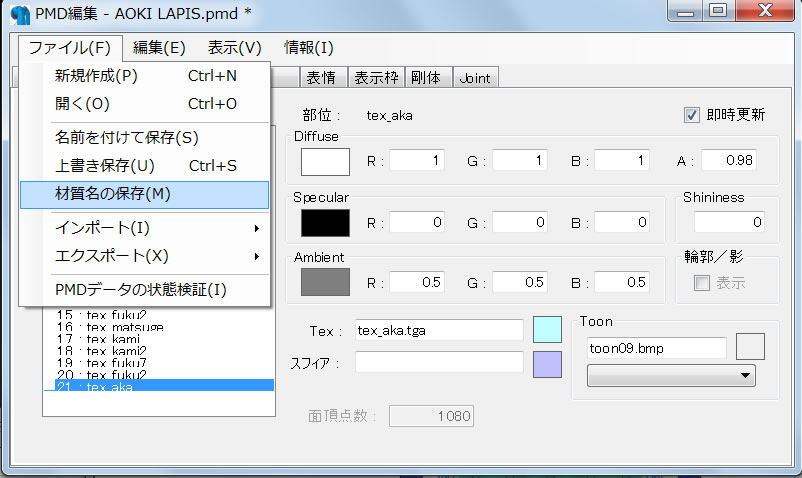
1.4 |
Go to File/(M) and save the new texture name. |
| |
|
1.5 |
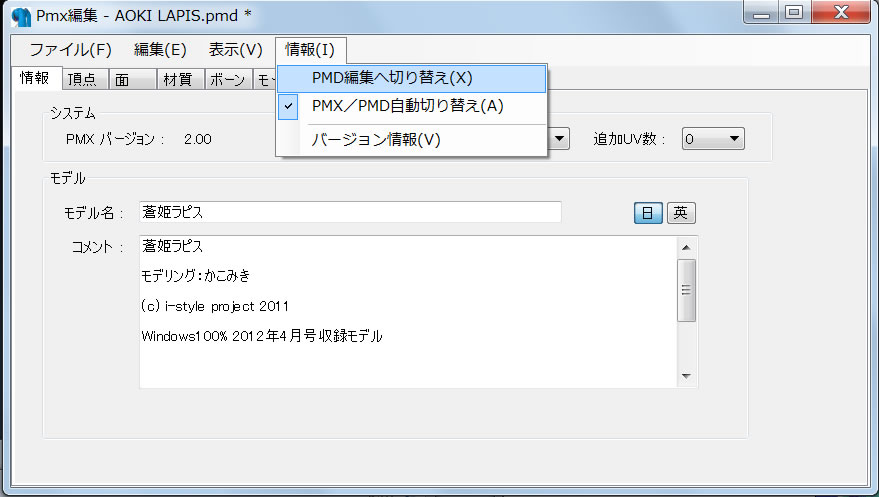
Go to I(Info) on PMD Top menu and select (X):PMDedit selection. |
| |
|
| 1.6 |
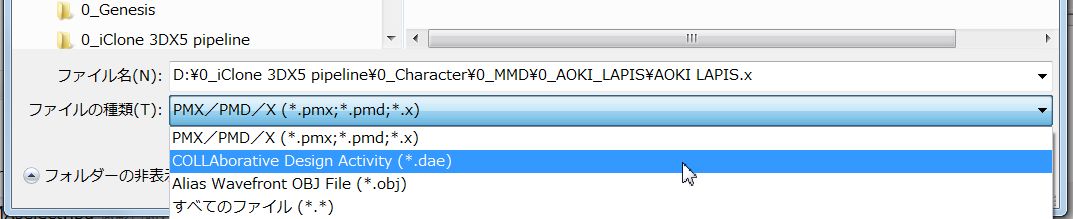
Go to File/Export and Select COLLADA DAE. (colladaExport Plugin should be installed.)
|
|
|
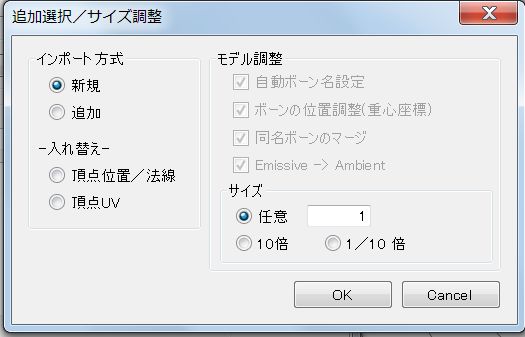
| 1.7 |
Set the size (here x7), push OK, confirm the Bone system (Matrix) and axis setting (Y). |
| |
|
| 1.8 |
Use Autodesk FBX converter for converting the DAE format to FBX. |
| |
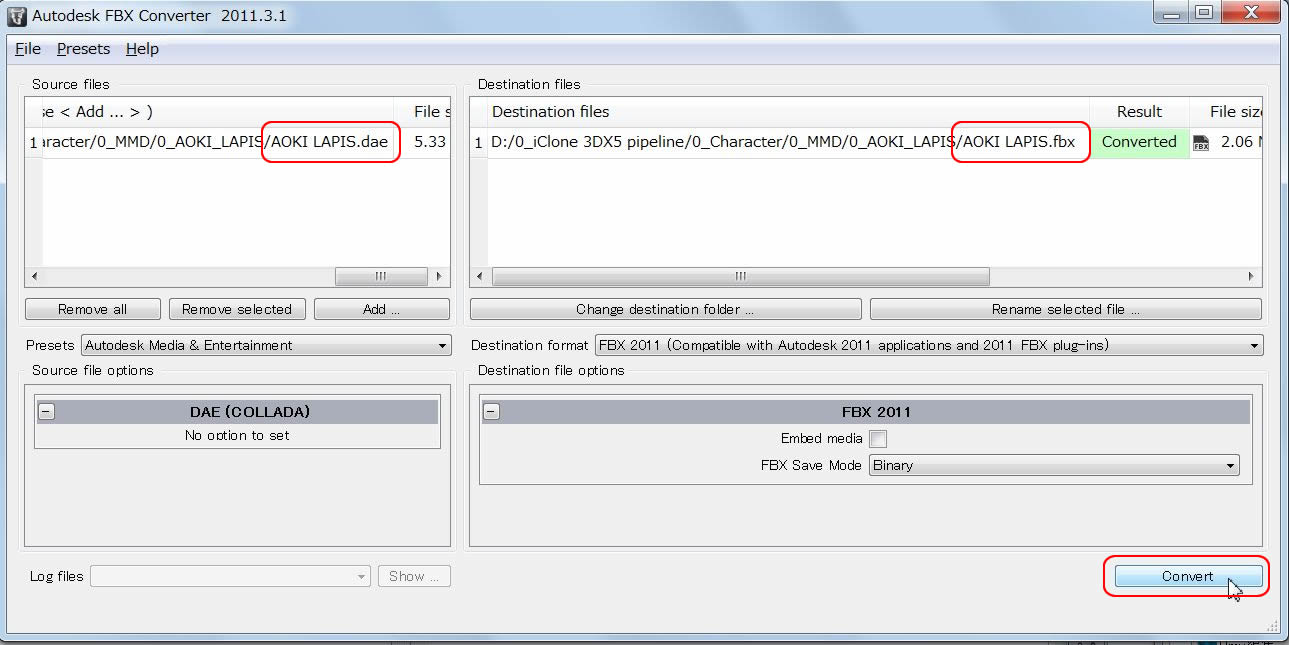 |
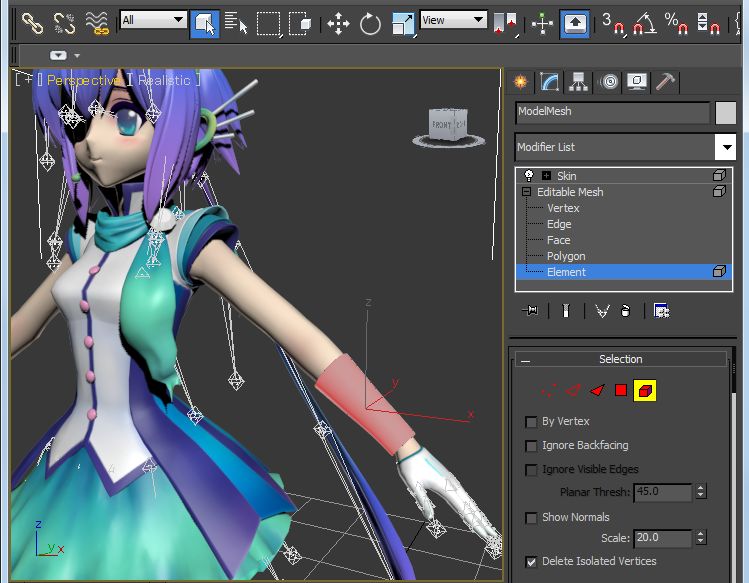
| 1.9 |
Before importing to 3DXchange, use any 3D tool to map sphere map data to the target mesh. |
| |
|
| |
Now the DAE character is converted to FBX format for 3DXchange Pipeline.
|
2 |
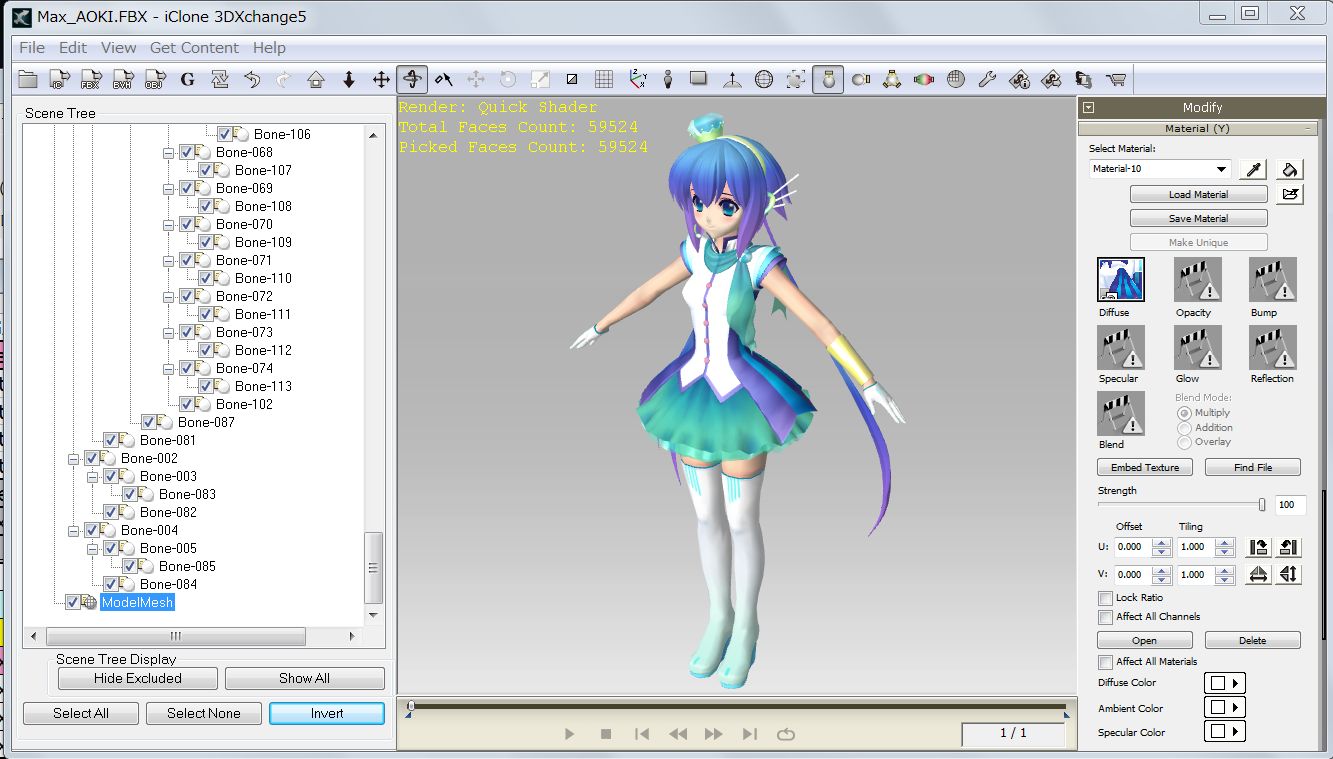
Import the FBX model into 3DXchangePipeline and manage textures in Material(Y) panel. |
|
|
| 2.1 |
Open Material list, select one by one and adjust each mapping factor accoring to the nature of the material. Material #128, #103 and #179 are .sph (bmp) format. |
| |
|
2.2 |
Go to Character and push Convert to Non-Standard, Bone Mapping manually. |
| |
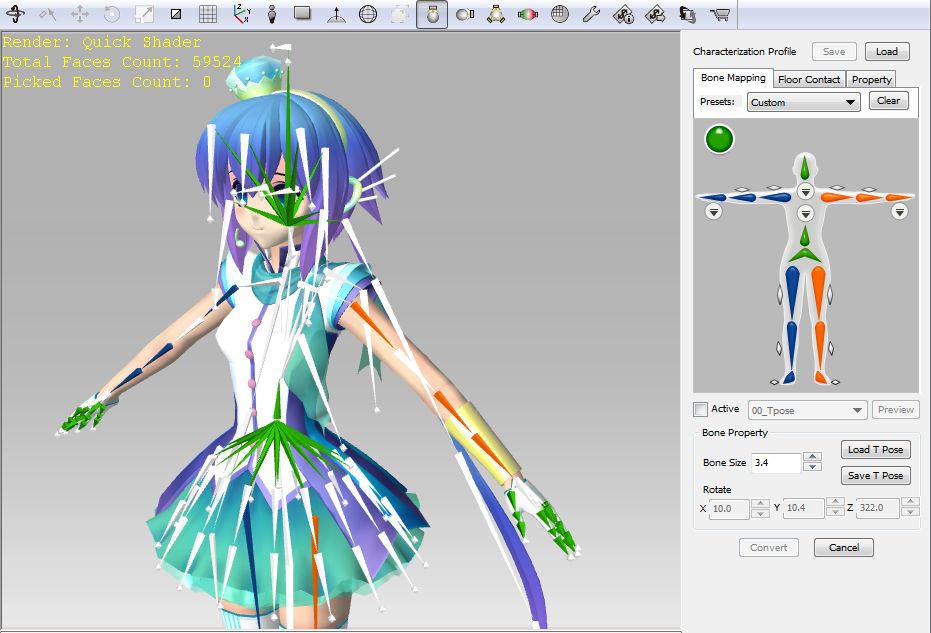 |
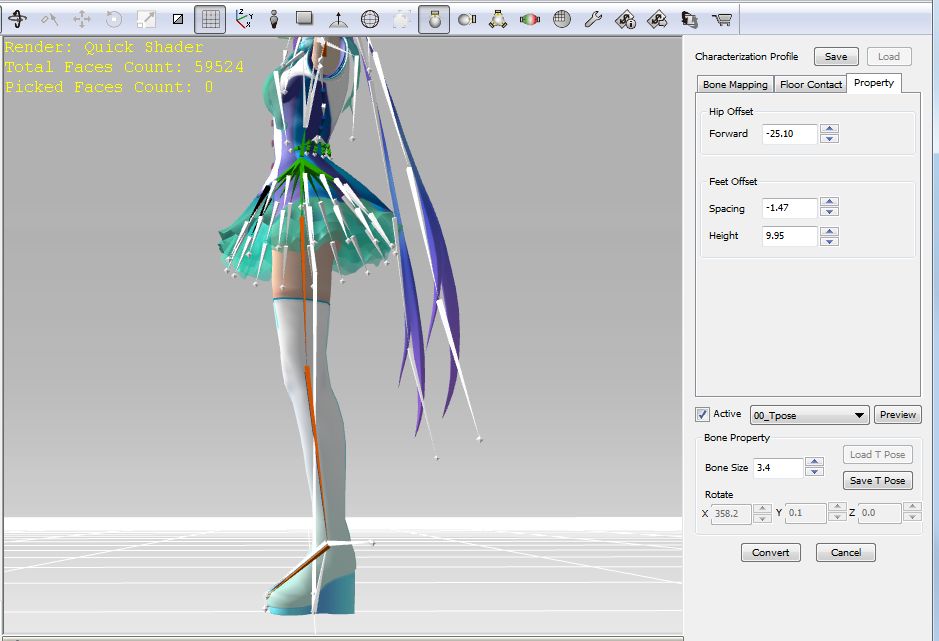
2.3 |
To make T-Pose select bone and use Rotate Object (E) |
| |
|
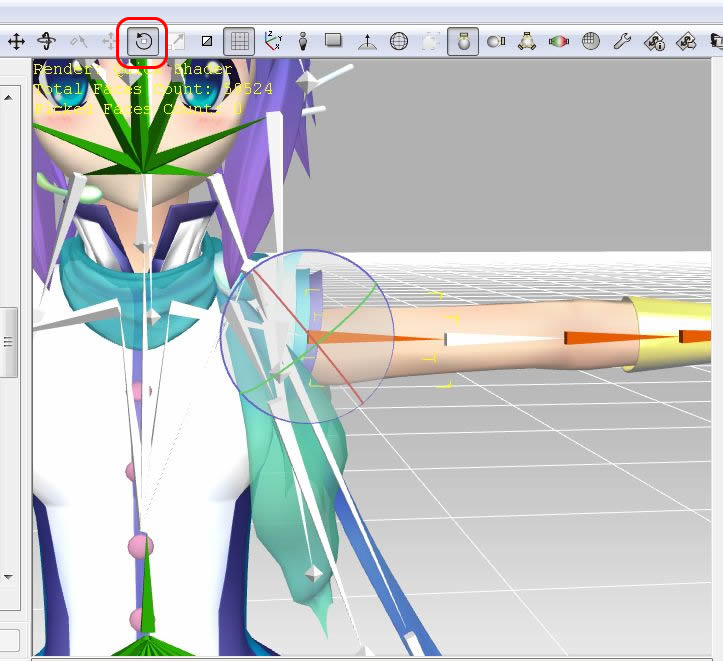
2.4 |
Apply 2 LegRolls to target bones, then Click "Activate" button for calibrations. |
| |
 |
2.5 |
Keep T-pose and adjust Hip Offset by repeating Activation. Make floor Contact, if needed. |
| |
|
2.6 |
Repeat Activation and confirm the mesh deformation against preset calibration motion. |
| |
 |
2.7 |
Push "Convert", then "Apply to iClone". |
3 |
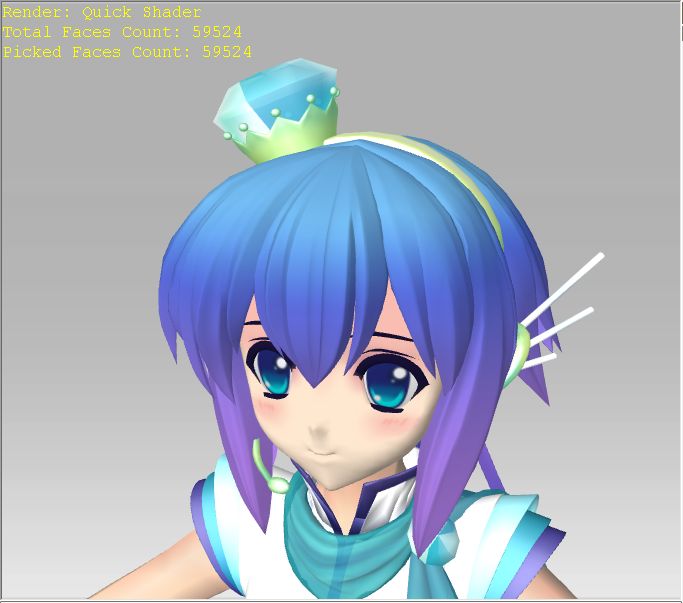
The character shows up in iClone5 preview screen. |
| |
 |
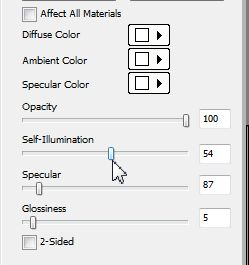
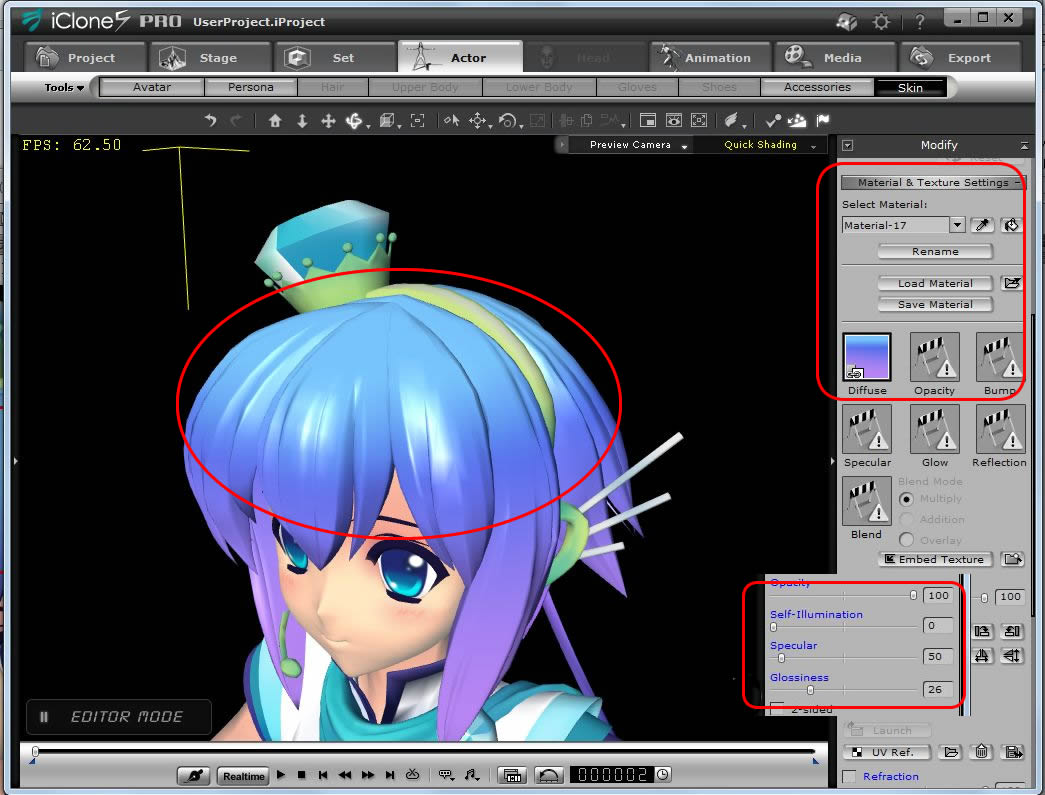
3.1 |
Select Skin/Materials and Texture Settings.
Adjust the Opacity, Illumination, Specurarity and Glossiness to express nature of the material. |
| |
|
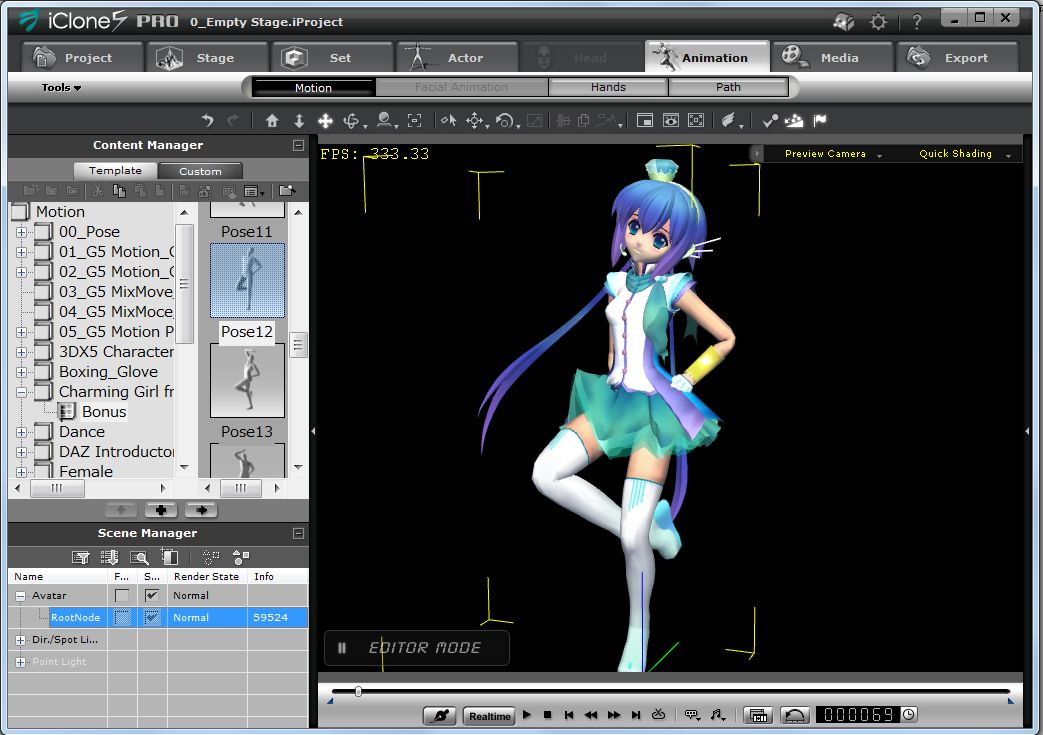
3.2 |
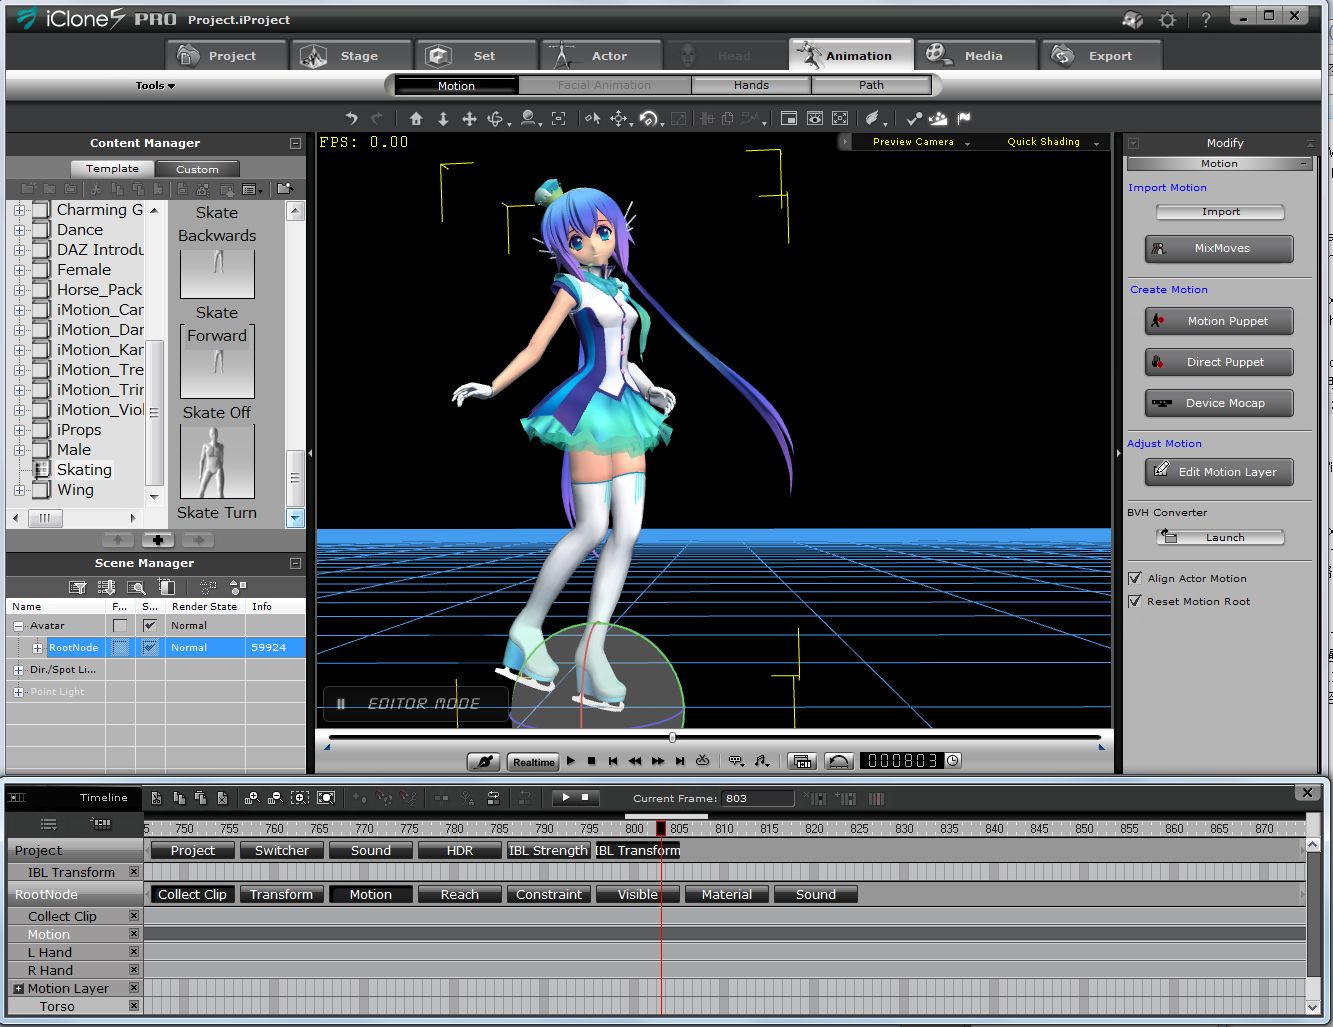
Apply any iMotion poses and confirm the character movement. |
| |
|
3.3 |
Apply any iMotions and animate the character in the powerful motion edit environment of iClone5. |
| |
|
| 3.4 |
Try short video to show the converted character. Video (wmv 2.8M ) |
| |
(To be Continued.... ) |
4 |
Soft Pony Tail |
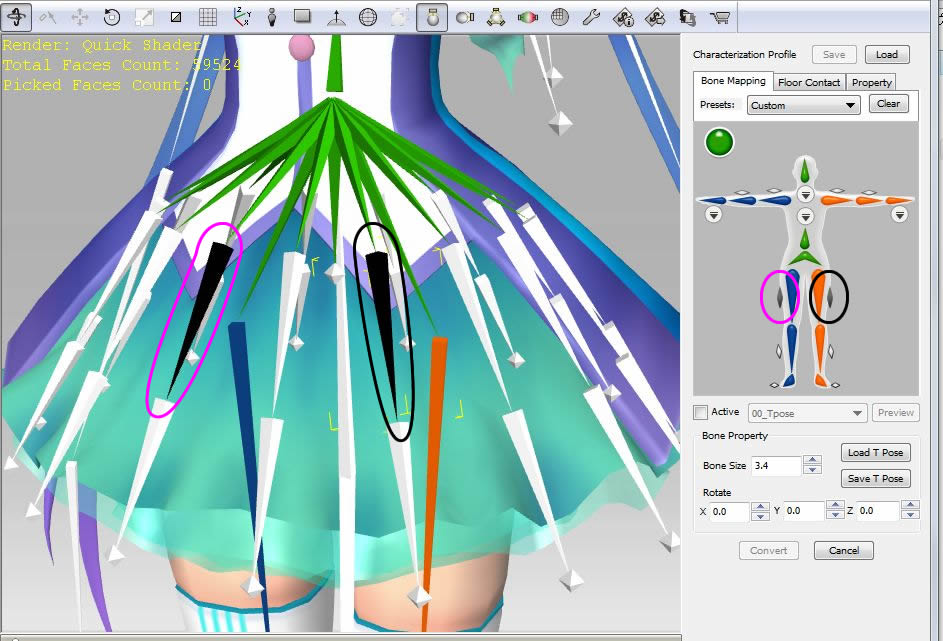
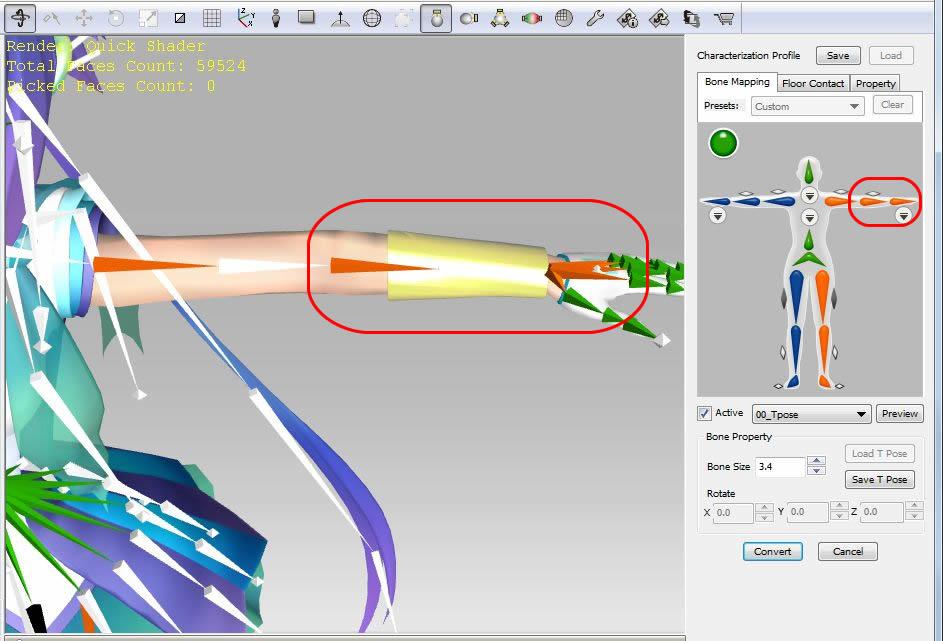
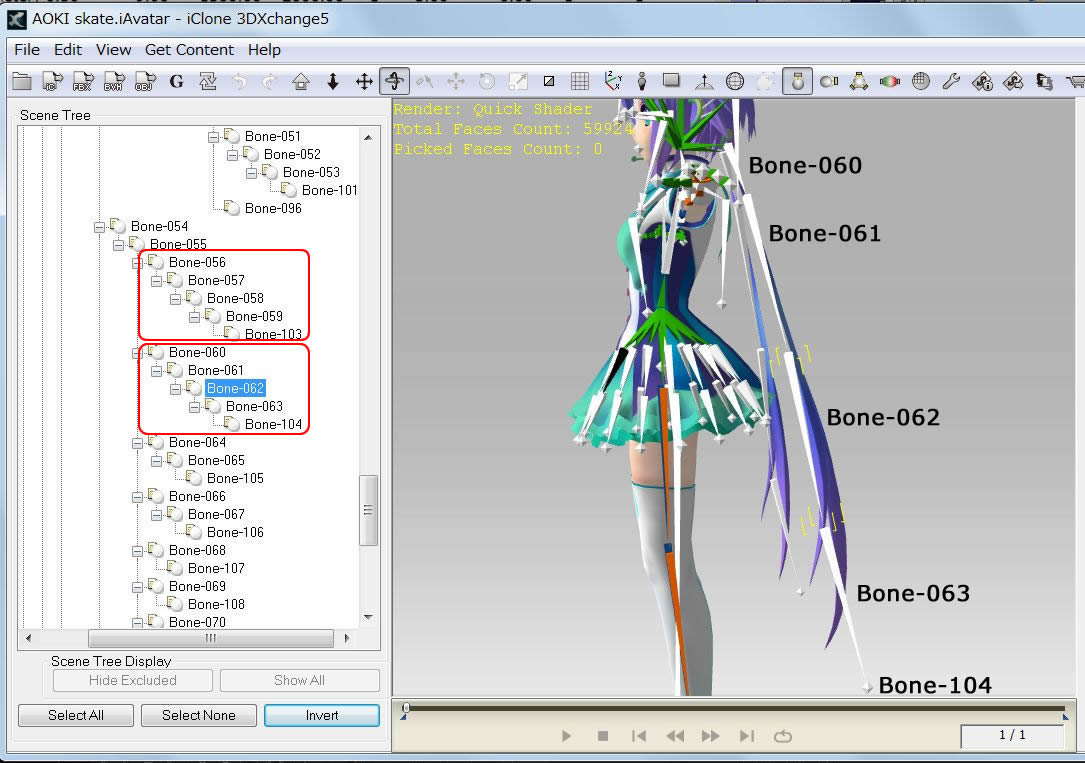
4.1 |
Select Bones in Pony tails. |
| |
 |
| 4.2 |
Make SPX file. Examine the adequate Parameters, sample file is shown as follows. |
| |
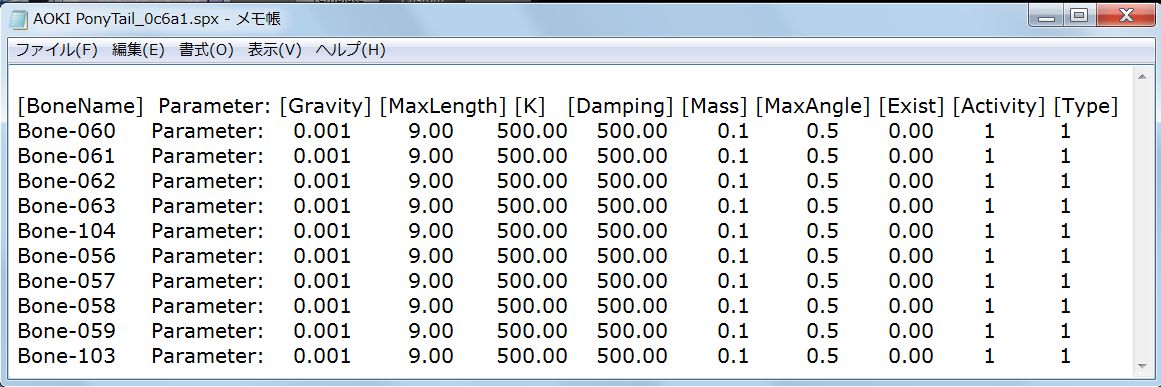 |
| 4.3 |
More details are reported in the Report #7, Chapter5. Go to Report#7 |
3DXchange5 Pipeline Test Report #6 2012.8.1, Rev1:8.9, Rev2:8.15 by Hirospot |
|