 and
and 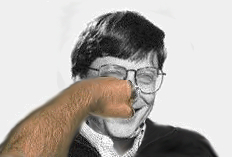
Note: I prepared mouseover template which you can save to the template folder and reuse without JavaScript editing. Please request to NTMM. I'll repost as soon as possible.
It is a little bit difficult to compose, but you can make mouseover even if you don't have your own web site. This procedure uses LAYERS(<layer> and <ilayer>) which is the HTML tag only Netscape supports. Please note that layers are quite different from normal images.
First, you must prepare two images which size are (almost) the same. Here is sample images. If you don't have, save them to your HD.
and
I can't remember who he is, but assume his name is Bill. :-) So first image file is named "bill.jpg", second is "punch.jpg". These images are the same size; height = 157 pixels, and width = 232 pixels. Both two images must previously located in your HD. Any directory will do as long as you know where.
Now, in composition window, click Insert Object icon | Insert Images icon. In the "Image location", choose file and select "bill.jpg". Hit return key once or twice (this is optional but make it easy to compose, I think). Do the same to "punch.jpg". This image appears after mouseover, so you can add alternate text if you like.
Next, you must define images as layer. Layer properties should be respectively:
bill.jpg : <LAYER name="bill" LEFT=200
TOP=15 VISIBILITY="show" onMouseOver="punch_show()">
punch.jpg : <LAYER name="punch" LEFT=200
TOP=15 VISIBILITY="hide" onMouseOut="punch_hide()">
Here, you can change colored part depending on your image name. But
if you change these parameters, you must change respective parts of the
JavaScript below (shown in the same color). Layer name can be such like
"image1", but for the beginning, it is better to name you don't confuse.
Left and top parameters define the image location. Numbers are pixels.
The standard point is the upper-left corner of the window. These values
also can be changed, but be sure to match the numbers in two layers.
If you have Tools | Layers | Create Layer..., using it will be handy.
In composition window, click upper image (bill.jpg), border will appear.
Then go to menu bar, click Tools | Layers | Create Layer... Blank small
window "Add Layer" will appear, click OK in the bottom. Now two yellow
tags are appear both left and right side of bill.jpg. First tag is <LAYER>
tag, so right click this and choose "HTML tag properties". The box with
<LAYER> appears, so move your cursor between R and > ,hit space key
and type above. (Alternatively, copy from " name=..." to "punch_show()"
and paste.) Click OK. Don't disturb second </LAYER> tag.
Do the same to "punch.jpg".
Now, you made two layers. Then you must make one more layer contains
both layers, to make it easy to handle them. Go Edit | Select all (or Ctrl+A),
and Tools | Layers | Create Layer... again. In the new <LAYER> tag,
add "i" before "layer", and type name="base", so this tag should be <ilayer
name="base">. (name=base will work.) Ilayer is for "inline layer", which
prevents image overlapping above the text you might add under the image.
You can change </layer> tag to </ilayer>, tho </layer> seems to
work.
Note that this layer ("base") is a parent layer, and "bill" & "punch"
are child layers.
In the next step, you must add JavaScript that control layers. Here's the sample scripts:
<SCRIPT language = JavaScript>
<!--
function punch_show() {
document.layers["base"].layers["bill"].visibility
= "hide";
document.layers["base"].layers["punch"].visibility
= "show";
}
function punch_hide() {
document.layers["base"].layers["bill"].visibility
= "show";
document.layers["base"].layers["punch"].visibility
= "hide";
}
// -->
</SCRIPT>
This script changes both layers' "visibility" property according to mouse move. At first, bill's visibility is "show" defined by <LAYER> tag. So bill.jpg will appear. If you mouseover bill, "punch_show" is activated and hide bill, show punch; so punch.jpg will appear. And if you mouseout punch, "punch_hide" is activated, and bill appears again.
Copy above script from <SCRIPT language = JavaScript> to </SCRIPT>, back to composition window. Move cursor after last </LAYER> tag, hit return key, and Insert | HTML tag... Paste copied scripts in the box. In this case, you can ignore "one tag only" notice. Click OK.
Now you can click Save button, and check if it works in the draft folder.
The reason is the nature of the Layer. Layer acts in the manner quite
different from usual images, such as overriding texts. So it requires some
tips to add texts below the image.
Congratulations! You did it.
The screen shot showing each HTML tag.
Here you can see an example mouseover.
10/17/1998
Joji Ikeda (^_^)