2013.12.20 Hirospot (Personal Site)
|
|
This is a traditional solution for getting Dance Motion data from Dancing Video. AKB48 is a very charming Japanese idle group and the 'Fortune Cookie in Love' has recorded milions hit. So many cover videos are seen in YouTube channels. I wanted to try playing this dance motion in iClone5, without using Kinect system. |
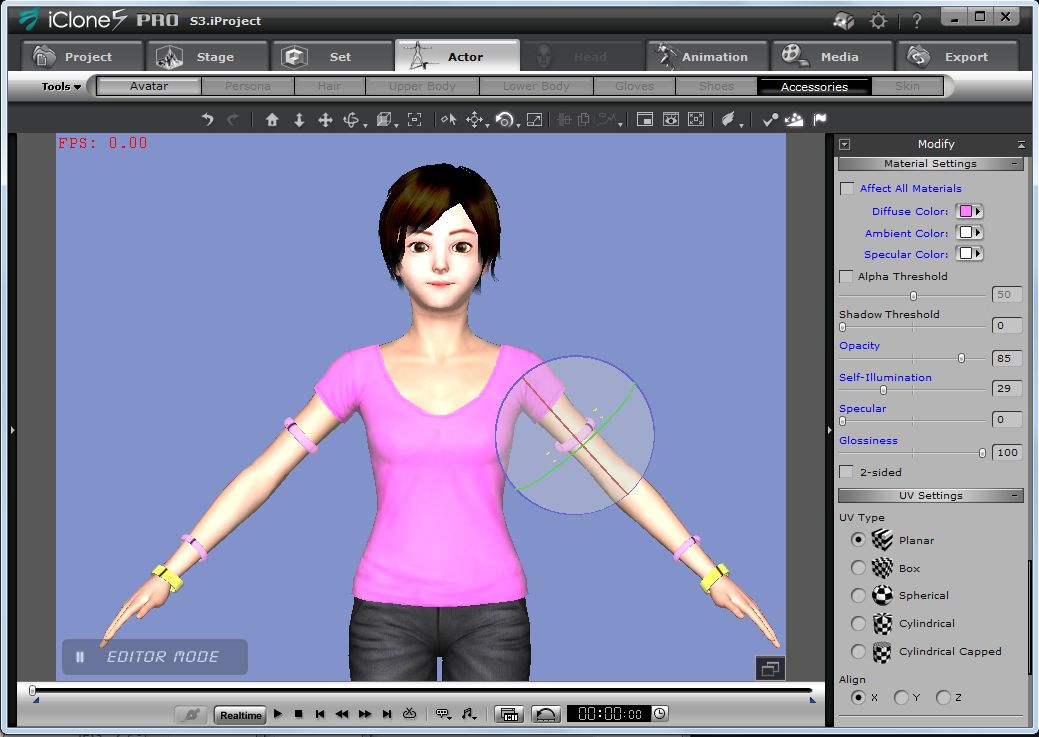
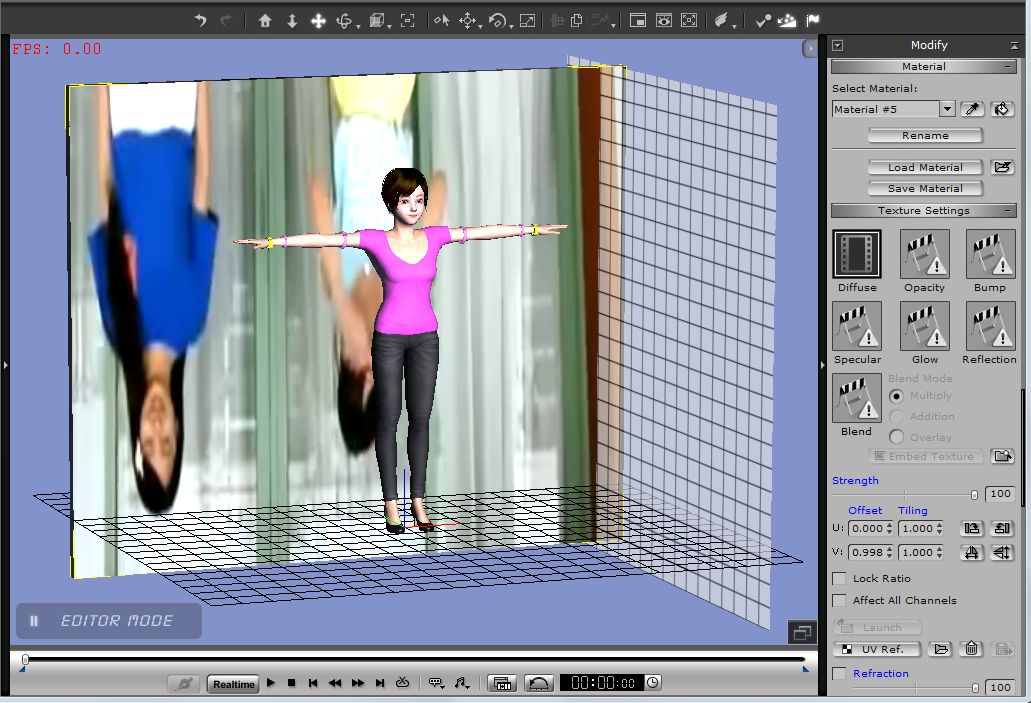
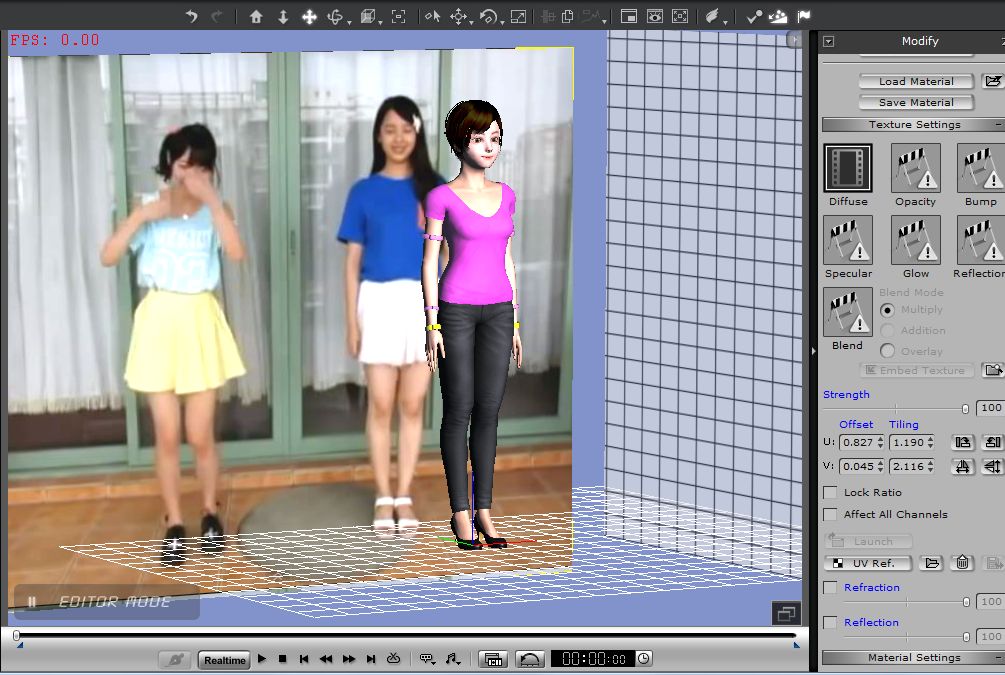
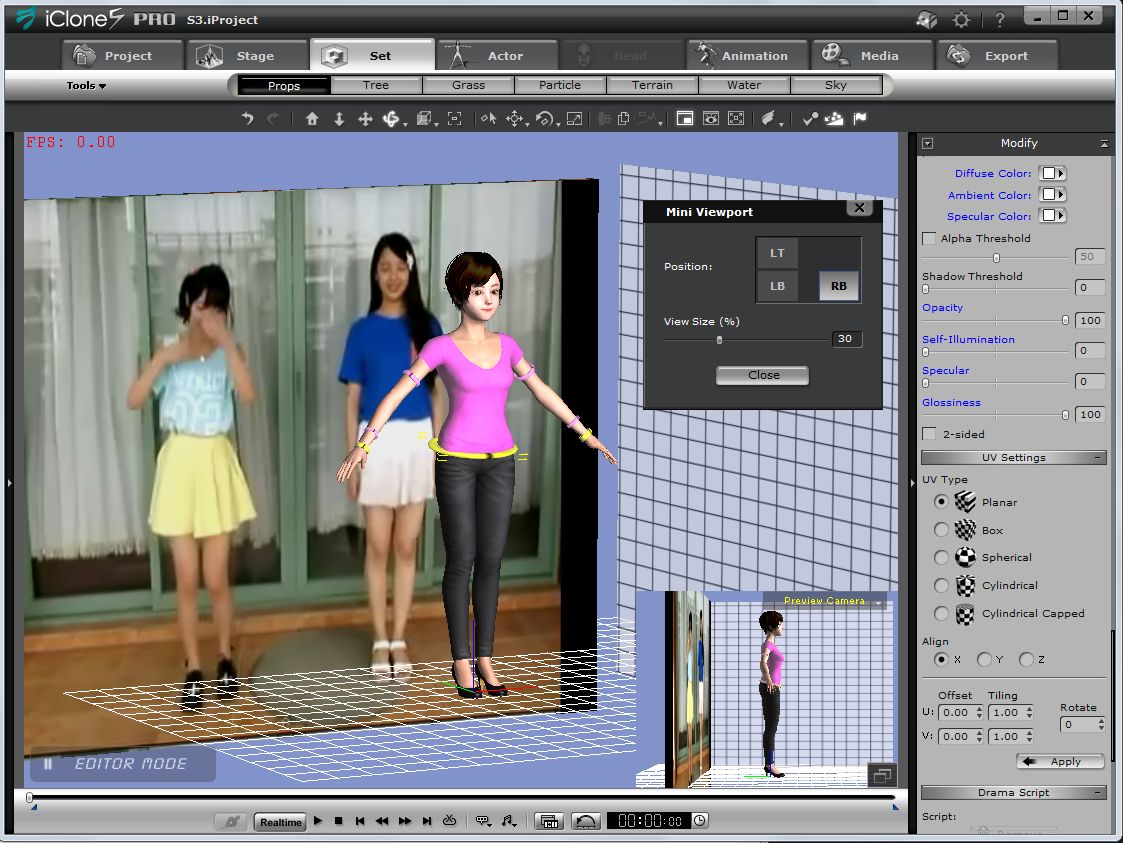
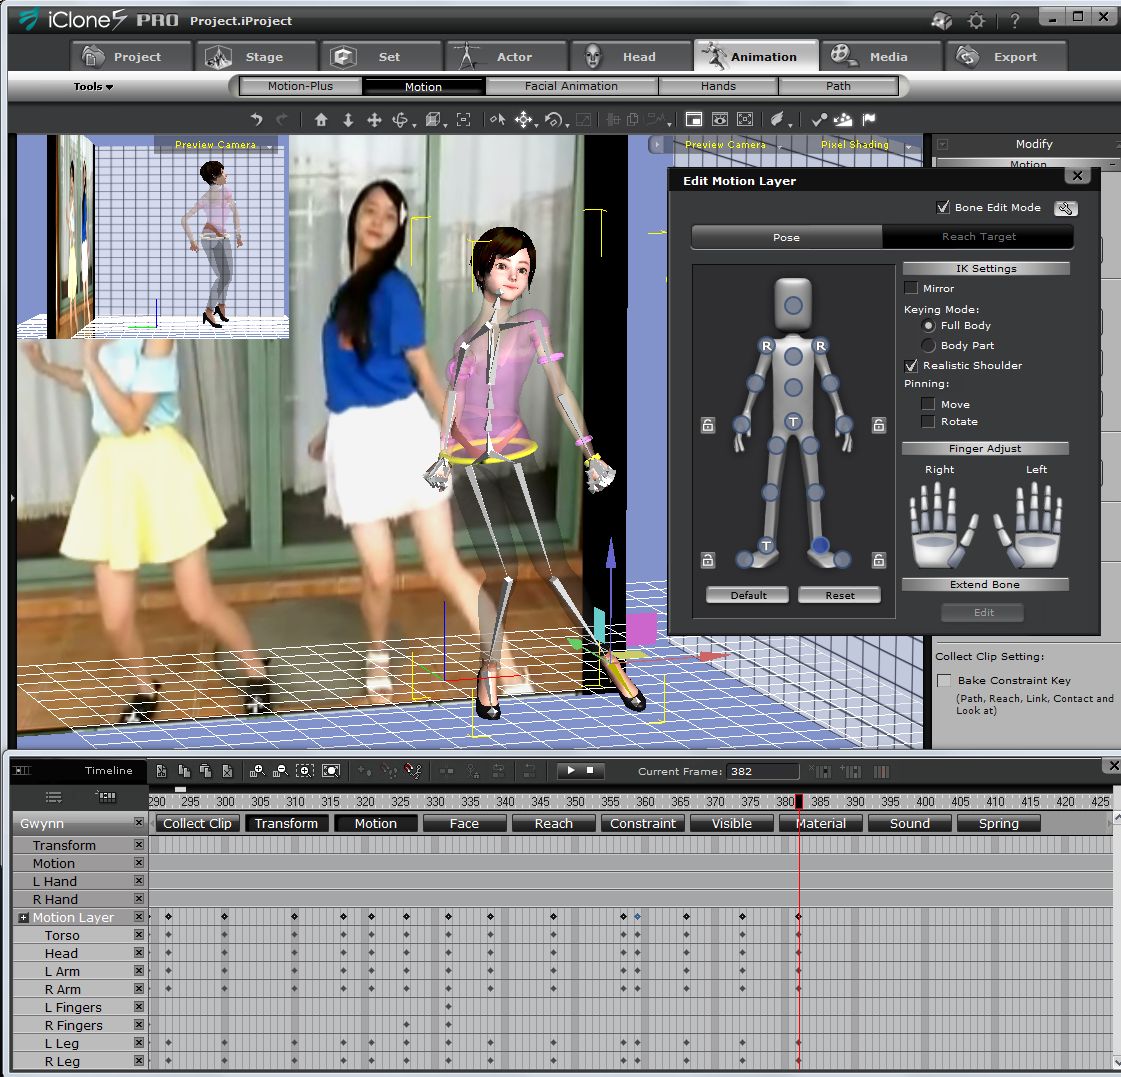
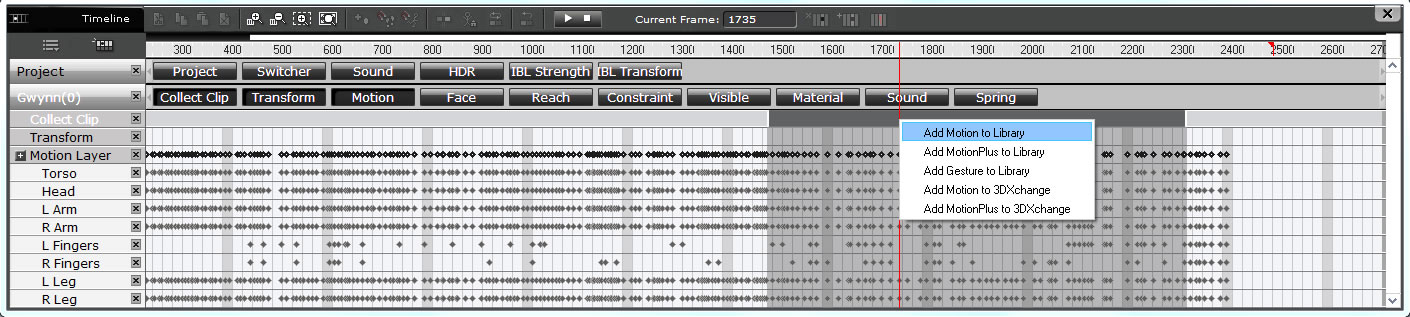
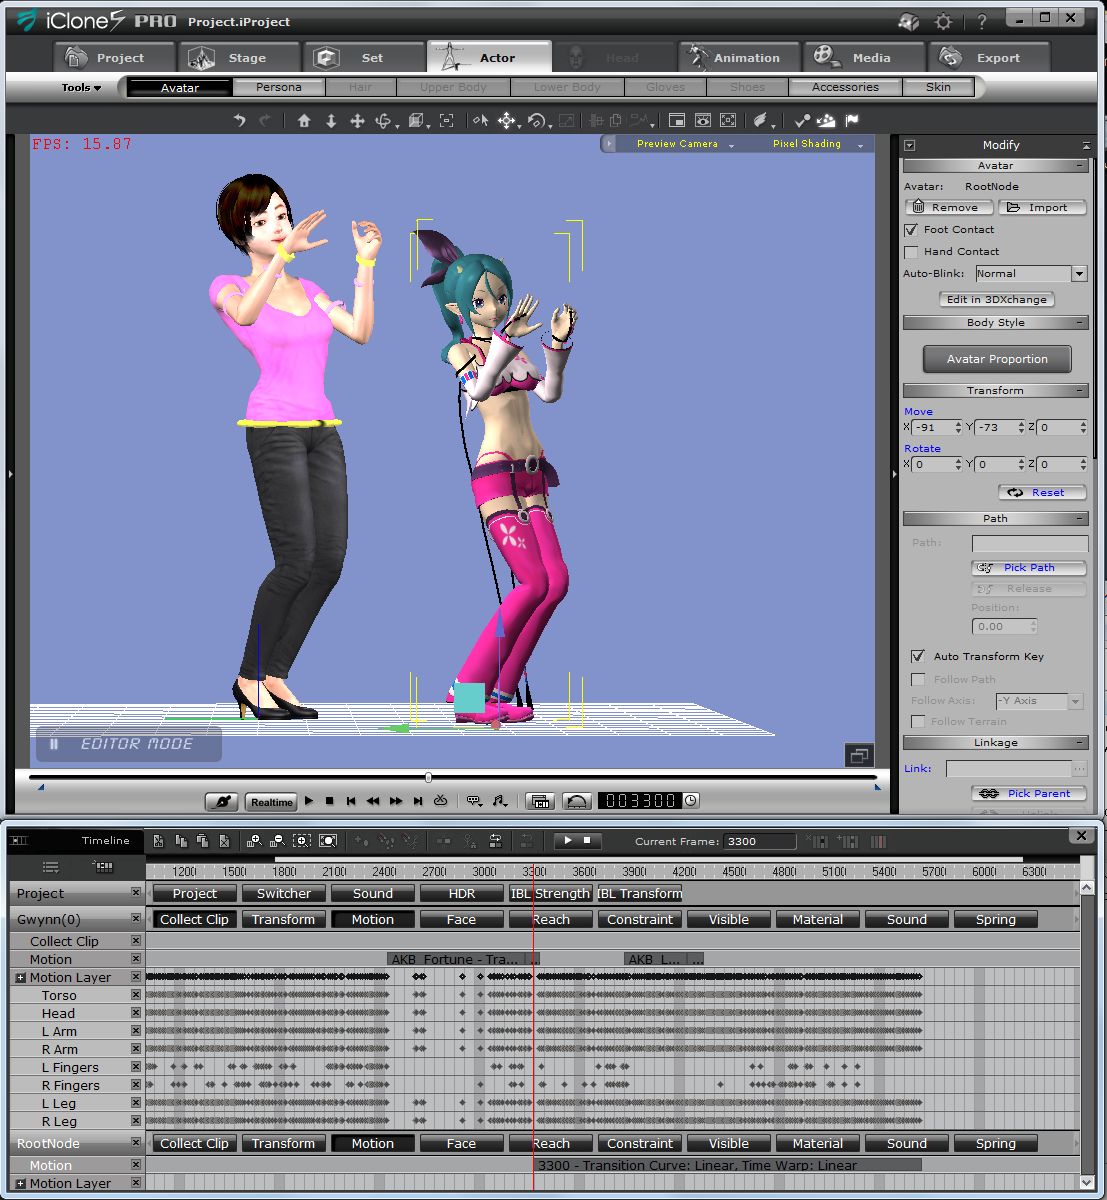
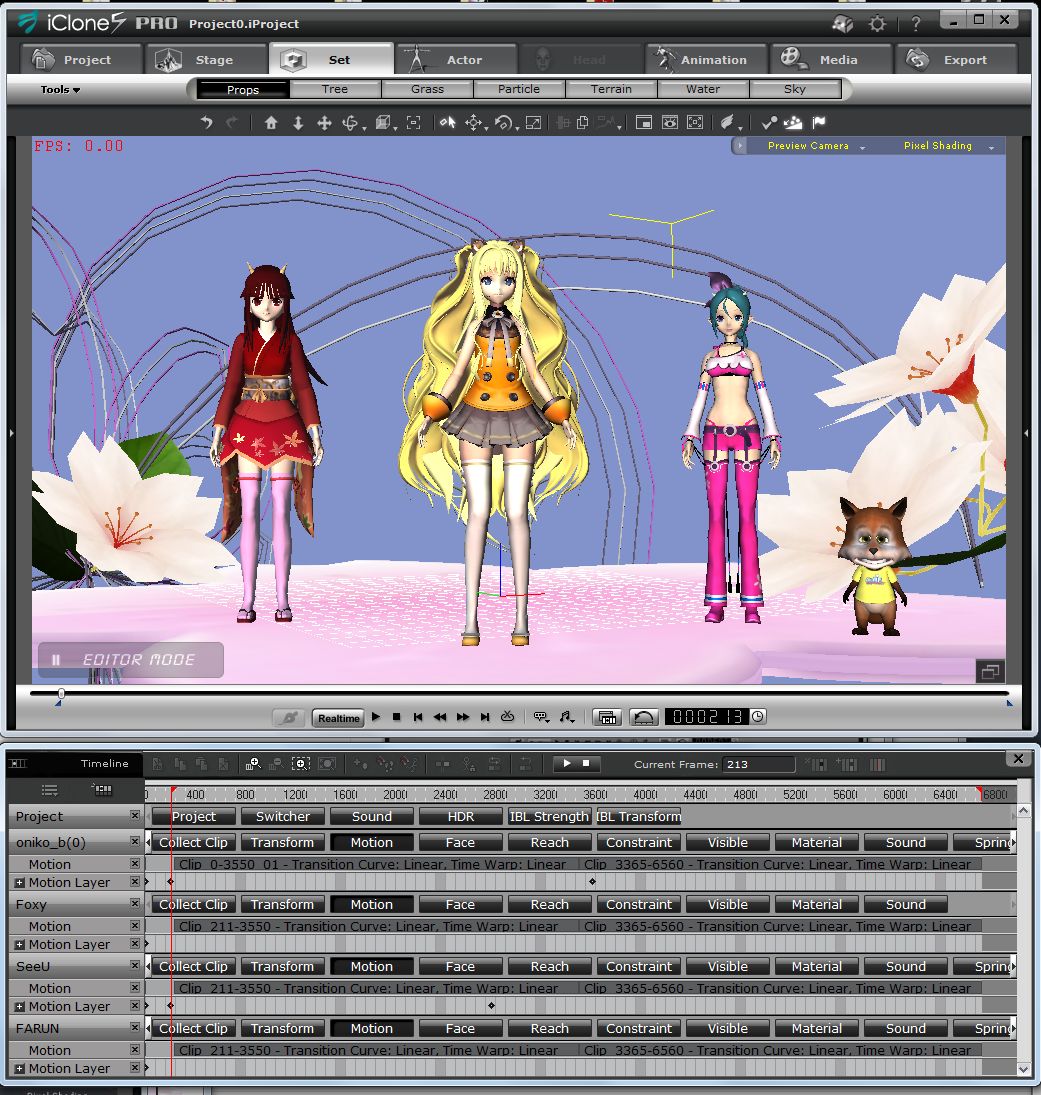
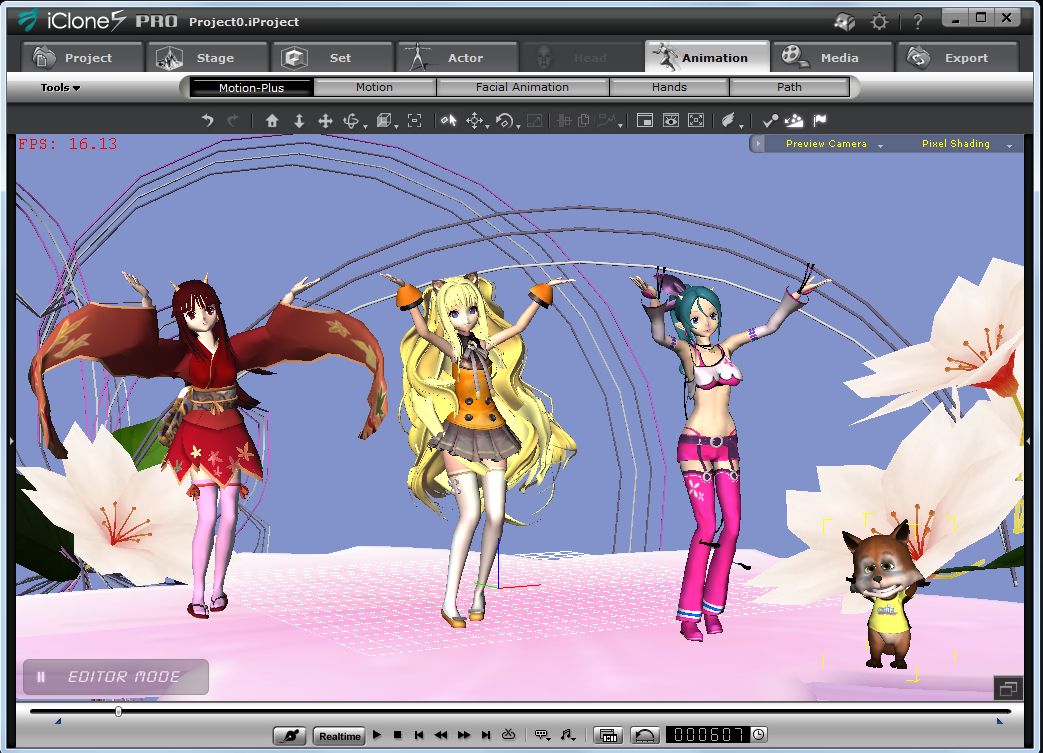 By locating a 3D target model (G5 Actor) in front of a Reference Dance Video image, G5 Actor can be manually postured to make a continuous dance motion data in iClone5. The 'Edit Motion Layer Panel' of iClone5.5 is useful to produce and edit each postures at each dance steps manually, the Motion Data for all keys are auto-generated as Key-Frame Motion and the result is saved in the Motion Layer Tracks in the Timeline. Then, iCone 'Motion Plus' tool can collect and save a part or all the Key-Frame Motion data for the use for other models, or transfer to 3DXchange5 for further FBX exporting. This practice is my first tryal and the traced dance video is not completed yet. |
Note: This is a personal report shown for other users who might be interested in these area. |
Sincere Thanks for the Following Resources that are referenced in my work. |
|||
Title, Autor and Copyright |
Access |
Notes |
|
| Music | Copyright: AKB48 Japan | AKB48 Official Channel (Japanese Lyrics) | |
| Lyrics-J | Yasushi Akimoto | 恋するフォーチュンクッキー(Japanese) | |
| Lyrics-E | JKT48 & Fang | KFC English (English Version) (AVI) | |
| Video1 | Voice & Sound:ibnu nawafil | JKT48 Fortune Cookie Yang Mencinta (English Lyrics) | |
| Video2 | Dancing:かやowo | Koi Suru Fortune Cookie | |
| Video3 | Dancing:yphong520 | Dancing cover with China (Note) Find the Video Source suitable for the Reference with full body, good contrast and constant camera angle. |
|
| Video4 | iClone5 Tutorial by Real;usion |
Intro to Timeline | |
| Video5 | ICLONE5 Tutorial by stuckon3d |
Sliding feet? Not on my watch: | |
| Video6 | iClone5 Tutorial by Reallusion |
Instant Kinect Motion Refinement (Human IK and Direct Puppet) | |
| Video7 | iClone5 Tutorial by Reallusion |
Producing a Custom Pose or a Key-frame Motion | |
The Most Appreciation for the iClone 5.51, no more crashes when doing Timeline Editing. |
|||
Tools |
Product Version |
Notes |
|
PMDEditor |
0.1.3.9 |
Add ColladaExport Plugin for DAE file export. (For more info in Report#4) |
|
FBX Converter |
2013.3 x64 |
Autodesk. Convert DAE file to FBX. | |
3DXchange 5 Pipeline |
5.5.2007.1 |
5.5 Patch 8/8/2013 | |
5.51.2209 |
|||
5.51.2312.1 |
5.51 Patch: 11/15/2013 | ||
iClone5.5 Pro |
5.5.3207.1 English |
Started with this version. Crashed frequently. | |
iClone5.51 |
5.51.3507.1 English |
5.51 Patch 11/15/2013, Downloaded 11/30/2013 Fixed: Reduced random crashes in the 64 bit version when using Motion Puppet & Timeline Editing. |
|
Selected Reference AKB Dance Motion is performed within a limited floor area. |
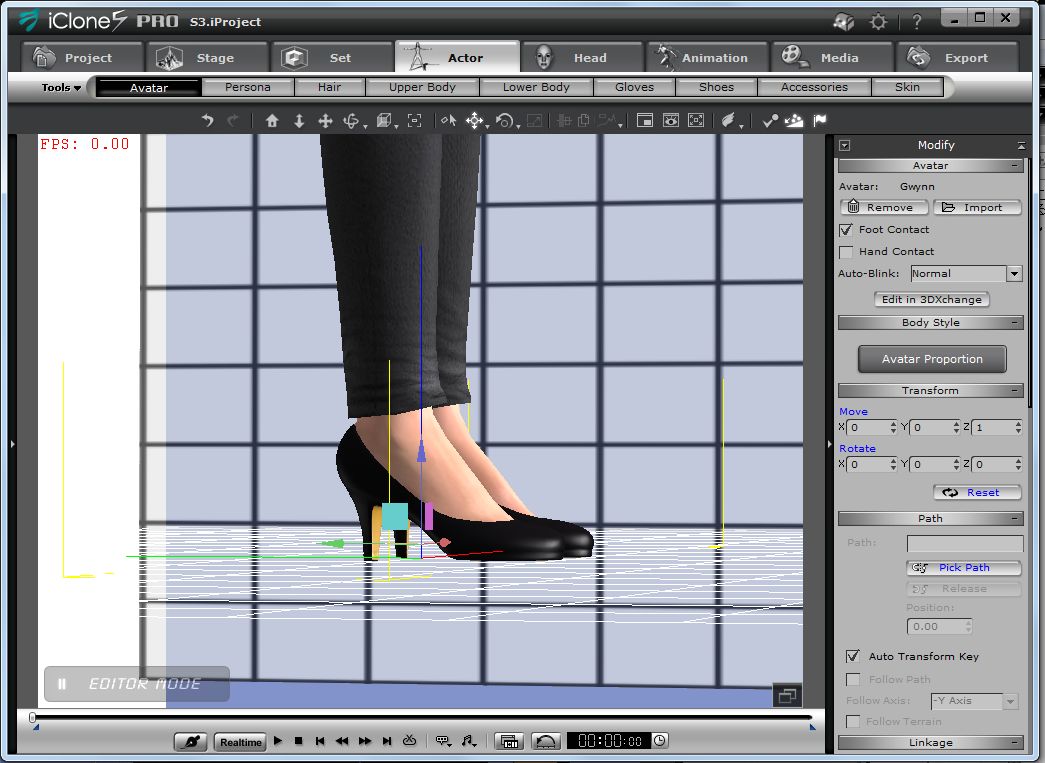
It is preferable that the Target 3D Model to be used for the Video Motion Tracking
|
 |
|
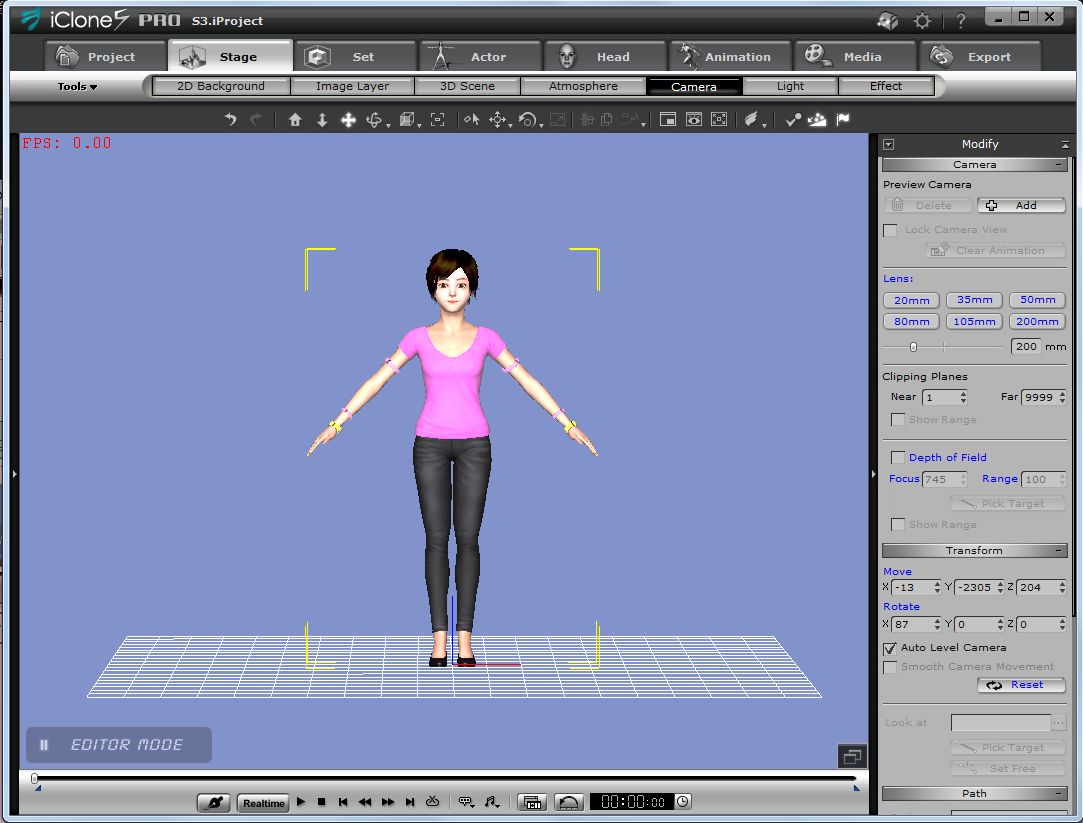
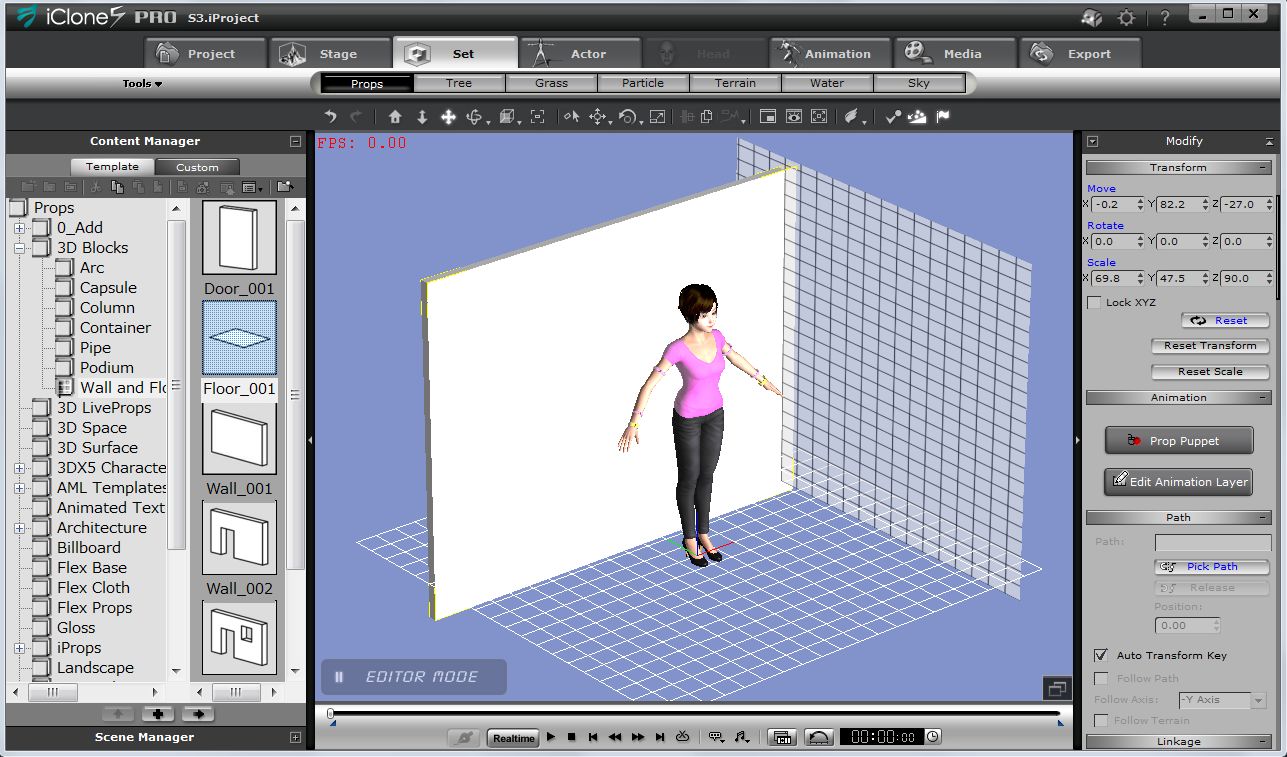
Go to Actor/Avatar, load the G5 Actor to the center of the Grid. Go to Modify, set Camera Lens=200.
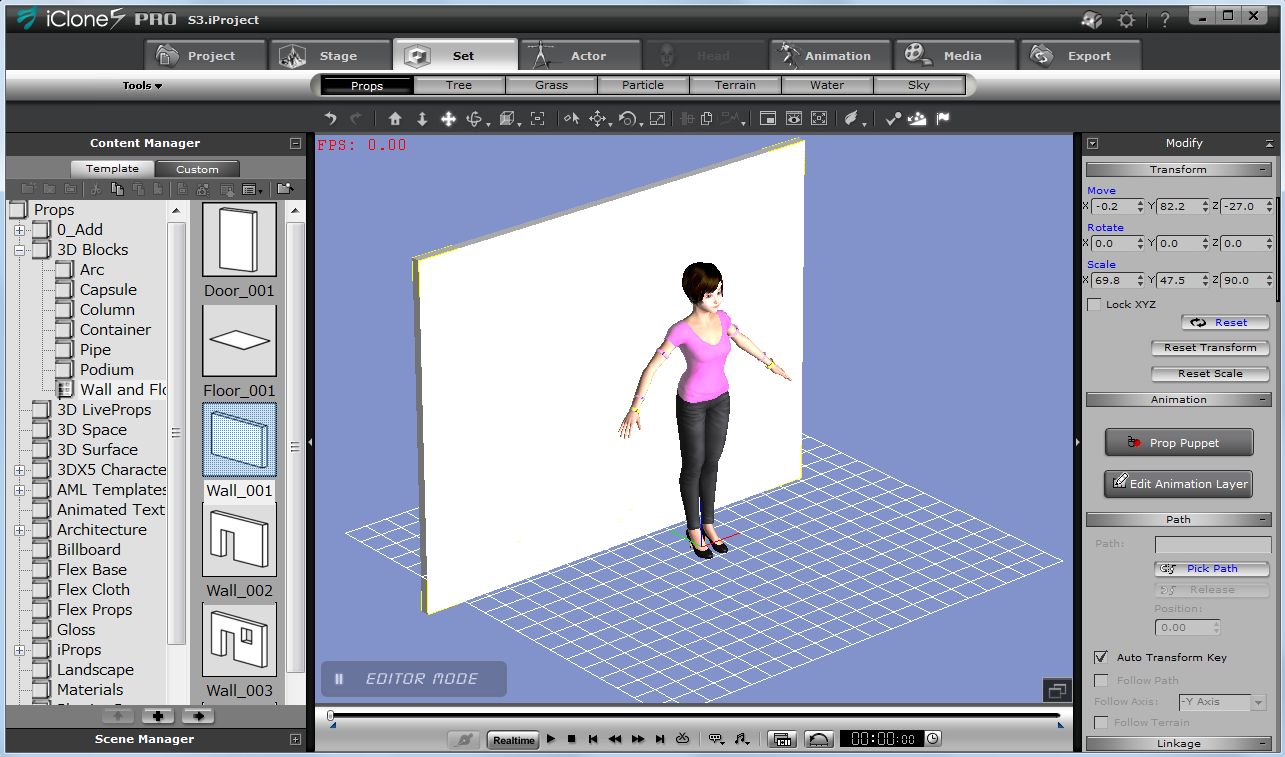
Use Floor instead of Wall to prevent double sided mapping.
This Prop visibility can be controlled by Scene Manager.
Reference video is necessary for Motion Tracing in iClone. Selection of Reference video is very important. Among many AKB Fortune Dance cover videos, select Camera angle being fixed, Full body being clealy visible, and Dance motion seems vivid and natural. |
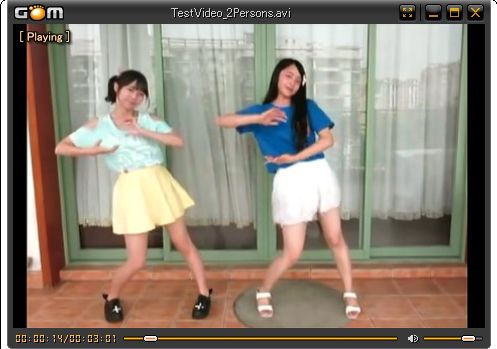 |
Lots of AKB Fortune Dance videos are searched in various web sites. The Video selected and used for this test is found in the YouTube This Site. |
 |
Initial Offset and
|
 |
Adjusted Offset and Tiling Vatues:
|
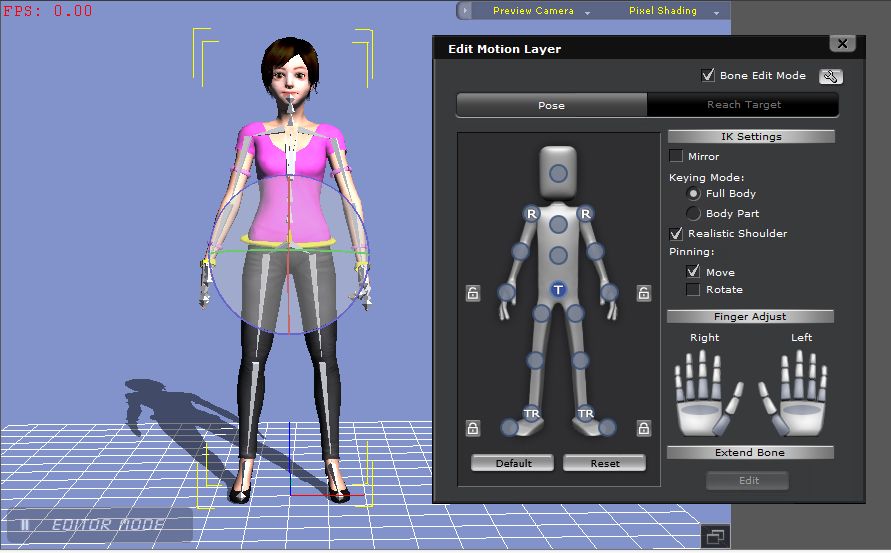
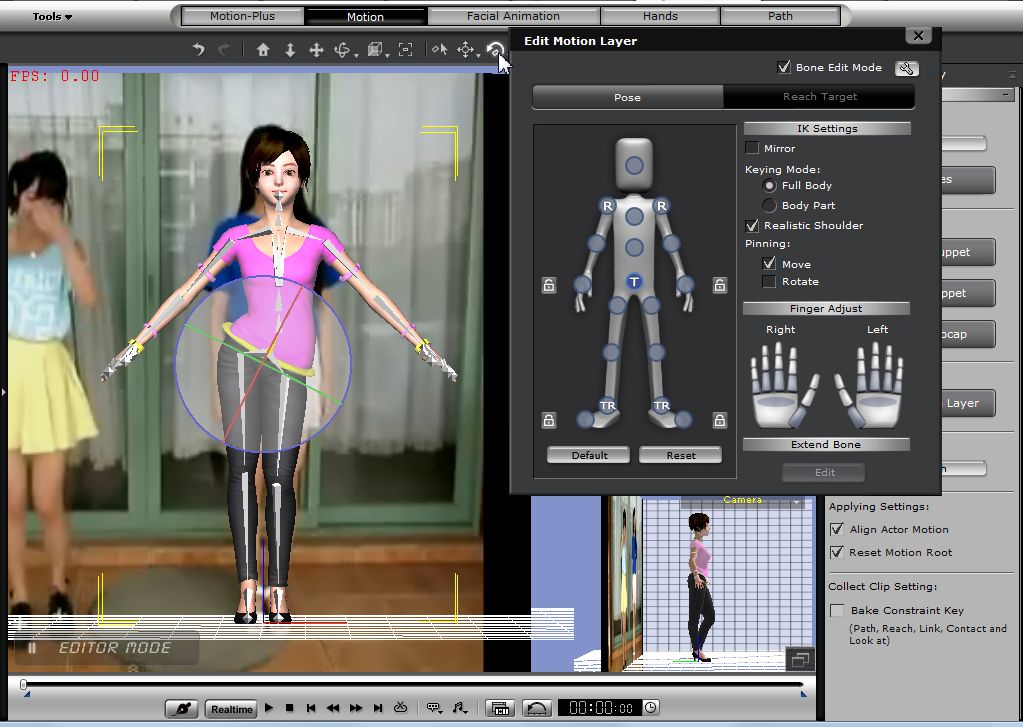
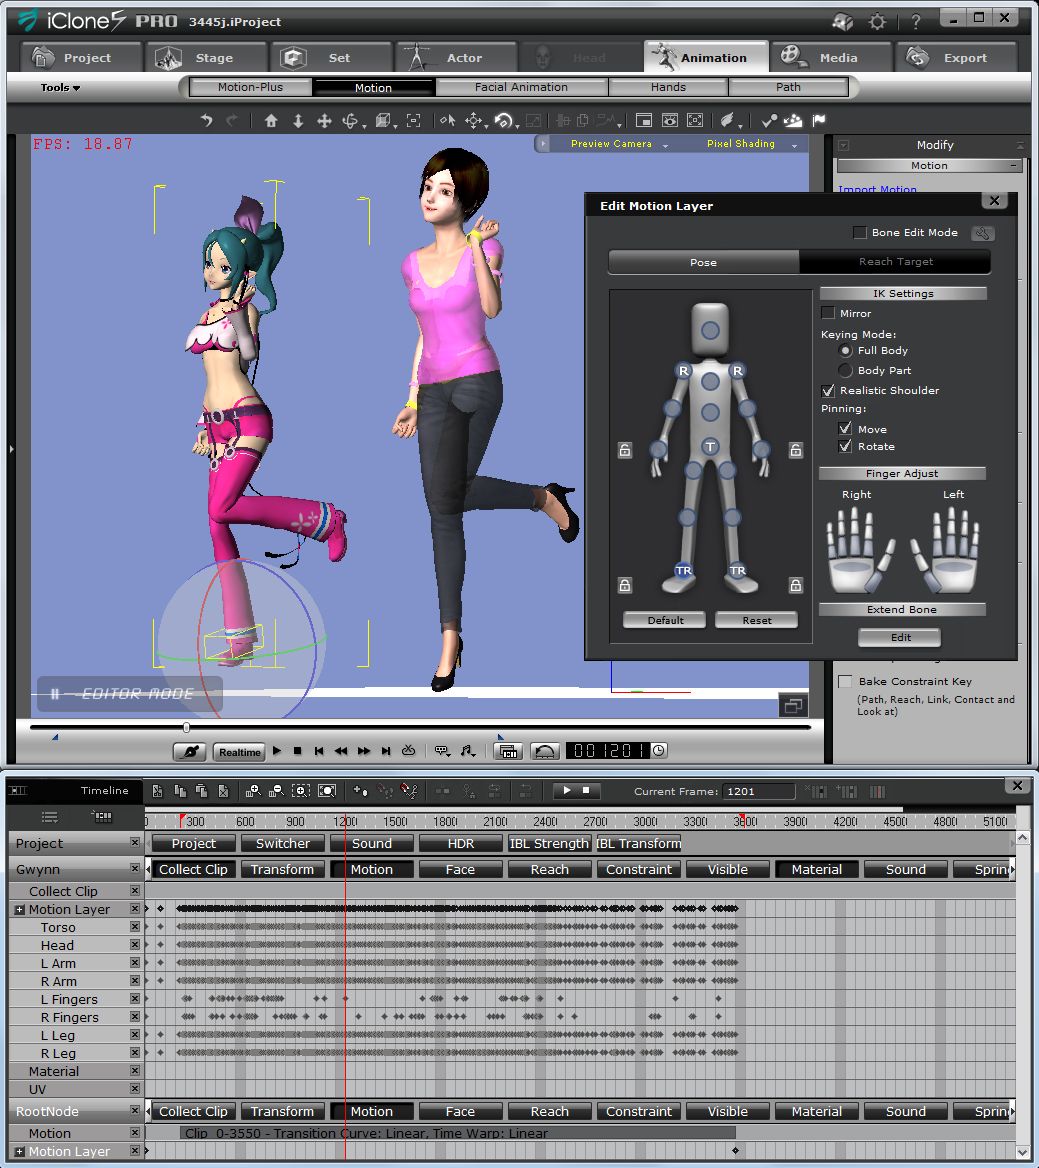
iClone5.5 has a powerful Motion Layer Editing features |
Activate Bone Edit Mode when necessary.
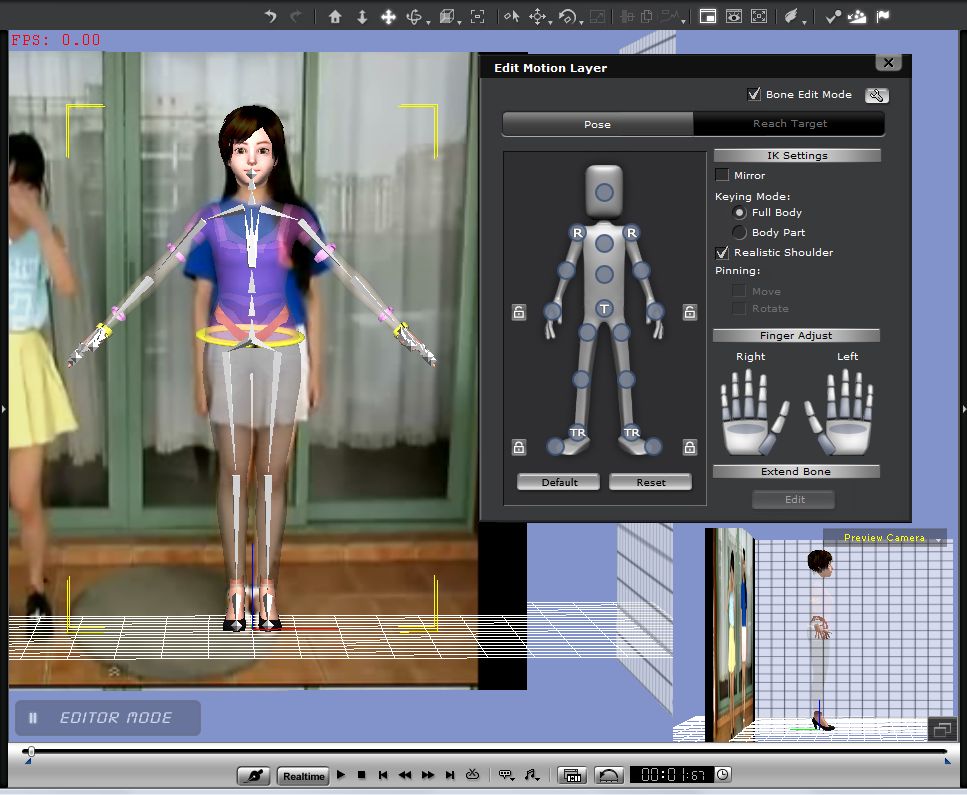

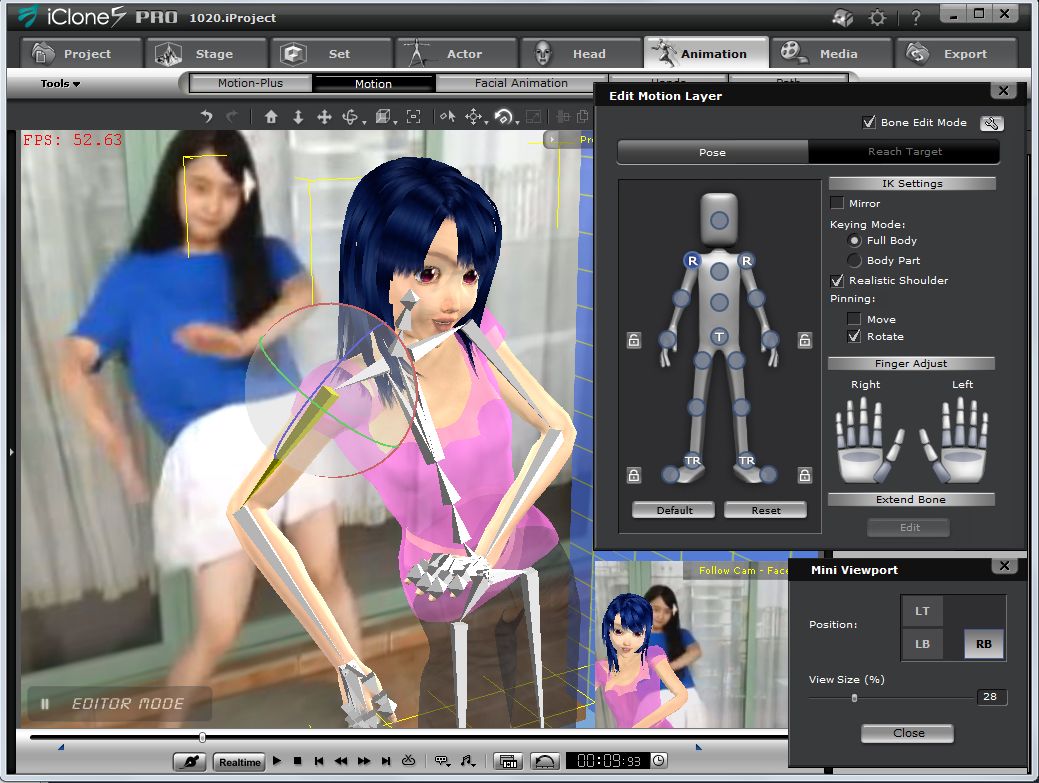
The Video Motion is Traced by Pose to Pose basis. Each Body Posture is to be determined in the motion flow to avoid discontinuity. Pay attention to the body leaning for the same front look in the Video. Think of Body Balance and correct leanings manually in the Motion Trace work. |
Shortcut |
A |
S |
D |
F |
G |
H |
J |
Camera Moves to |
Left |
Right |
Back |
Front |
Up |
Bottom |
Face |
1 |
Zoom in by the Time Slider and observe the Video motion to find the right frame for editing. |
2 |
Move the Time Slider back and force between keyframes and compare Head Positions between G5 and Video. Adjust G5 Body center to match. |
3 |
Determine the side body posture from view on the Video and imagine the body posture to make the front view on the Video. |
4 |
Also, confirm the G5 Actor in various camera angles for unexpected Leaning and unnatural neck and body part posing. |
5 |
Set Body Center Positions and angles first for every keyframe and pin before other body parts move. |
6 |
To prevent unexpected IK movement, use the proper Camera angle and watch the Bone movement. |
7 |
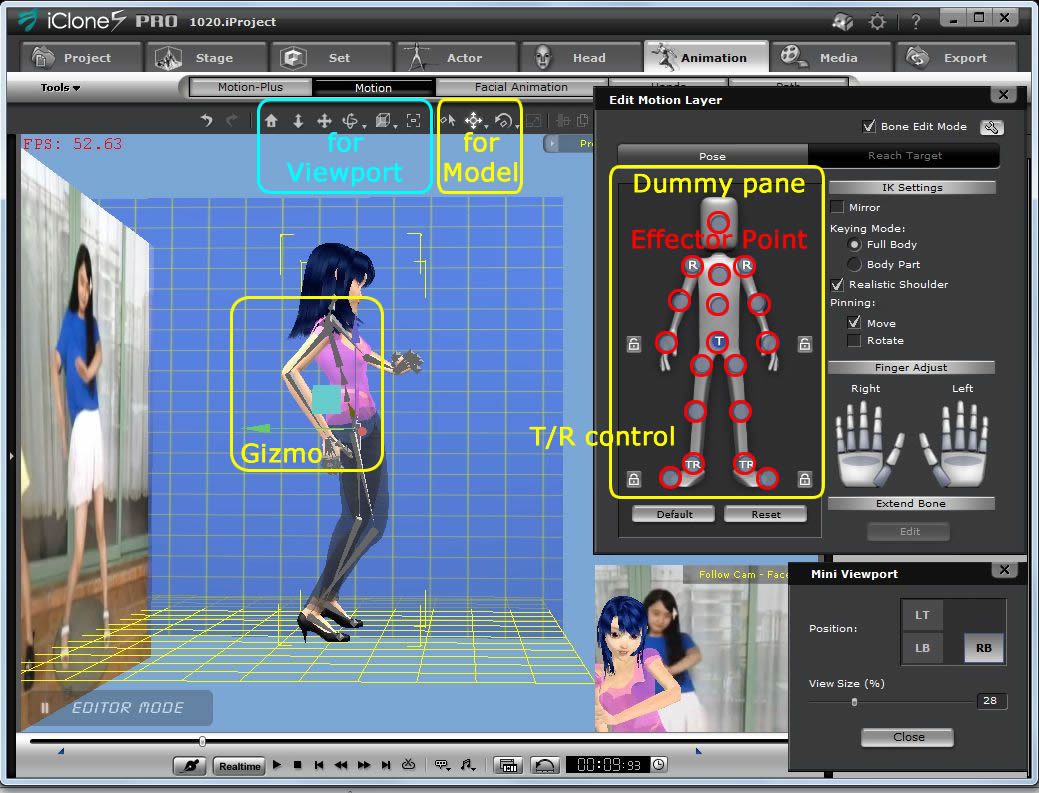
Use Dummy Pane carefully as Effector Point piece of the spine area is different from G5 Character. |
8 |
Foot Sliding tend to happen at transitional period. Remove all the T/R control in the Effector Points.
|
9 |
Foot Sliding happens between timeframes. Use Body center of the Dummy Pane to aligne slidings. |
10 |
Use Vertical Grid to see a difference between frames for a side view of the 3D Target Model. |
11 |
Mouse is not recommended for the detailed Manipuration in the Timeline, Time bar and Time Slider.
|
12 |
Proceed Tracing little by little, save the Project periodically before losing work data by sudden trouble. |
Items |
Experiencing Wishes |
|
1) |
Gizmo Indication | Gizmo Indication is needed when Camera view is to be changed. |
2) |
Edit Motion Layer | Bone Edit Mode selector better be located closer to Dummy Pane. |
3) |
Dummy Pane | Effector Point piece of the spine area does not match to G5 Character. Solution: Confirm the bones deflection, use pinning tool and Gizmo for correction. |
3) |
Model Posture Manipulation Tools |
Select, Move & Rotate Tool to be designed as floating near the Gizmo or in Edit Motion Layer. |
4) |
Foot Slide Fixer | Foot Sliding correction by numerical manner among multiple key frames. Partial Solution: Remove all T/R control and use Body Center of Effector Point for adjustment over frames. |
5) |
Timeline Design | Display Bar, Range mark and Time Pointer be more accessible for frequent use by Mouth. Light face Letters in the Right button menus. Partial Solution: Slide the edge of the Timeline Panel to forward the time bar. |
6) |
Key icon size | Key icon size in the sub track be more selectable for easy Mouse operation. |
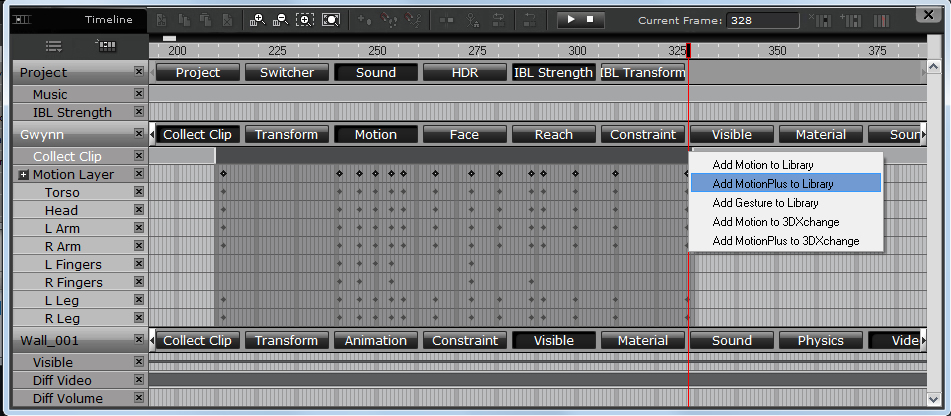
By using Collect Clip and Add Motion-Plus in the Timeline, newly traced motion data is saved in the Motion-Plus Panel. |
 |
iClone Motion Plus file Folder location /Users/Public/Documents/Reallusion/Custom/Template/
|
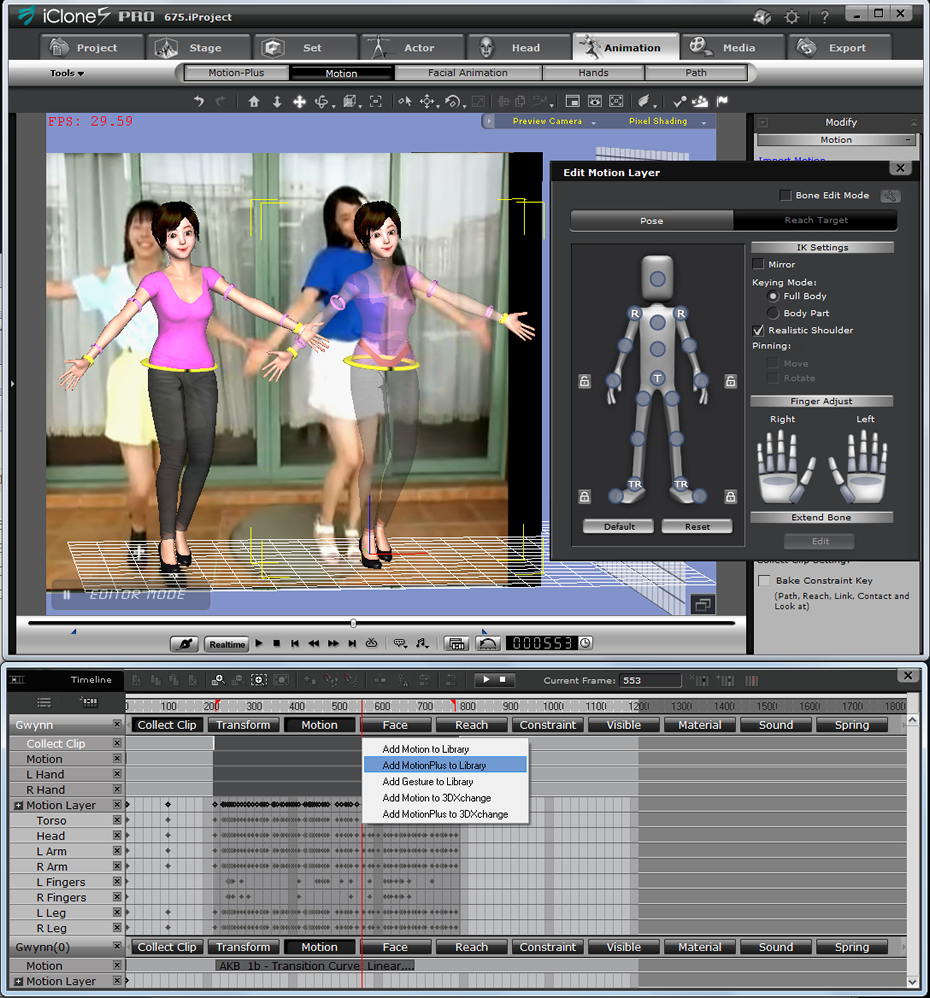
The iMotion file is applicable to the other 3D model in the same Project, however, |
Key-Frame Numbers for the Dance Motion are listed in the Table.
Two Clips are conbined for the Demo Video which is 60% length of the Reference Video.
Frame No. Test A Demo |
Frame Counts/ Clip No. |
The words of the Song |
MP1 Long Clip1 |
MP2 Long |
117 212 |
Start |
Music Starting |
||
117-1550 212-1600 |
1283 Intro |
Intro Dancing |
Start: 211 |
|
1550-2520 1584-2384 1600-2415 |
823 Clip 1 Music 1 |
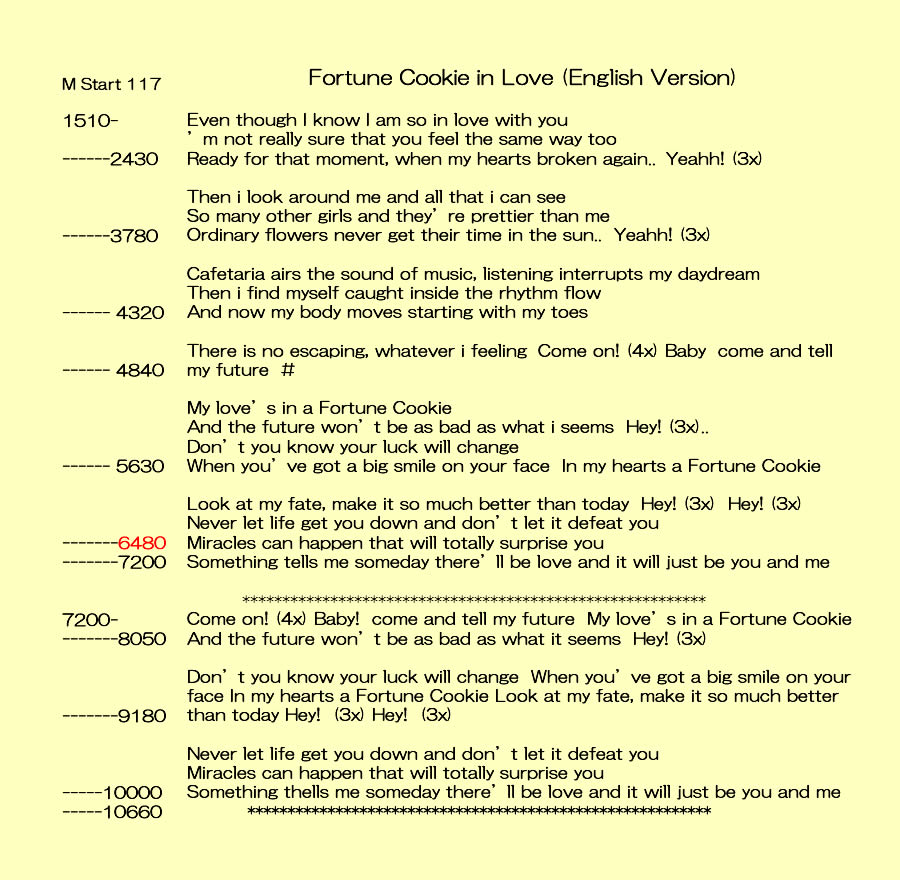
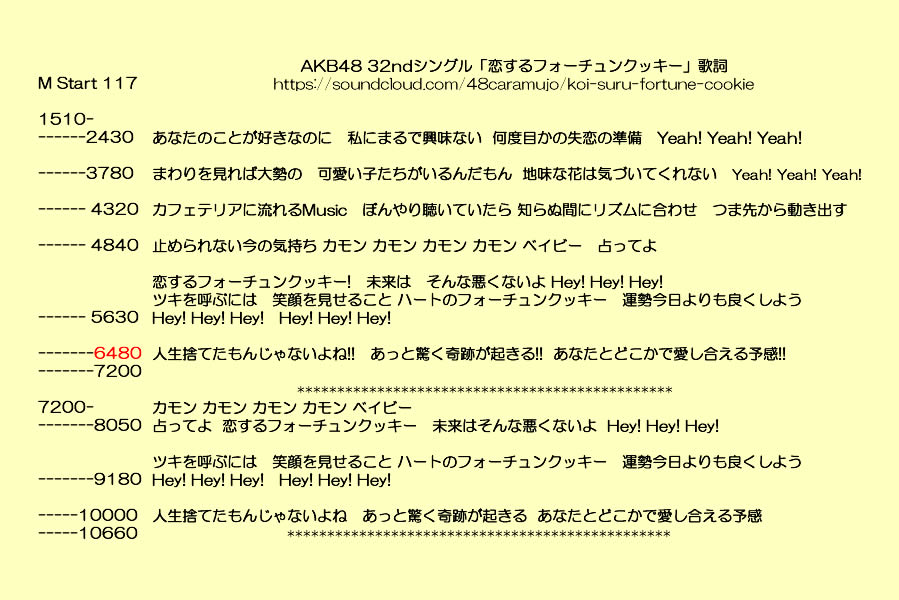
あなたのことが好きなのに 私にまるで興味ない 何度目かの失恋の準備 Yeah! Yeah! Yeah! Even though I know I am so in love with you ’m not really sure that you feel the same way too Ready for that moment, when my hearts broken again.. Yeah! Yeah! Yeah! |
||
2380-2520 2415-2550 |
115 Clip 2 Motion1 |
Yeah! Yeah! Yeah! | ||
2520-3470 2500-3320 2550-3360 |
830 Clip 1 Music 1' |
(Repeat Rhythm Motion 1) まわりを見れば大勢の 可愛い子たちがいるんだもん 地味な花は気づいてくれない Yeah! Yeah! Yeah! Then i look around me and all that i can see So many other girls and they’re prettier than me Ordinary flowers never get their time in the sun.. Yeahh! (3x) |
|
|
3330-3470 |
87 Clip 2 Motion1' |
(Repeat Motion 1) |
Start: 3365 |
|
|
3400-3870 |
カフェテリアに流れるMusic ぼんやり聴い ていたら 3338-3846/(508)/ Clip 3 |
|
|
|
||||
4425-4935 |
4330-4560 (Bending) 4560-4840 |
止められない今の気持ち 3846-4323 |
||
4935-6120 |
4840-5340
|
恋するフォーチュンクッキー! 未来は そんな悪くないよ Hey! Hey! Hey! (ツキを呼ぶには 笑顔を見せること ハートのフォーチュンクッキー 運勢今日よりも良くしよう) My love’s in a Fortune Cookie And the future won’t be as bad as what i seems Hey! Hey! Hey! Don’t you know your luck will change When you’ve got a big smile on your face In my hearts a Fortune Cookie |
|
|
6120-6700 |
5630-6560 |
人生捨てたもんじゃないよね!! あっと驚く奇跡が起きる!! |
|
End: |
6560-7200 |
(Transitional Motion) | |||
7200-8050 |
(Not Ready) |
カモン カモン カモン カモン ベイビー 占ってよ 恋するフォーチュンクッキー 未来はそんな悪くないよ Hey! Hey! Hey! Come on! (4x) Baby! come and tell my future My love’s in a Fortune Cookie And the future won’t be as bad as what it seems Hey! (3x) |
||
8050-9180 |
(Not Ready) |
ツキを呼ぶには 笑顔を見せること ハートのフォーチュンクッキー 運勢今日よりも良くしよう Hey! Hey! Hey! Hey! Hey! Hey! Don’t you know your luck will change When you’ve got a big smile on your face In my hearts a Fortune Cookie Look at my fate, make it so much better than today Hey! (3x) Hey! (3x) |
||
9180-10000 |
(Not Ready) |
人生捨てたもんじゃないよね あっと驚く奇跡が起きる あなたとどこかで愛し合える予感 Never let life get you down and don’t let it defeat you Miracles can happen that will totally surprise you Something thells me someday there’ll be love and it will just be you and me |
||
-10780 |
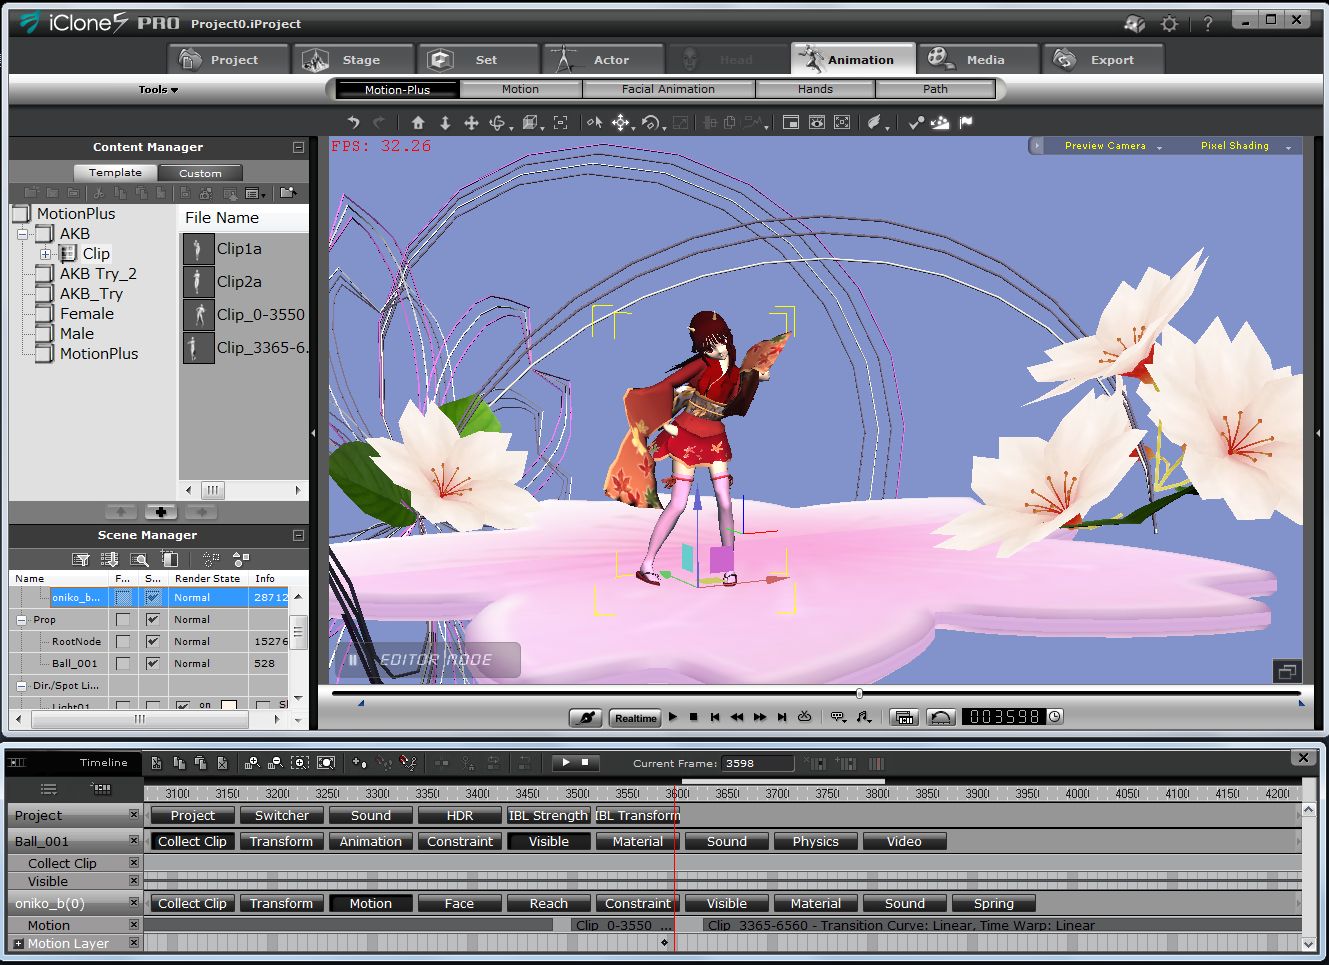
Following stage and models are used which have been converted to iClone format.
Only half length of Reference Video is completed and shown in my DEMO Video.
Object |
Product Name |
Copy Right |
Notes |
Stage |
Sakura Stage |
yuduki |
|
MMD Model |
HINOMOTO ONIKO/NAMANARI |
HINOMOTO ONIKO Project |
MMD 2nd Pack Special Appendix Model #006 |
MMD Model |
FARUN |
SHINICHIRO IITSUKA, |
MMD 3rd Pack Special Appendix Model #011 |
MMD Model |
SV01 SEEU |
KKUEM Modeling:MAMAMA |
MMD 3rd Pack Special Appendix Model #008 |
iClone Model |
3D Universe_Foxy | 3D Universe |
3DX5 Character Designer's Resource pack (More Info) |
Play the Music, Locate both Motion Clips to match.
Format |
Output Size |
Output Fange |
Render Quality |
MP4 |
1280 x 720 |
209-6700 |
Final Render |
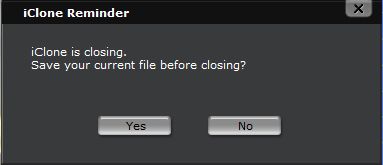
Following issues are observed when the Motion Tracing work is processed in my PC environment. Manageable but needed strong patience for Interruptions caused by following issues: What's wonderful that frequent crashes at Timeline Editing work has gone out in the iClone 5.51. |
1) Following Reminder Comes out many times, but working data is saved as Project.iProject.
|
||||
|
2) NVIDIA Windows Kernel Mode Driver stops response frequently, but recovers soon.
|
||||
3) iClone 5 AP stops operation many times.
|
||||
|


2013.12.20 Hirospot (Personal Site)