1-8 |
About LipSync XML file location |
1 |
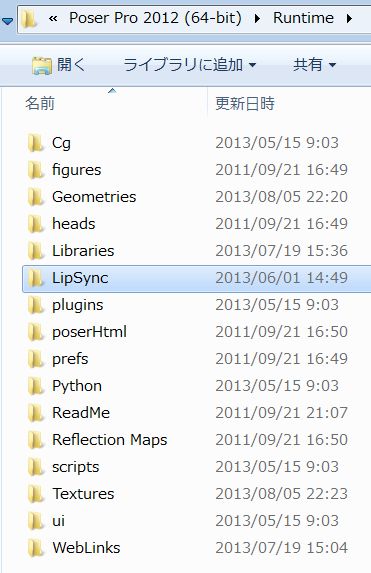
Location of the LipSync File : Poser Pro 2012 |
1-1 |
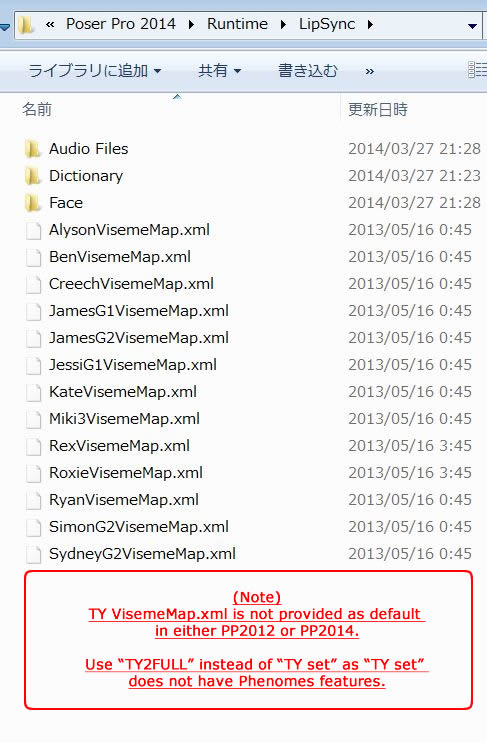
Go to OS(C:)/(Program Files)/Poser Pro 2012/Runtime/LipSync and open the folder. |
| |
|
Added xml files are located at the bottom.
 |
|
2 |
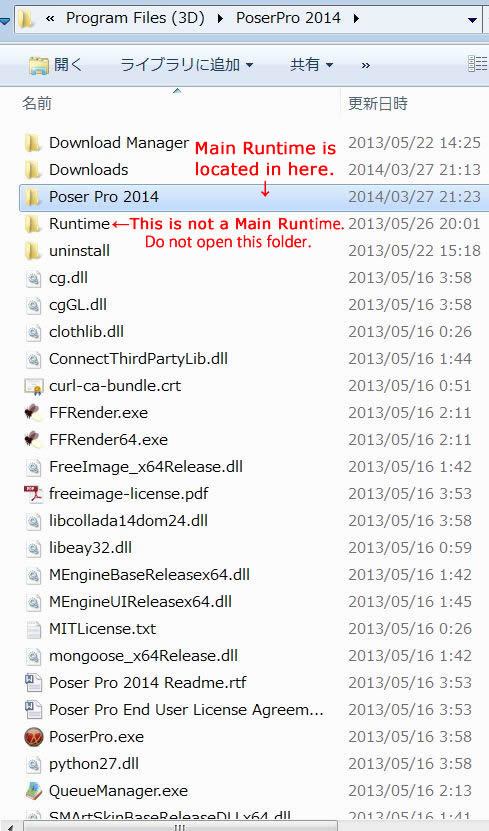
Location of the LipSync File : Poser Pro 2014
|
| |
(Note)
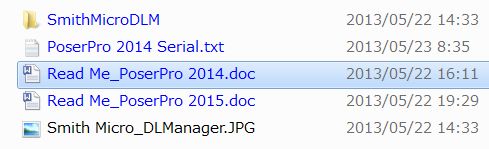
Installation of Poser Pro 2014 is managed by SmithMicroDLM(Download manager).
When first installing Poser Pro 2014, the user is presented with several Runtime location options. |
Please check the Read Me_PoserPro 2014.doc
for more details.
"Smith Micro Poser Pro 2014 README v 1.0�h ���@page4 Flexible Main Runtime Location
|
 |
| |
|
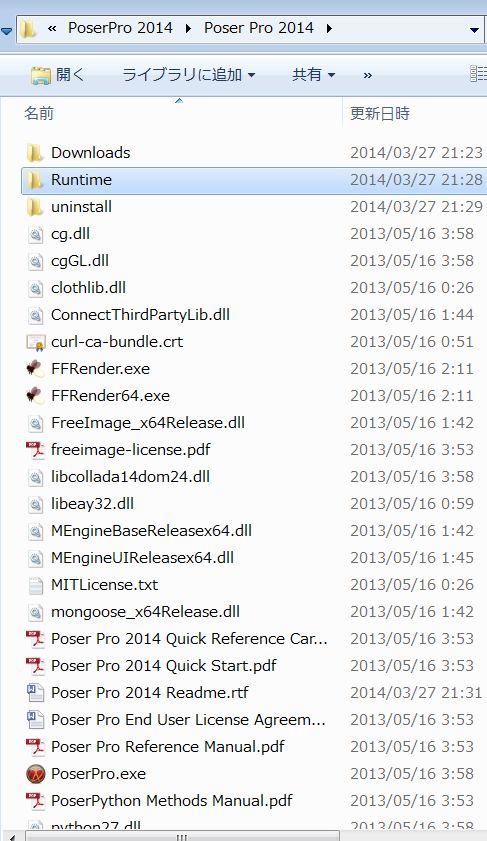
2-1 |
Go to OS(C:)/(Program Files)/Poser Pro 2014 and open the folder. |
| |
|
Open this Runtime folder.
 |
|
| |
LipSync folder is here.
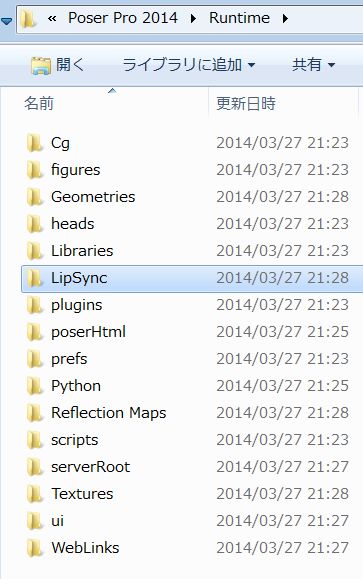 |
TY2 xml files are not located yet.
 |
|
2-2 |
When TY2 is planed to use in PP2014, copy the TY xml files from PP2012 |
3 |
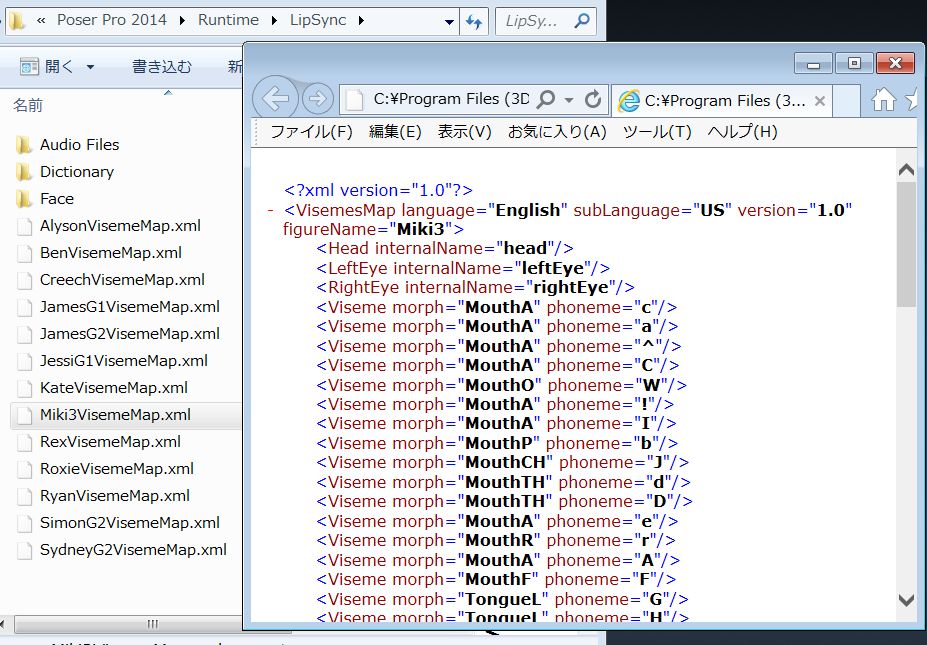
How to open XML files. |
| 3-1 |
Just double click on the target XML file, then XML file should open on your browser. |
| |
|
4 |
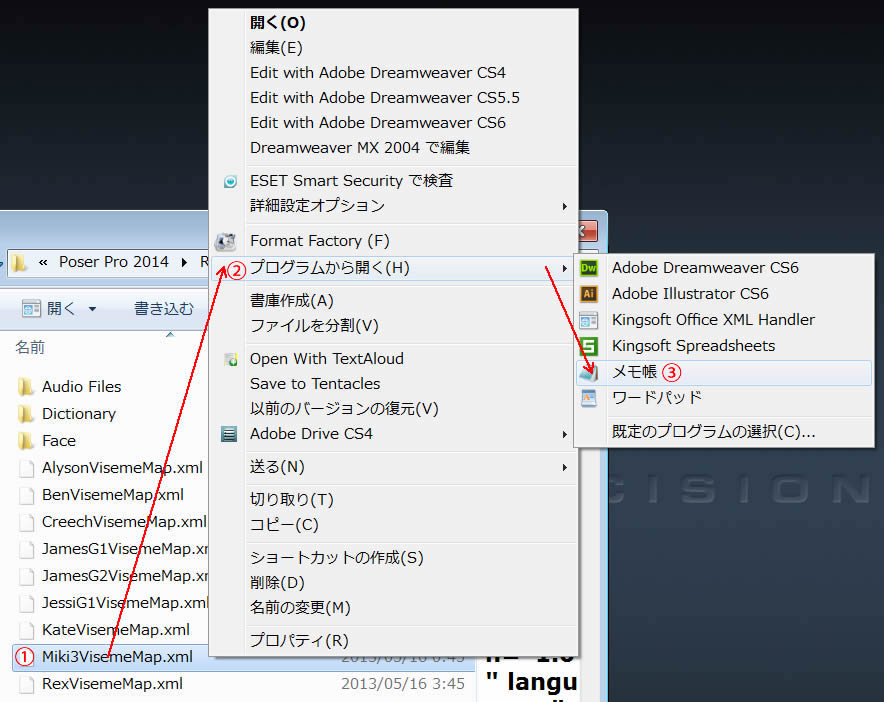
How to open Text Editor tool. |
4-1 |
�@Click right button on your mouth, then,
�Abring mouth pointer to the 'Open from Program(H)', then
�Bleft click on the target Text Editor such as notepad (Microsoft).
|
| |
|
| |
|
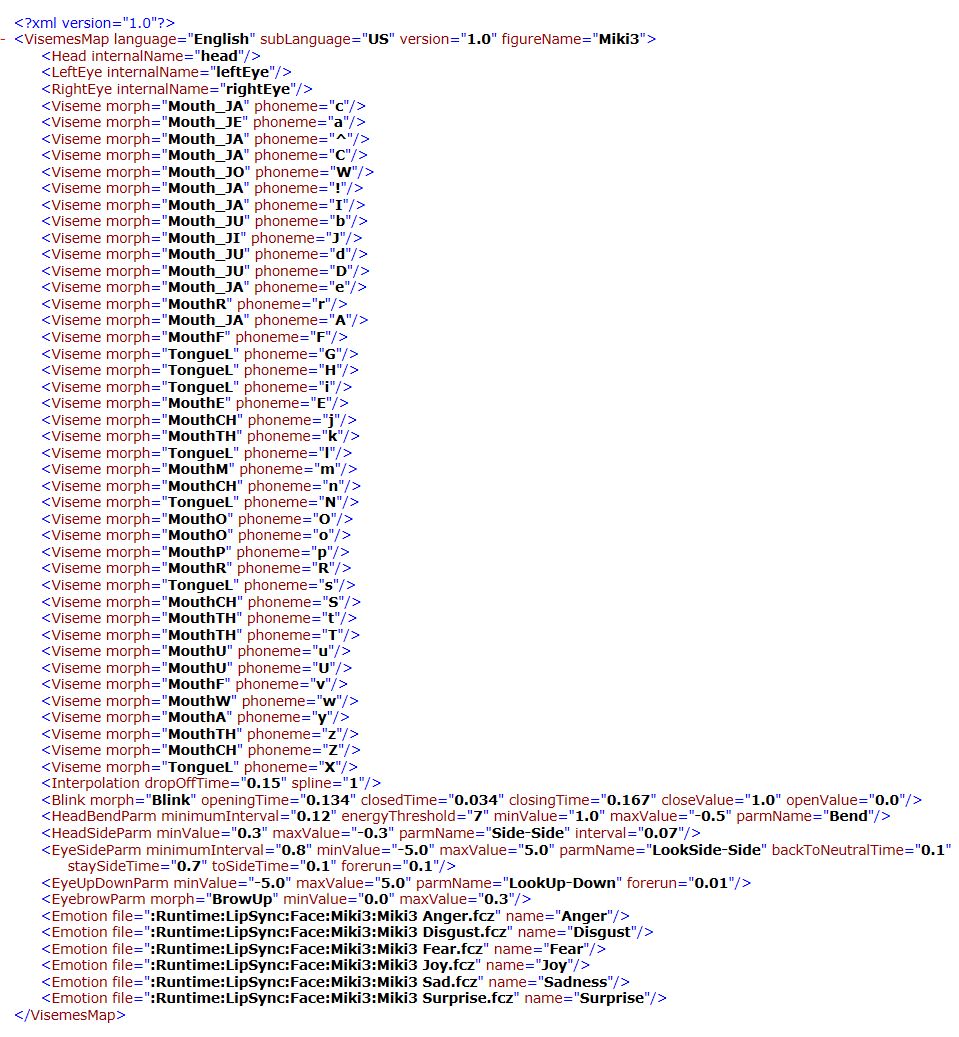
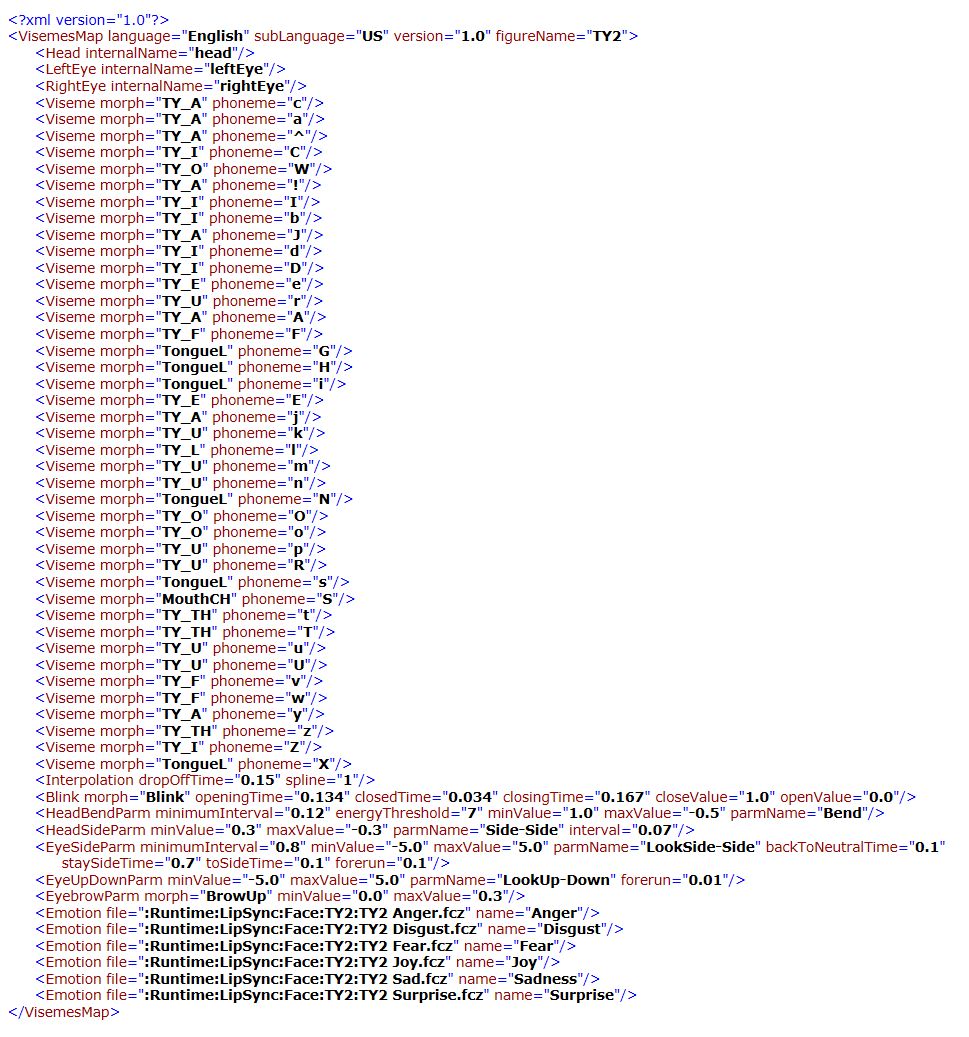
5 |
Comparison of LipSync Files: Miki3(default) and TY2(New) |
| |
|
| |
|
6 |
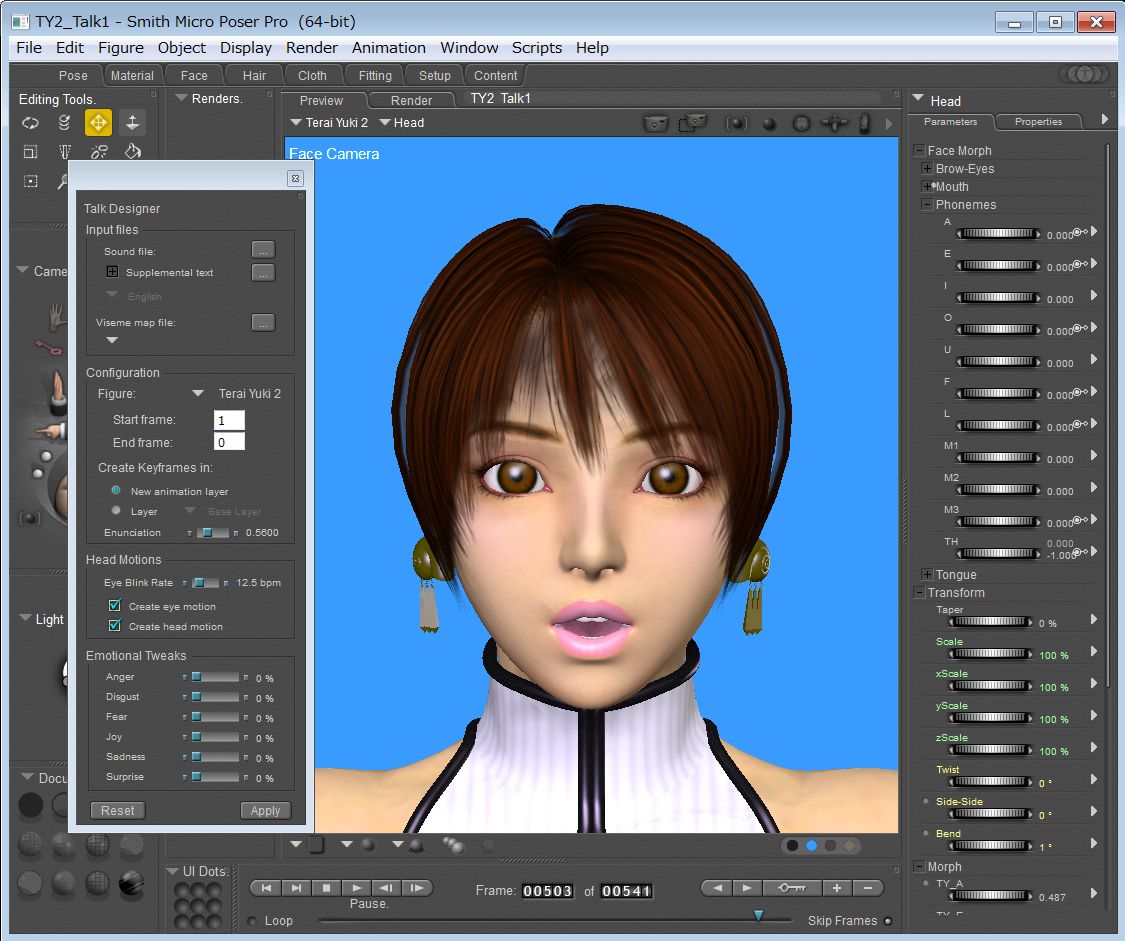
TY2 Talk test on PP2014 |
6-1 |
TY2 Talk test file saved in PP2012 is opened and talked on PP2014 at this moment. |
| |
She speaks without Sound file name indication at this moment.
 |
7 |
Phonemes in the PP2014 |
| |
(Note)
This is a complementary for the Phonemes operation for PP2014.
TYBikini.pz3 is used to distinguish the Phonemes work.
Phonemes A, E, I, O and U for TYBikini has been registered through
"Object"/"Spawn Morph Target"/"Morph Name" operation.
|
| 7-1 |
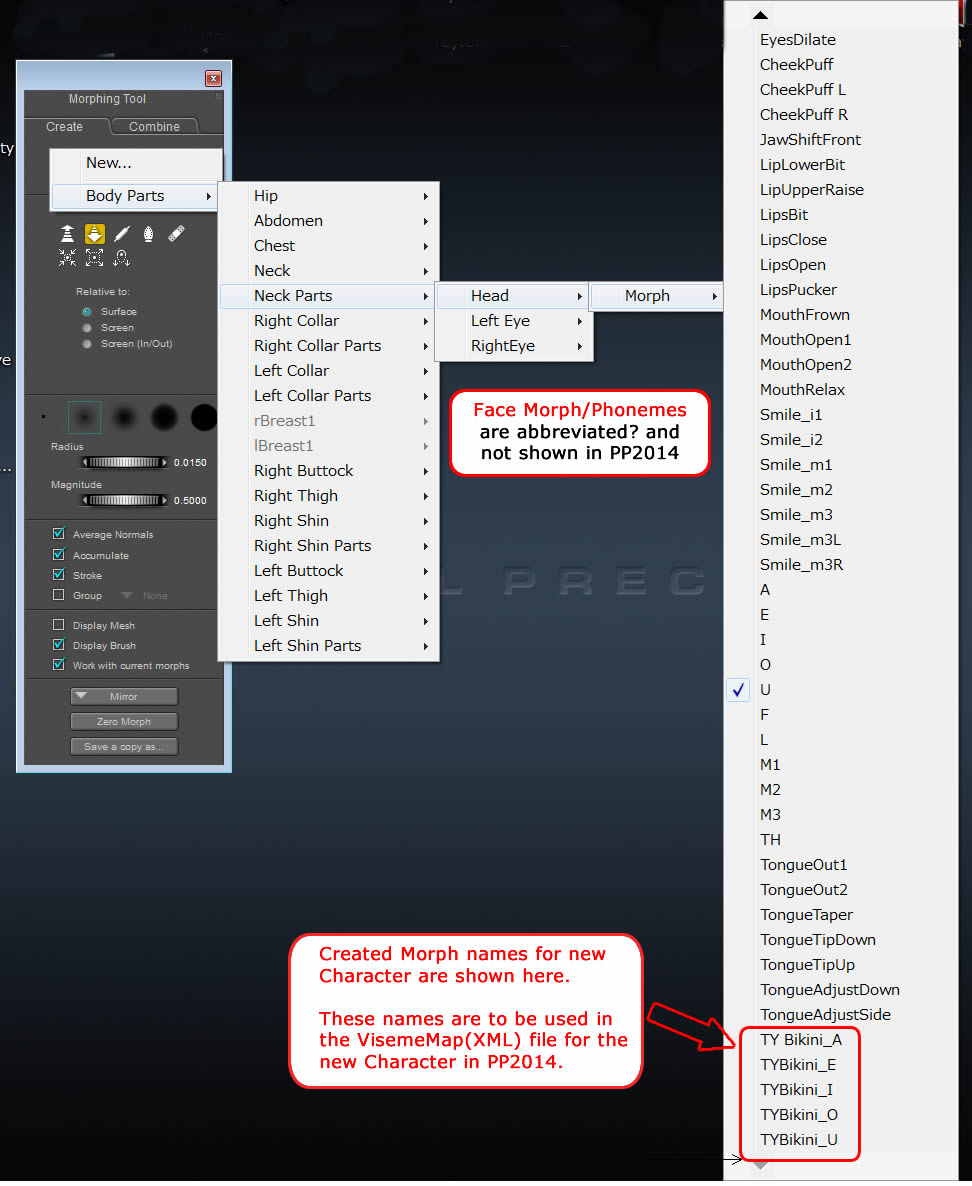
Open Morphing Tool and right click on the blue colored area below. |
| |
 |
| 7-2 |
Expand the Morphing tool until the Face Morphs are shown. |
| |
 |
| 8 |
Creating new VisemeMap file for new character model. |
| 8-1 |
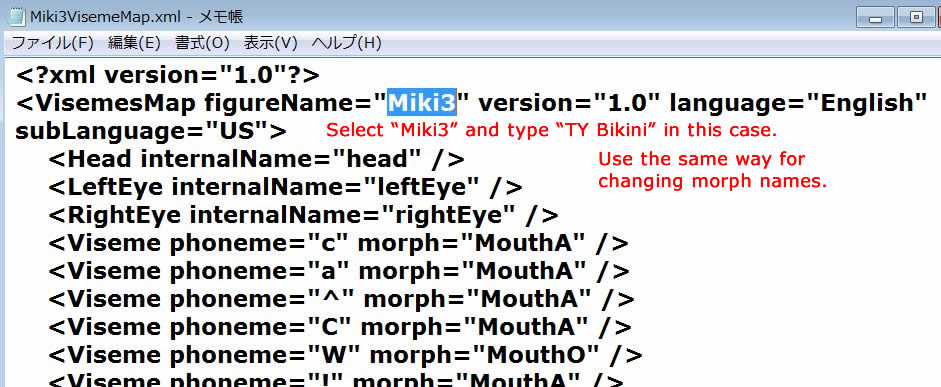
Open your character XML (Miki3VisemeMap.xml) on any Text Editor (Using notepad here). |
| 8-2 |
Change the VisemeMap figureName="Miki3" to your character name. |
| |
 |
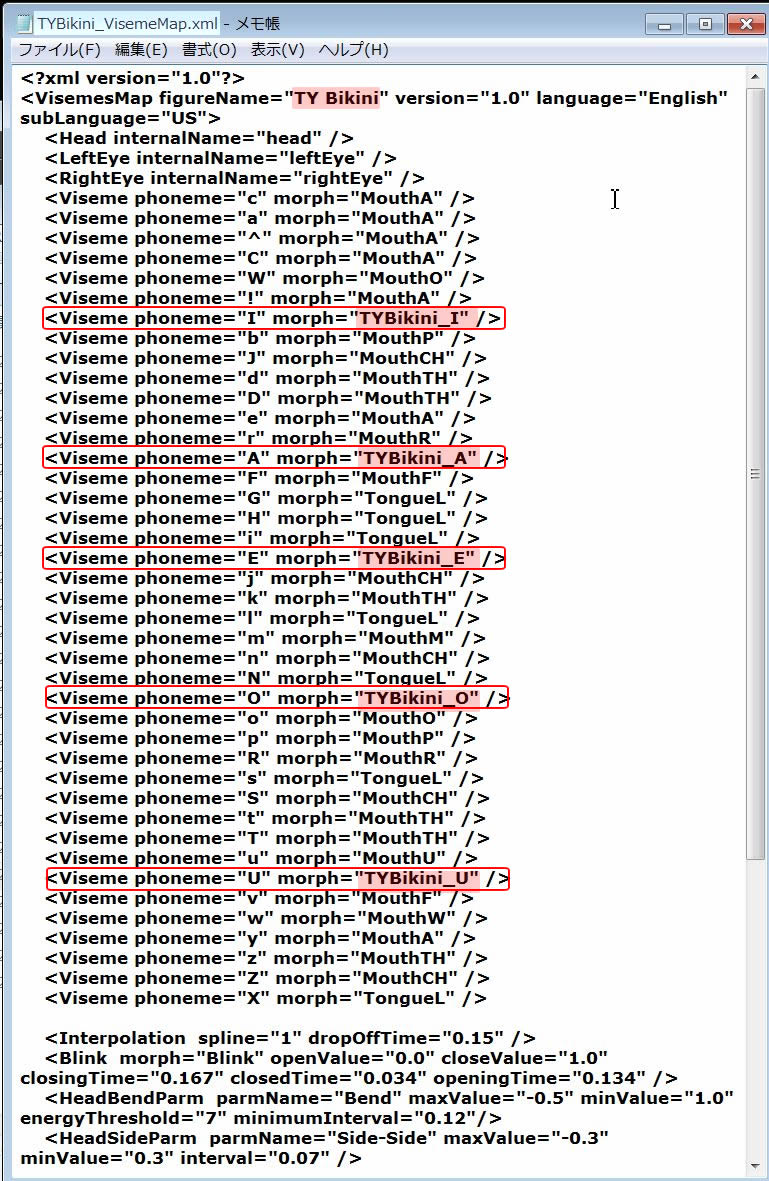
| 8-3 |
Select morph names of Viseme phoneme A, E, I, O and U and type the new Phenomes name.
(These 5 phonemes are selected just for experiment and not enough for actual use) |
| |
 |
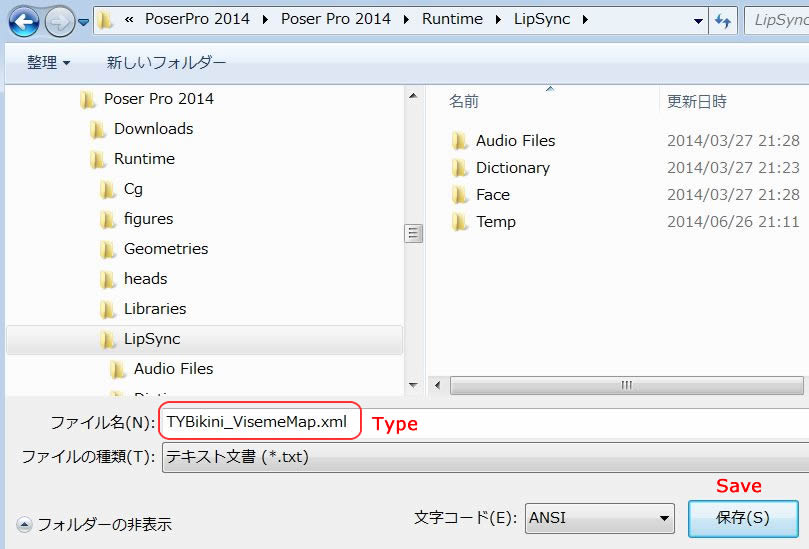
| 8-4 |
Save the edited XML file with new file name into the location "PP2014/Runtime/LipSync." |
| |
 |
| 8-5 |
Assign the saved XML file name on the 'Talk Desinger'/'Viseme Map File' and push 'Apply' buton. |
| 8-6 |
Go to Report #13 (1-9) for the Talk Desinger operation. |
| |
|
| |
|