3DX5.5/iClone5.5 Test Series 13: Does Poser Model TY talk in iClone & Unity?
2013.8.12 Hirospot (Personal Site) |
Tested Poser Model Facial Morph and iClone New MotionPlus |
| |
|
|
 印は日本語でのレポートです (Japanese report) 印は日本語でのレポートです (Japanese report) |
|
|
|
The report refers to Facial Morph transfer of Poser Model to 3DXchange5 and the new MotionPlus feature introduced in iClone5.5 PRO version.
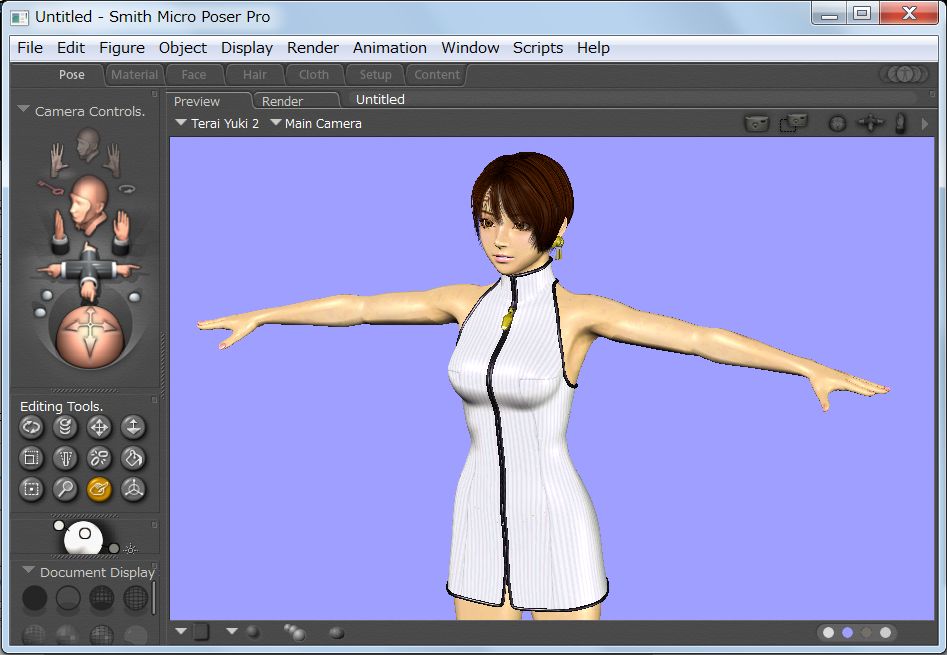
Poser model Terai Yuki, formerly famous Virtual Idol character in Japan is used for the test.
PoserPro and FBX Converter 2013 was used to transfer Poser Facial Morphs to 3DX5.5 and they are expanded with the powerful 'Expression Editor' in 3DX5.5 for the use in iClone5.5.
By using new iClone MortionPlus, body motions and facial expressions were imported into 3ds Max,body motions to Unity
for the low poly TY Set.
|
|
This Report is based on the personal experiment and not a tutorial. |
|
Many Thanks
Following Models are used in this Report |
Poser Figure Terai Yuki Set,
Terai Yuki 2 FULL
Terai Yuki c 2005 Ken-ichi Kutsugi /
extage All rights reserved. |
|
|
Terai Yuki |
Terai Yuki 2 |
Terai Yuki (Set) |
|
Terai Yuki 2 FULL |
|
TY-Dress |
|
TY-Dress |
|
TY-Boots |
|
TY-Boots |
|
| |
|
Shorts |
|
Hair |
|
Hair |
|
Earrings |
|
Earrings |
|
TTL |
37,628 |
TTL |
|
|
|
Tools used in the test |
Version |
Comment |
(0) Terai Yuki |
TY and TY2 Poser Version |
|
(1) Poser Pro 2010 SR1 |
8.0.3.11916 |
Smith Micro Software, Inc |
(2) Poser Pro 2012 |
9.03.23027 |
Smith Micro Software, Inc |
(3) FBX Converter |
2013.3 X64 |
|
| |
(Note)When used 2011 which is suggested for Morph data conversion, my Screen went unstable. 2013 is usable even Limitation Notice pops up. |
(4) 3DXchange5.5 Pipeline |
5.5.2007.1 |
|
(5) iClone5.5 Pro |
5.5.3207.1 |
|
(6) 3ds Max |
2012 |
|
(7) Unity 4 (Free) |
Version4.1.5f1
|
|
|
|
Test Step for the Report and Comment
|
Test Step |
Tools used |
Comment |
TY |
TY2 |
1 |
Phonemes and
Talk Designer |
PosePro2010 |
Use Phonemes by TY2 FULL.
TY Set does not support Phonemes. |
|
|
2 |
Create Collada File |
PosePro2010
Poser Pro 2012
|
Converted node datas are different in the 3DX Scene Tree. |
|
|
3 |
Morph data Conversion |
FBX Converter 2013 |
It is told that FBX conversion of Morph data is only supported by FBX Converter 2011, however, 2013 worked better. |
|
|
4 |
Characterization |
3DXChange5.5 Pipeline |
Notations are changed in the Scene Tree between PoserPro2010 and 3DX5.5 |
|
|
5 |
Expression Editor |
The edited result is used in iClone. |
|
|
6 |
Viseme Operation |
iClone5.5 Pro |
Useful to enhance the Lip synching |
|
|
7 |
MotionPlus |
iClone5.5 Pro |
Streamline the Motion transfer process |
|
|
8 |
FBX Export |
3DXChange5.5
|
Issue: Advanced Settings for 3ds Max |
△ |
△ |
| to 3ds Max2012 |
Facial Expression was transfered.
(Needed to import Voice audio.) |
|
|
| to Unity (Free) |
Facial Expression was not transfered.
(Need to add Plugin)
(Need to import Voice audio.)
Polygon Count of more than 65,535 is not supported by FBX inport into Unity
|
|
X |
|
|
PoserPro Phonemes and Talk Designer |
1_1 |
Start PoserPro2010, Open Poser Library and show Terai Yuki 2 FULL on the Preview screen. |
| |
|
1_2 |
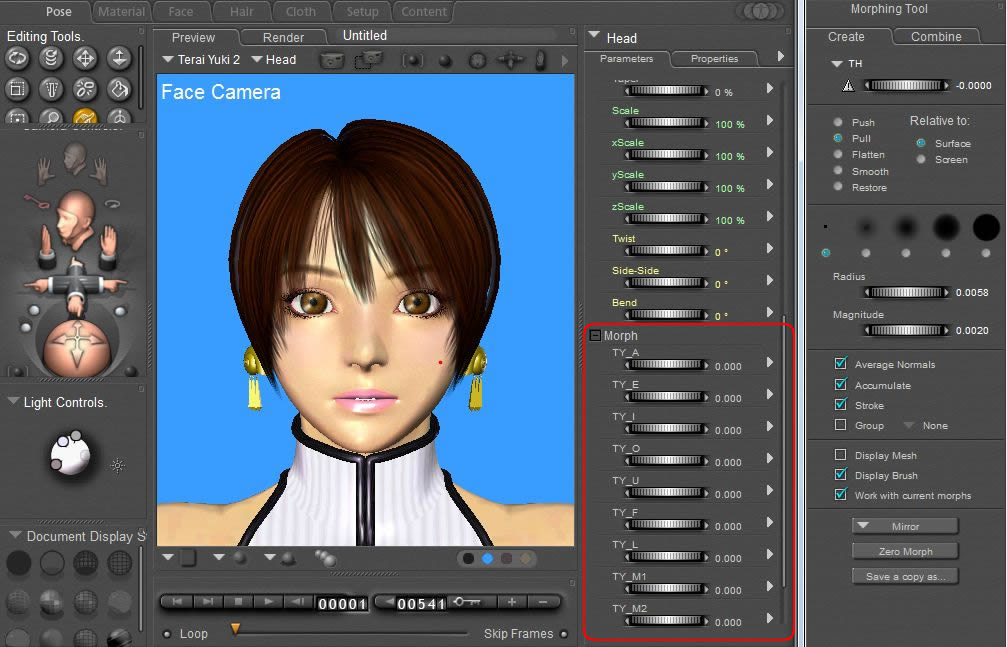
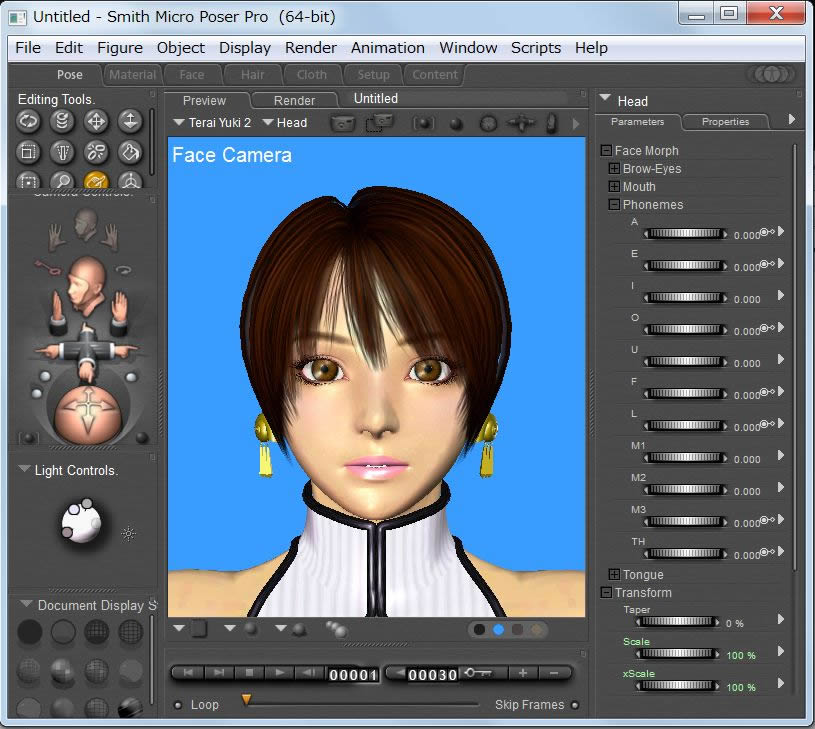
Use Face Camera, Select Head , and expand the Phonemes under the FaceMorph in Parameters panel.
|
|
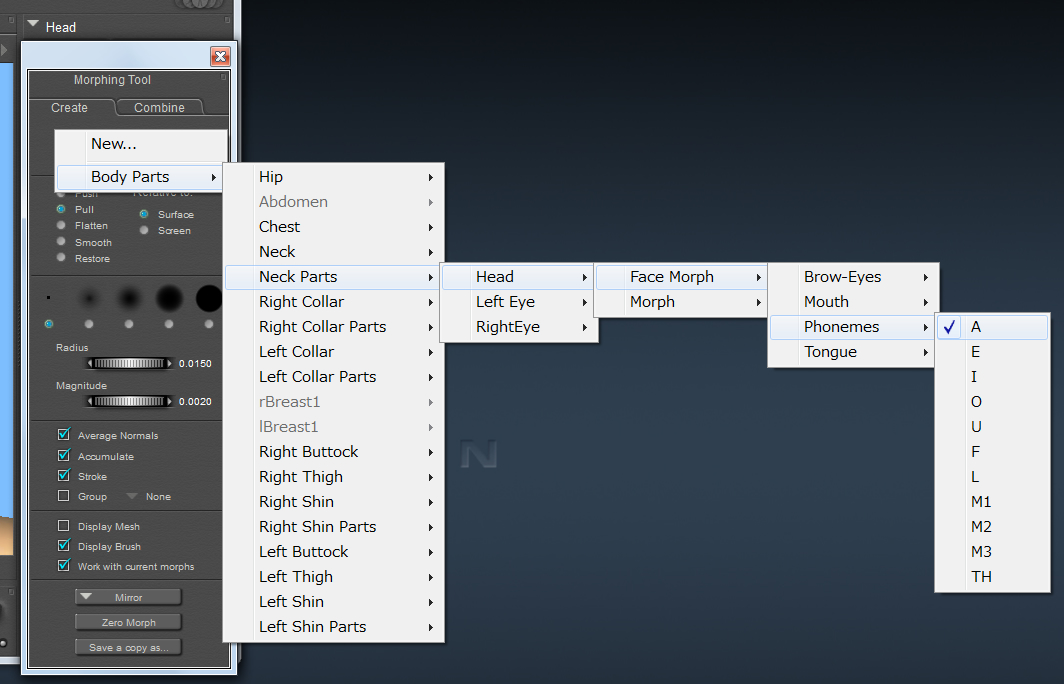
(Note) Show the Morphing Tool and click on the TY face then Phonemes dials appear in Parameter panel.
|
1_3 |
Lip shape can be changed by moving Dials in the Phonemes, however, Lipsynching by sound file is not available on the PoserPro. |
| |
(Note1) When needed TY lipsynching on PoserPro, create Phonemmes for TY own. |
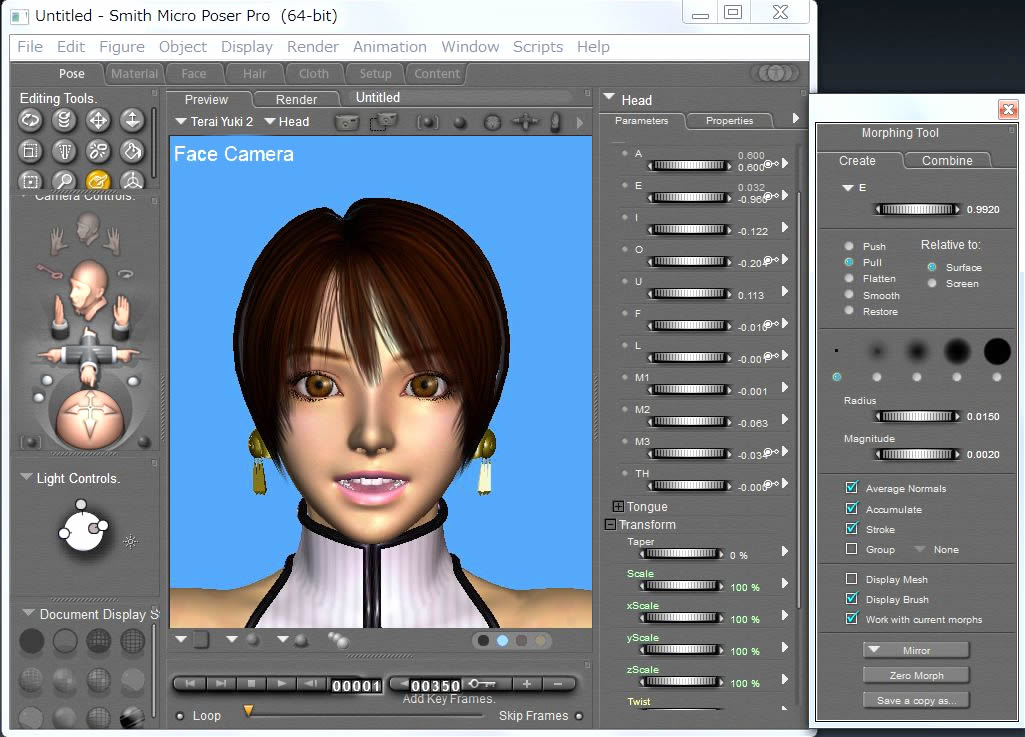
(Note2) It is not really necessary to make the TY own lipsynching in PoserPro, however,
vocal expression can become more flexible.
|
|
1_4 |
Registering of the TY own Ponemes: Go to Morphing Tool/Create/Body Parts/Neck parts/...Phonemes/◎ |
| |
|
1_5 |
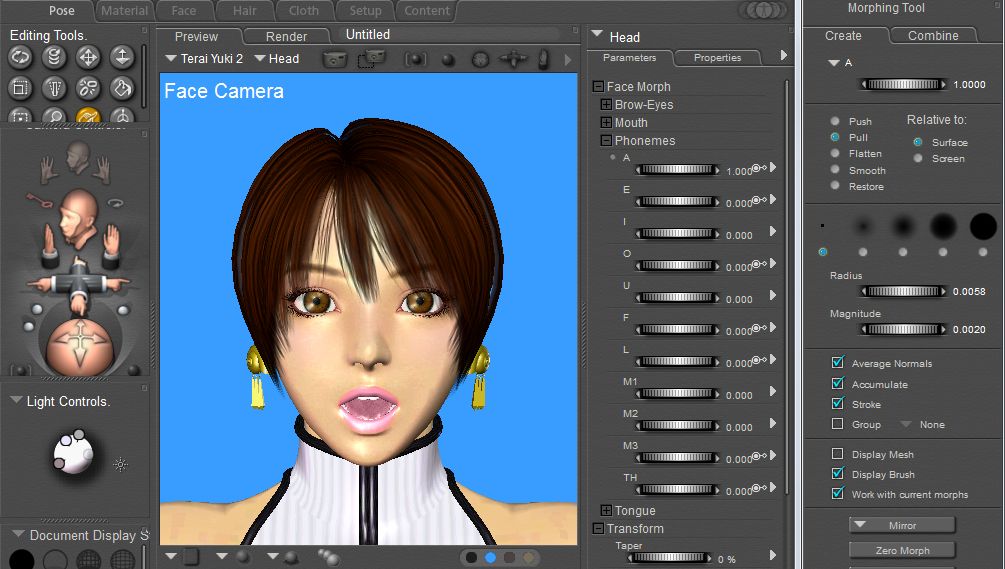
Adjust the Phonemes dial to get the lip shape for Phenomes A, E, O, U, .... |
| |
Adjust each dial of Phenomes in Parameters panel until to get 1.000 dial reading of the Create in Morphing Tool.
Reset the previous Letter settings when the next Letter settings.
|
1_6 |
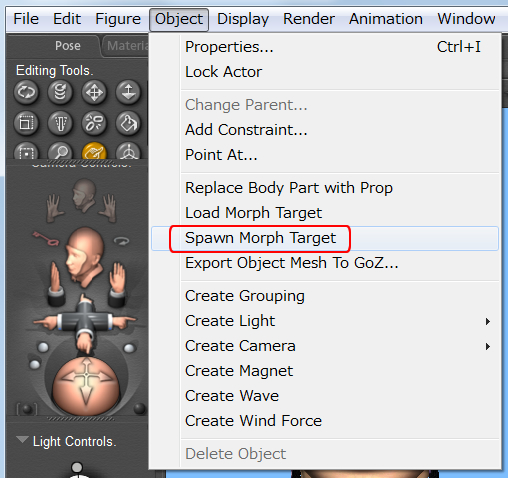
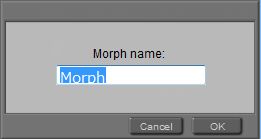
Go to Object/Spawn Morph Target and enter the created Morph shape name in the Morph Name window.
Push OK button to register. |
| |
 |
Morph → TY_A などとしてみます。
 |
|
1_7 |
Created Morphs are shown under the Parameters dial.
|
| |
|
1_8 |
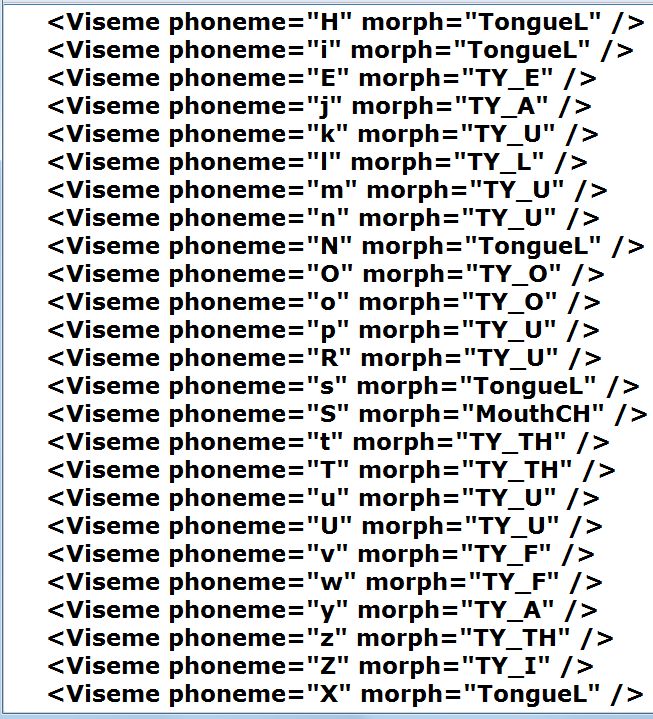
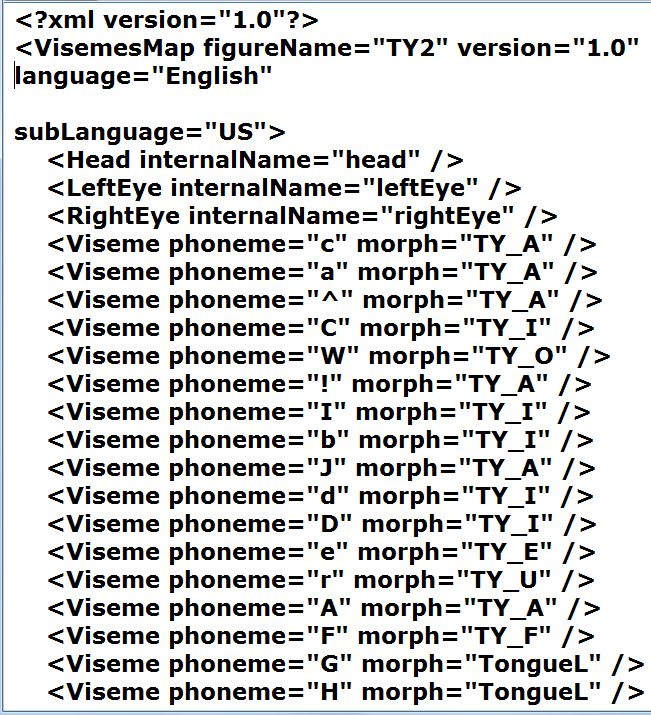
Create Viseme map file for Yuki now registered as follows. |
| |
1) Use Text Editor to open .xml file in the default RUNTIME/LipSync, and allocate the registered Morph.
2) Use any name when allocation is not possible and save. |
More Info |
|
 |
|
|
1_9 |
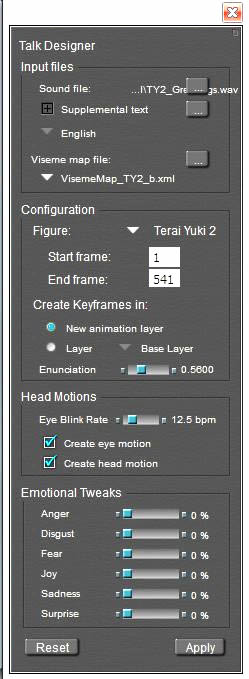
Select Talk Designer under Windows menu, proceed as follows.
|
| |
|
1) |
Input files/Sound File:Select the (.WAV)file for a test.
(in the Runtime/LipSync/Audio File)
|
2) |
viseme map file: Select the created Viseme map file. |
3) |
Configuration/Figure: Select Terai Yuki 2
|
4) |
Enunciation:Adjusting level of Mouth opening |
5) |
Head Motions:Adding emotion by Eye Blink rate, Eye Motion and Head Motion |
6) |
Push Apply button when finished all settings in Talk Designer.
|
|
|
1_10 |
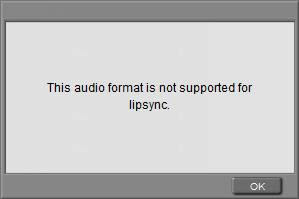
Following message may appear when Apply button is pushed if the (.WAV) file is not supported.
|
| |
|
| 1_11 |
Lipsynching animation is confirmed on the PoserPro, save as TY2_TalkTest1.wmv. |
1_12 |
Crick Figure/Zero Figure and proceed to export. |
2 |
Create Collada File in PoserPro |
| |
1)Check on Terai Yuki2 only at Select Objects.
2) At Export Options :
・Use Centimeters for Export standard units
・Do not check 'Bake all morphs'
・Select Preset as Default.
・Do not check Invert transparency map. |
|
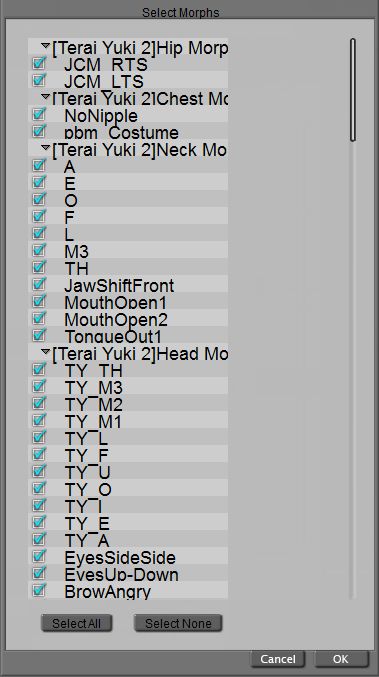
3) Select All at Select Morphs.
 |
|
3 |
Morph data Conversion for 3DXchage5.5 |
3-1 |
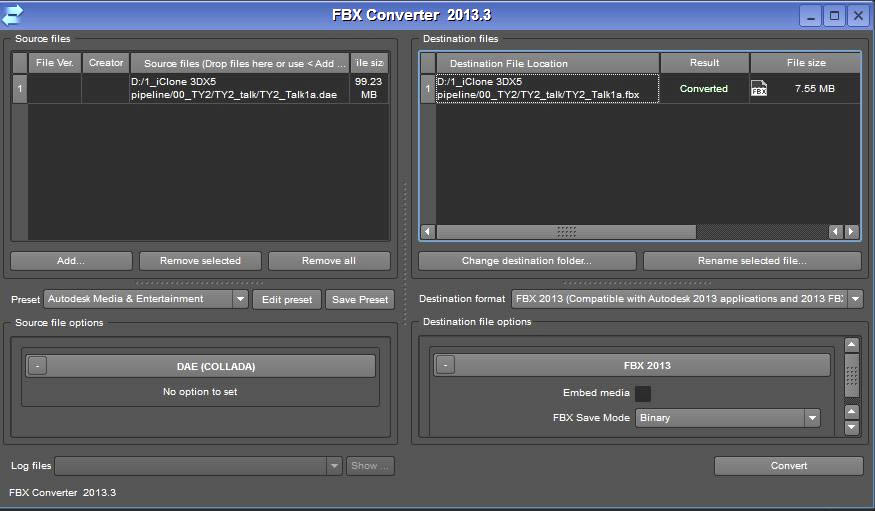
Use FBX Converter 2013 for Exporting Collada(.DAE) file created at Poser Pro2010. |
| |
|
3-2 |
Terai Yuki 2 is imported into 3DXchange5.5 Pipeline with her Hair shown backward. Set Opacity to '0'. |
| |
The Direction of the TY Hair can be corrected at the Characterizing stage later.
(TY Hair material is not used in this report to show the face expression)
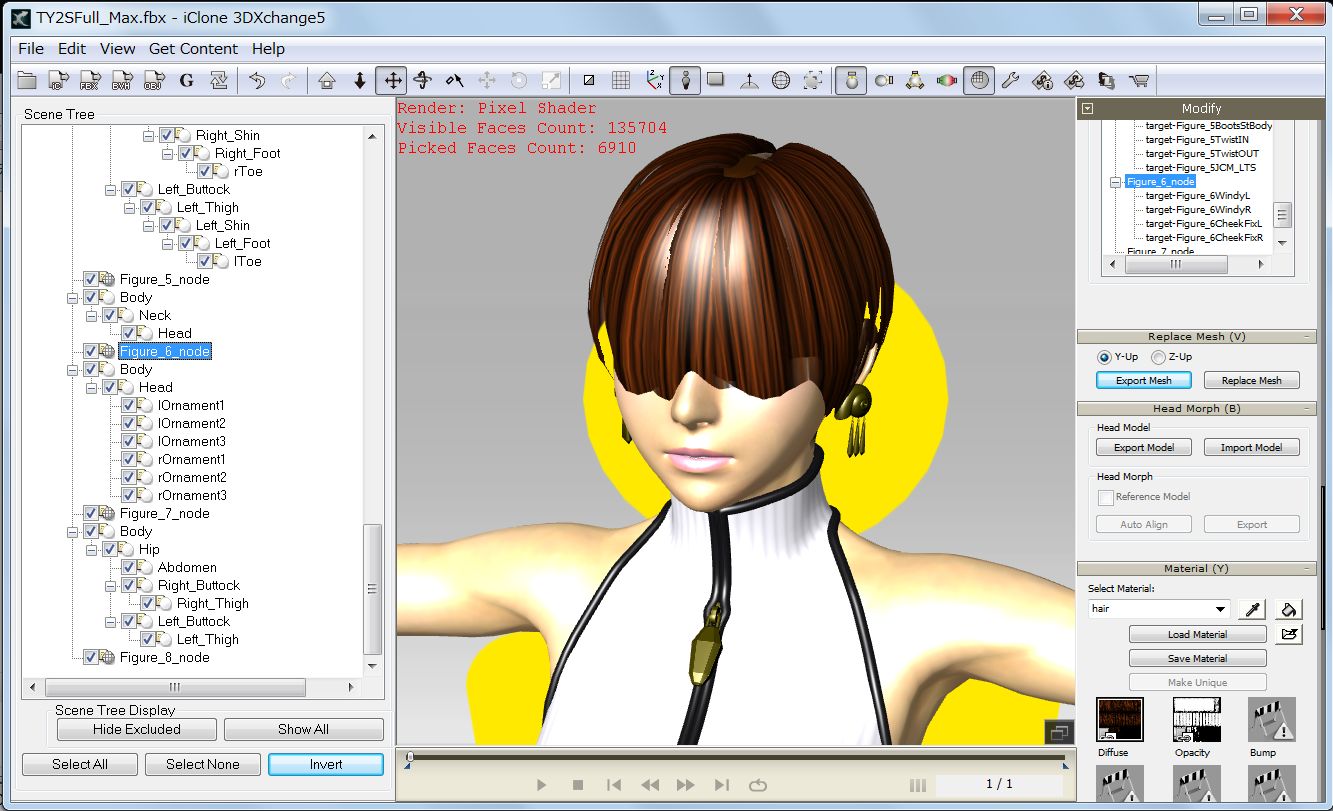
|
3-3 |
Correction of Black Eyes: Go to Material/Select Material: |
| |
Select Cornea, set Opacity to '0'.
Select Iris, set Specurar to '0'.
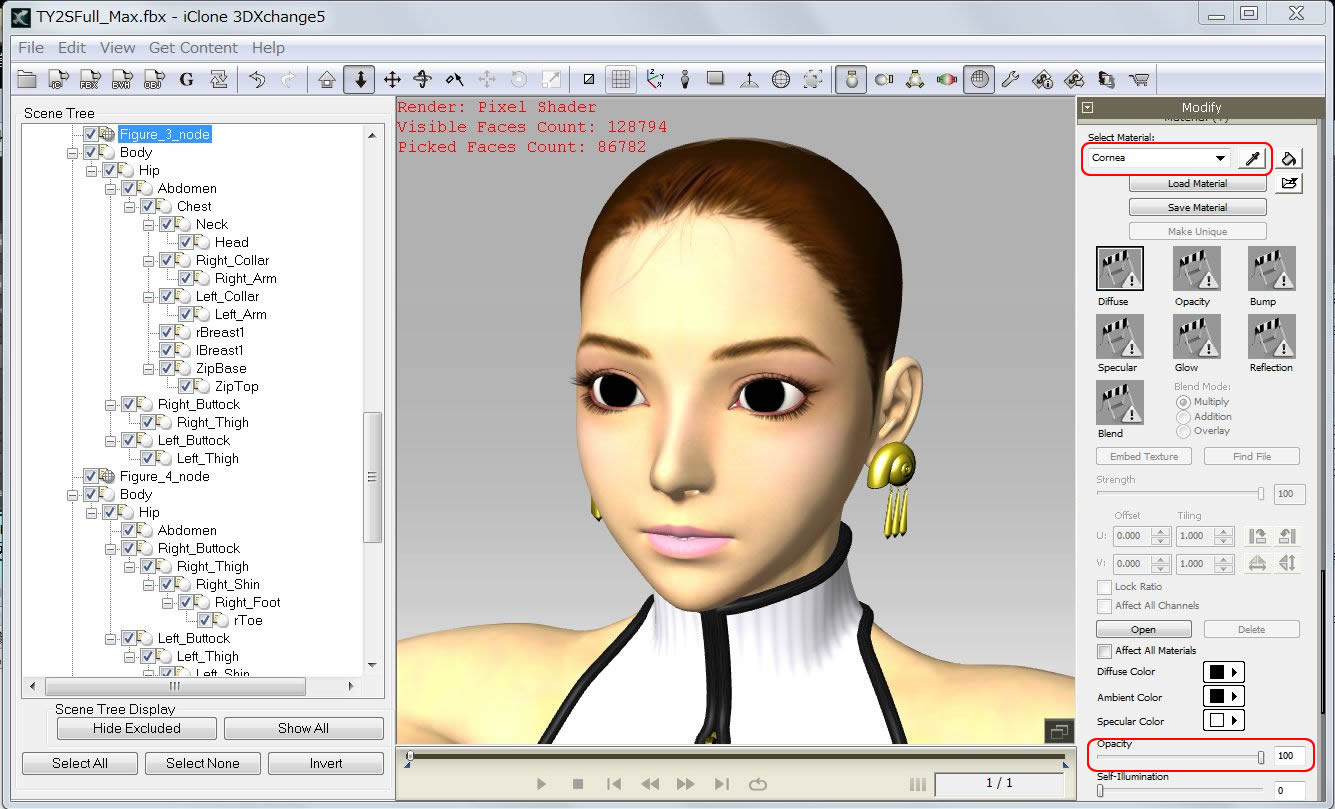 |
3-4 |
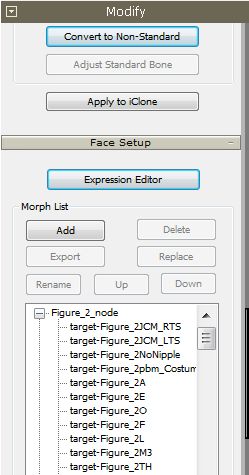
Morph data provided in the PoserPro2010 are imported and shown in the Morph List.
|
| |
(Node names and notation can be different according to the version of PoserPro and FBX Converter)
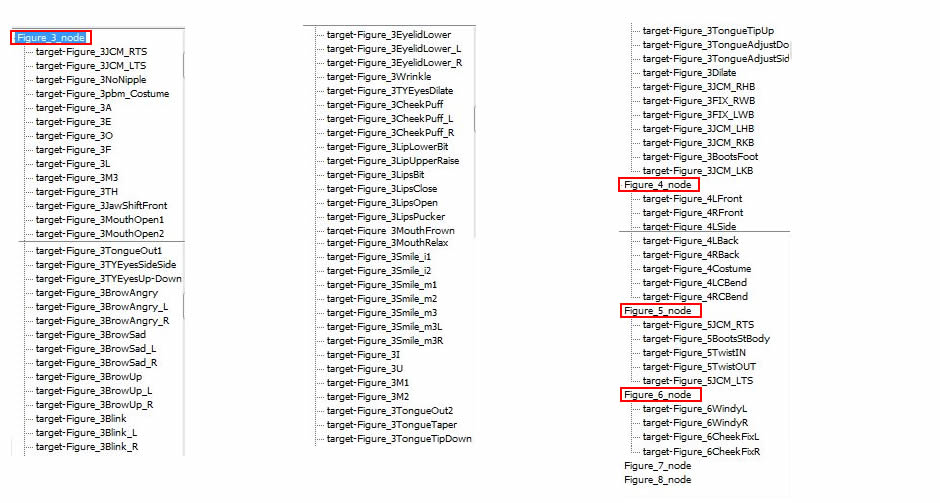 |
3-5 |
When a morph is selected in the Morph List, TY model is respoded on the 3D View. |
| |
|
4 |
Characterization & Expression Editor at 3DXchange5.5 Pipeline |
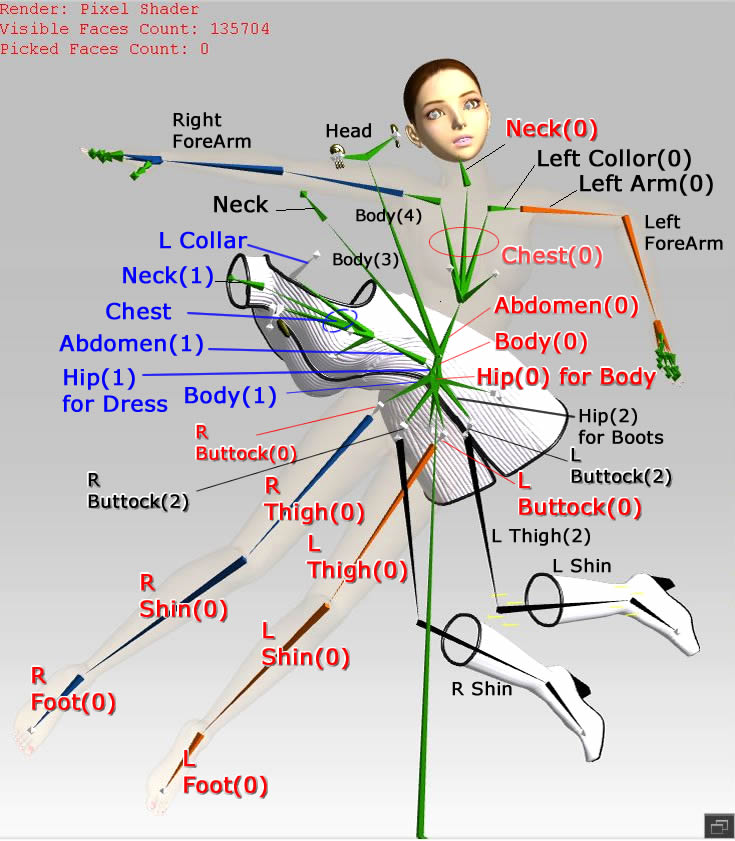
4-1 |
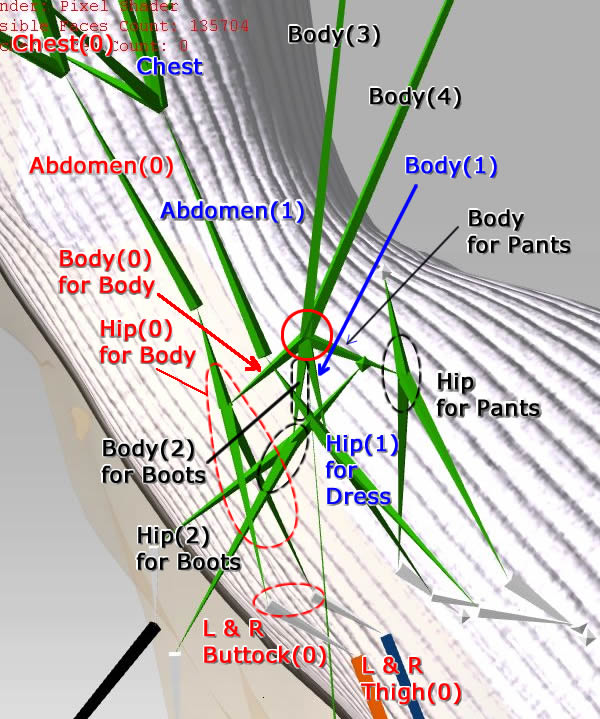
Use Bone Mapping UI and Scene Tree to assign each bones. |
| |
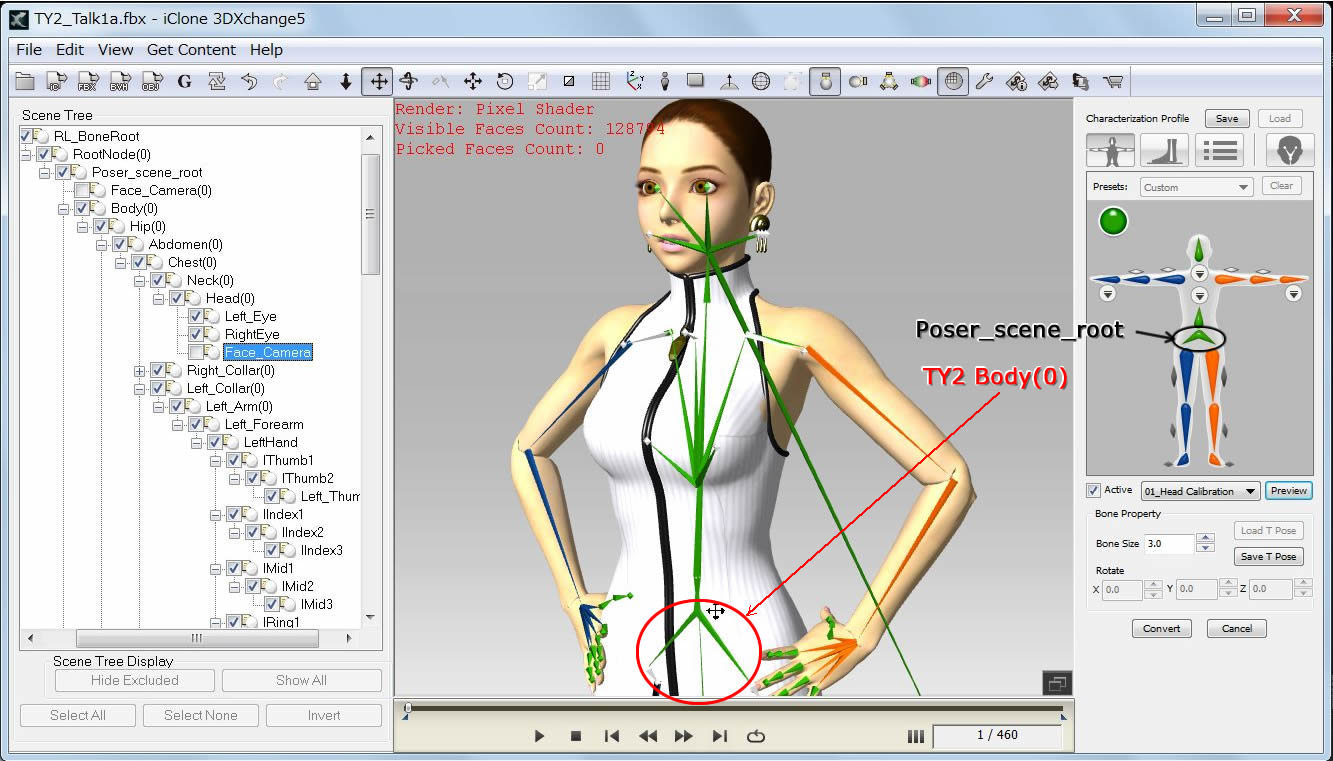
| |
Procedure |
1) |
Use Scene Tree to identify whic Figure node numbers refer to which model mesh.
|
2) |
Use Rotate Object tool to confirm Bone Mesh Morphs. (Body, Dress, Earrings,Boots) |
3) |
At Bone Mapping UI, Apply 'Hip' to the 'Poser_scene_root'. |
4) |
Select Custom, apply bones on the UI to the corresponding bones in the Scene Tree. |
|
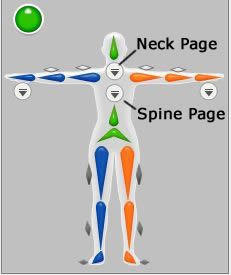
Bone Mapping UI |
|
Neck Page in Yellow color
Spine Page in Orange color
Basic bones are shown in Red color
|
3DX Presets |
Terai Yuki 2 FULL |
| |
|
Head |
Head(0) |
Neck Page |
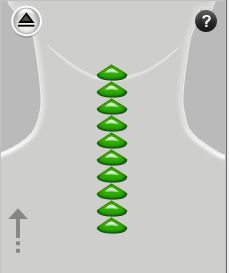 |
Neck9 |
Head(2) |
|
Neck8 |
Head(1) |
|
Neck7 |
Head |
Head(2) |
Neck6 |
Neck(1) |
Head(1) |
Neck5 |
Neck |
Head |
Neck4 |
Neck(0) |
Neck(1) |
Neck3 |
Chest |
Neck |
Neck2 |
Chest(0) |
Neck(0) |
Neck1 |
*Abdomen(2) |
Chest |
Neck |
*Abdomen(1) |
Chest(0) |
| |
|
LeftHand |
Left (R)Hand |
| |
|
LeftForeArm |
Left (R)_Forearm |
| |
|
LeftArm |
Left (R)_Arm(0) |
| |
|
|
◆Left(R)_Arm |
Spine Page
|
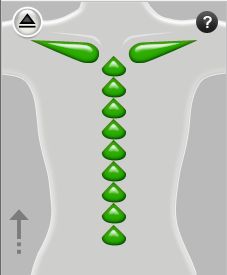 |
Left(R)Shoulder |
Left(R)_Collor(0) |
Spine9 |
Abdomen(0) |
Spine8 |
Hip2 |
Spine7 |
Hip(1) |
Spine6 |
Hip(0) |
Spine5 |
Hip |
Spine4 |
Body(4) |
Spine3 |
Body(3) |
Spine2 |
Body(2) |
Spine1 |
Body(1) |
| |
|
Spine |
Body(0) |
| |
|
Hips |
Poser_scene_root |
| |
|
Left(R)UpLeg |
L(R)_Thigh(0) |
| |
|
◆ Left(R)UpLegRoll |
◆L(R)Thigh(2) |
| |
|
Left(R)Leg |
L(R)_Shin(0) |
| |
|
◆Left(R)LegRoll |
◆L(R)Shin Left Thigh(1) |
| |
|
Left(R)Foot |
L(R)Foot(0) |
| |
|
Left(R)ToeBase |
◆L(R)_Foot |
(* Testing to include Abdomen or not)
|
4-2 |
The Direction of the Hair can be corrected at the Characterizing stage if you wish. |
| |
Select Neck bone in the Scene Tree, uncheck 'Active' and use 'Rotate Object' tool.
When angle adjustment of Hair is finished, check 'Active' to complete.
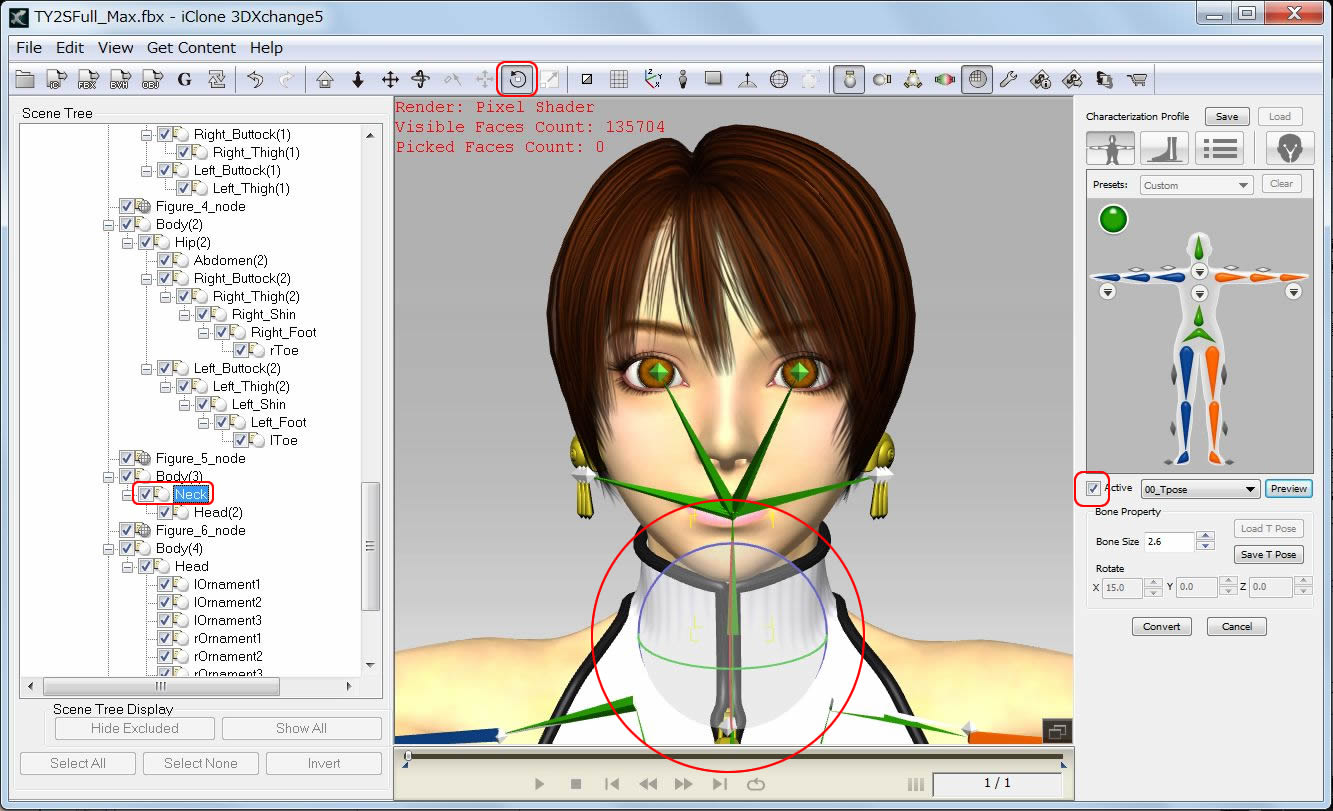
|
| |
(TY Hair material is not shown in the following report) |
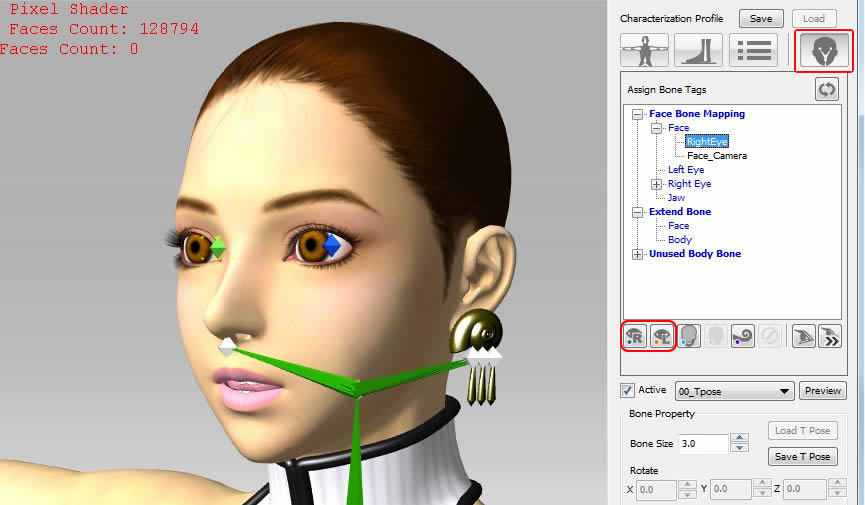
4-3 |
Click 'Face/Extend Mapping' icon and make Eye Mapping for both eyes. |
| |
|
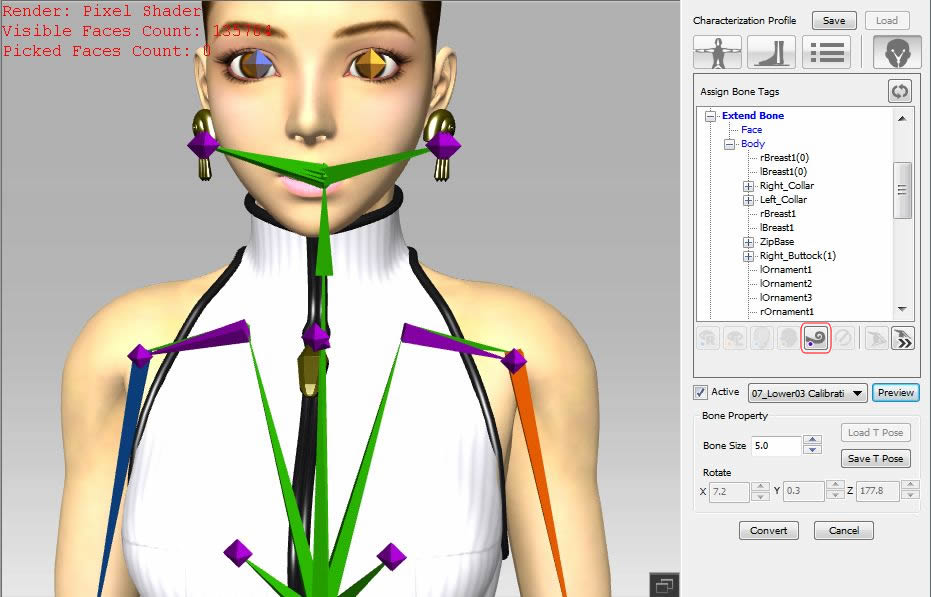
4-4 |
Expand Unused Body Bone and make mapping to Extend Bones. |
| |
|
4-5 |
Keep Active and click Convert button. |
| |
Read Notice, click OK, then Expression Editor will become active. →
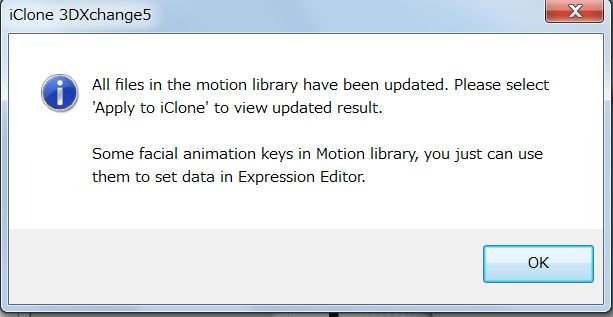 |
 |
|
5 |
Expression Editor |
5-1 |
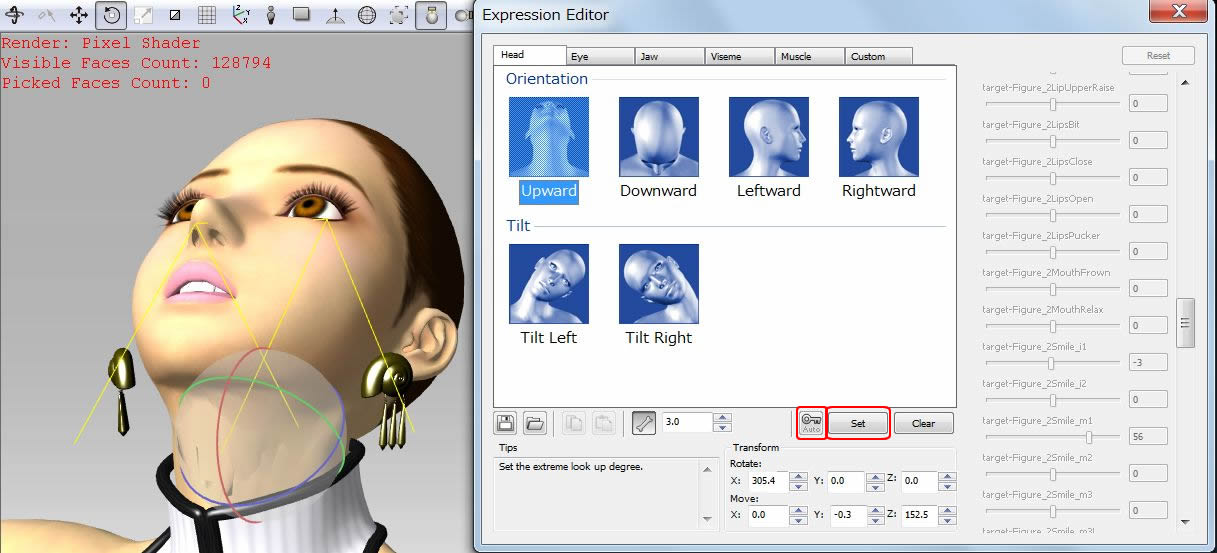
Set Expression for Head, Eye, Jaw, Viseme, Muscle and Custom in Expression Editor. |
|
!) Head Expression:Select 6 directions and adjust the head by RotateObject tool and Set.
(Use Auto key) |
| |
|
5-2 |
Eye Expression:Select 4 directions and adjust eye angle by RotateObject tool and Set. |
| |
|
5-3 |
Viseme:Adjust Morph sliders imported from PoserPro2010 for each Viseme Elements. |
| |
|
5-4 |
Muscle:Adjust Morph sliders provided in PoserPro2010 for brow movement. |
| |
|
5-5 |
Save the Viseme Settings. The result is transfered to iClone as Lip Synching list. |
| |
Facial Animation Profile Format name:*.3dxFaceAnimProfile |
|
| |
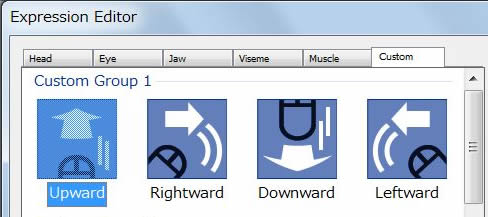
1) Custom:Any expression used in iClone Puppeteering panel can be set.
→Custom Group1:Face expression only |
| |
|
| |
2) Custom:Dress Morph→Custom Group2:Facial expression with Dress Morph |
| |
|
| |
3) Custom:Boots Boots Morph |
| |
|
5-6 |
Go to Spring and set Translate/Rotate to Mapped Extend Bones with Group Settings. |
| |
Apply Motions in Preview Motion/Animation and cofirm the Spring Effect.
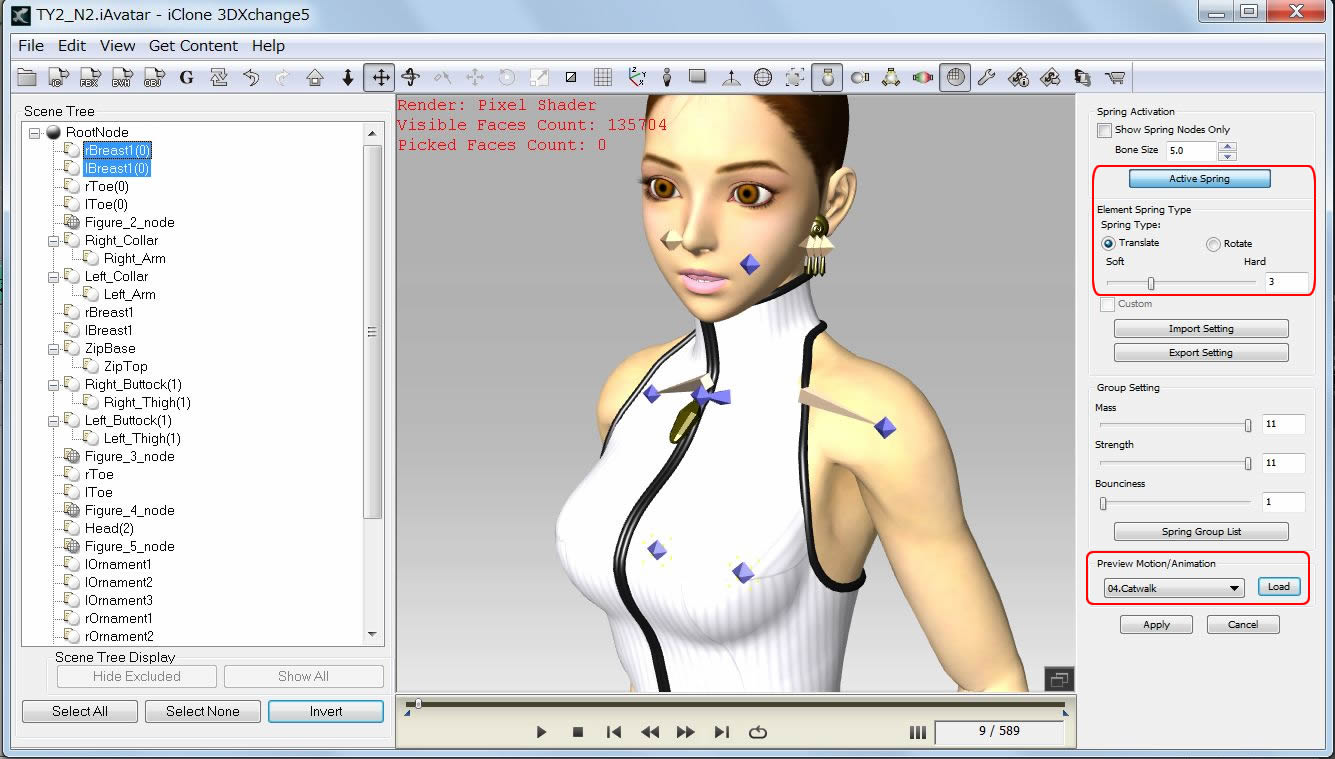
|
5-7 |
Now, close Expression Editor, click 'Apply to iClone' button. |
| |
Modifications with Expression Editor are possible after 'Apply to iClone' is done.
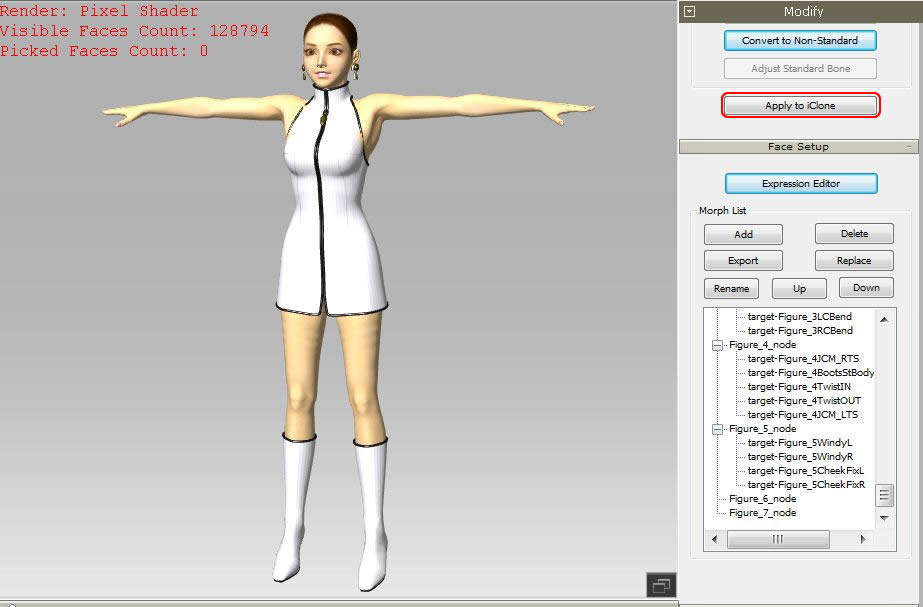
|
|
TY2 FULL applied to iClone5.5 |
| |
Select Actor/Skin, set Opacity to '0' for her Hair.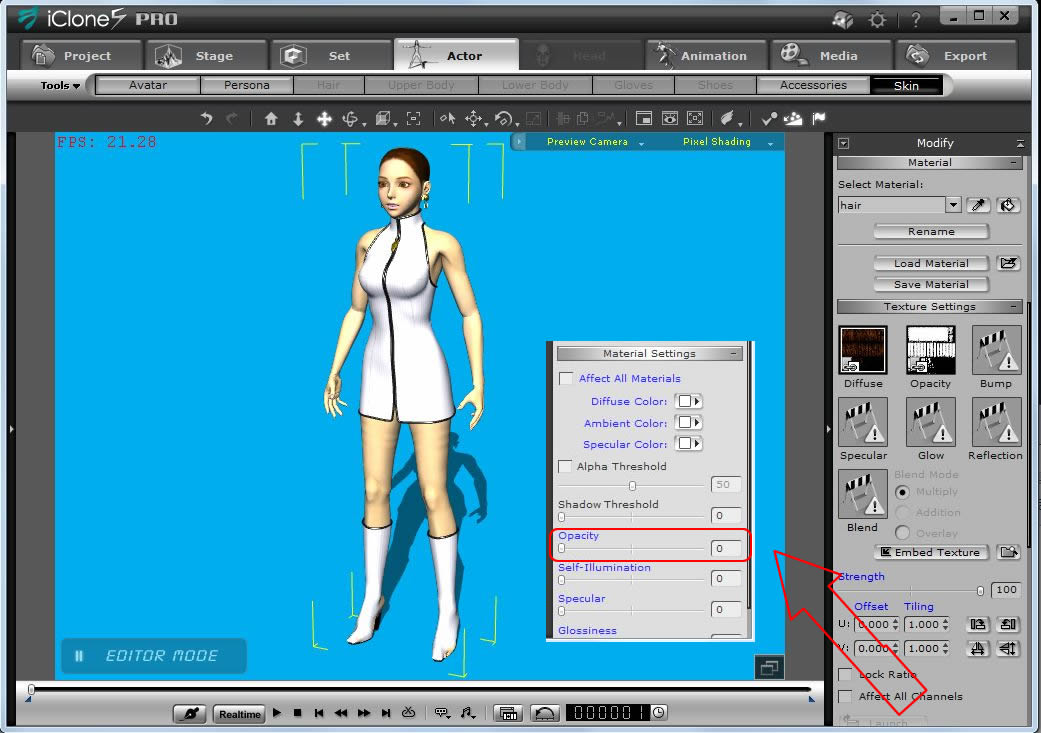 |
6 |
Text to Speech in iClone5.5 (Viseme Operation at iClone5.5) |
6-1 |
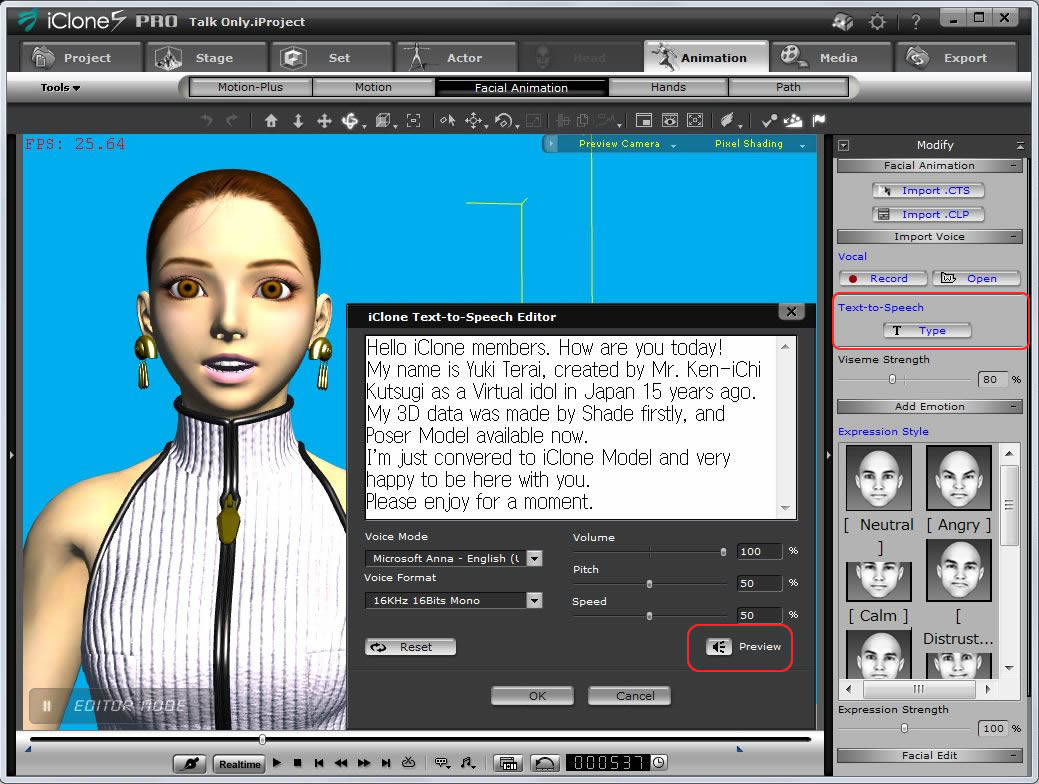
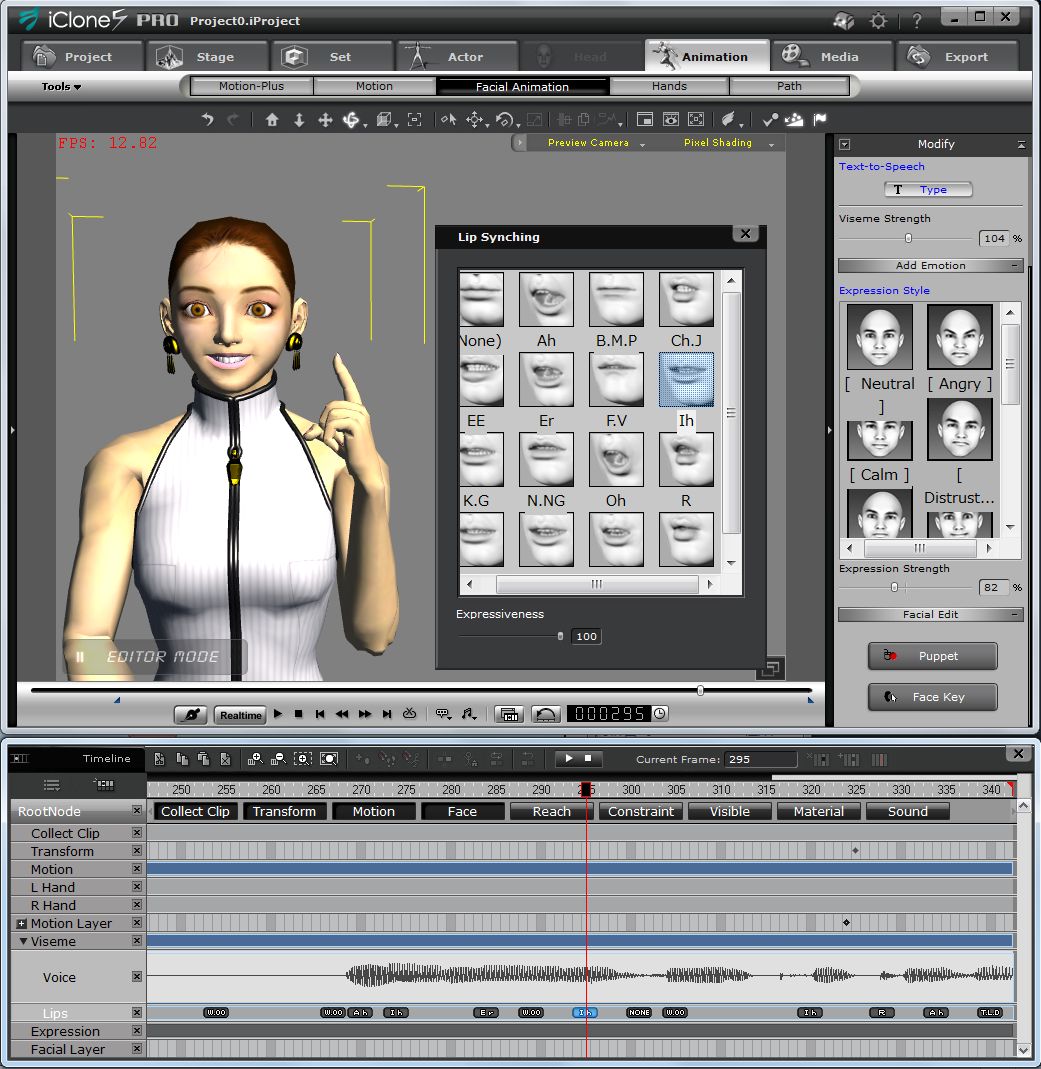
Go to Animation/Facial Animation/Modify/IMPORT Voice, click T Type button at Text-to-Speech. |
| |
1) Enter Speech content, click Preview button and click OK button. |
| |
2) TY2 mumbles in the 3Dview. Save the Speech content in the Text Editor for the further use. |
| |
|
6-2 |
Use SAPI TTSAPP as VW Julie voice is suitable for TY. |
| |
|
6-3 |
Make fine adjustments at each Phoneme for more natural lip shape. |
| |
Lip Synching List
( Viseme list)
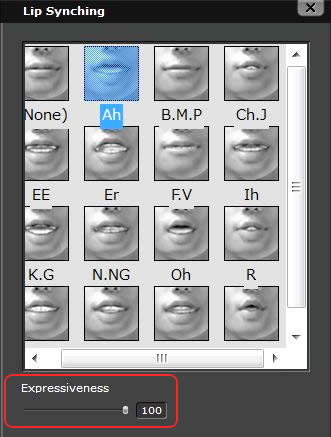 |
| |
Viseme
口形素
|
Visual + Phoneme の造語
視覚音素 |
Phoneme
音素 |
Minimum unit to distingush
phone
発音を区別するための最小音声単位 |
|
|
Tool |
method |
1) |
Voice Waveform |
Show Timeline (use F3 key) and open Viseme. |
2) |
Lip Synching List
Viseme list |
The List pops up when Double click on the Lips Line. |
3) |
Confirmation of
Lip movement
|
Slide the Timeline on the Voice waveform. |
4) |
Adding Viseme
|
Move Timeline to the point and click on the Viseme in theLip synching List. |
5) |
Viseme Strength
in all |
Viseme Strength Slider is used for all Visemes.
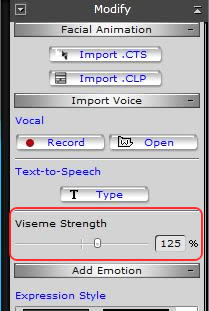
|
6) |
Each Viseme Strength |
Each Viseme Strength is adjusted by
the Expressiveness Slider at the bottom of the LipSynching list. |
|
|
6-3 |
Use 'F3' key to show Timeline. Click on the Track List, Open RootNode(0) in the Character. |
| |
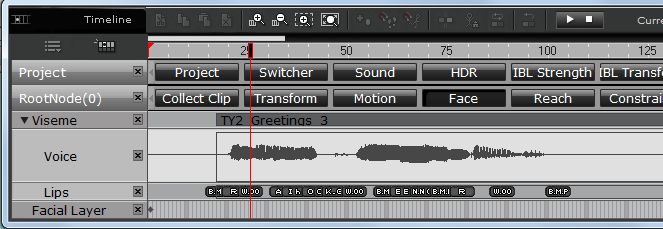 |
Click Face tub on the RootNode to show Viseme.
Click on ▼mark to show Voice waveform. |
|
6-4 |
Extend the timeline, show Voice waveform and Phoneme Marker simultaneously for timing adjustment. |
| |
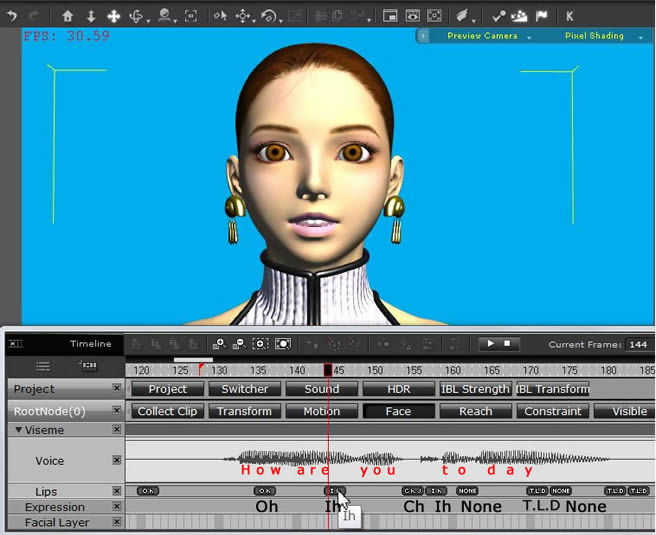 |
【 How to look Speaking 】
|
1)Click on the Phoneme marker and move.
2)Paste the proper marker to mach the viseme.
3)Place 'None' marker on no voice area.
4)Delete unnecessary Viseme keys by Delete button.
|
|
|
6-5 |
Replace Phenome markers and adjust Expressiveness for better Voice Expression. |
| |
Locate stoppers to limit the replay area for faster adjustment.
|
Speech Words |
My |
Name |
is |
|
Yu |
ki |
|
Te |
ra |
i |
Assigned Viseme |
Ih |
None |
T.L.D |
|
Ih Ch.J |
Ch.J |
|
Ih |
T.L.D, |
Ih |
Edited |
Ah |
EE |
Ih |
|
W.OO |
Ih |
|
EE |
Ah |
Ih |
Expresiveness |
70 |
100 |
70 |
|
100 |
100 |
|
100 |
100 |
100 |
|
|
6-6 |
Facial Expression |
| |
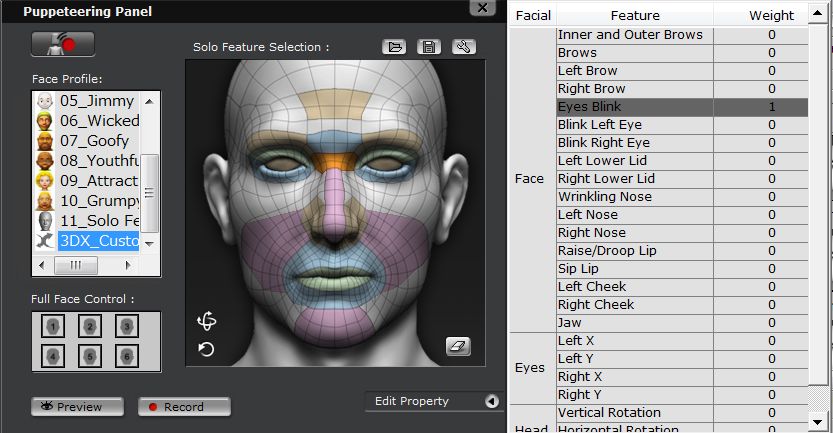
1) 3DX_Custom in Puppetering Panel can be used when more facial expression is needed. |
| |
2) Six Groups of Expression Editor in 3DX5 is shown under the Full Face Control table.
|
| |
Weight value must not be all zero when using Edit Property.
 |
| |
3) Select group first in the Full Face Control, click two orbit markers and click Preview button. |
| |
4) Move mouse around to bring Facial Expressions set in the Custom Expression Editor. |
| |
 Custom Group1:Face expression
|
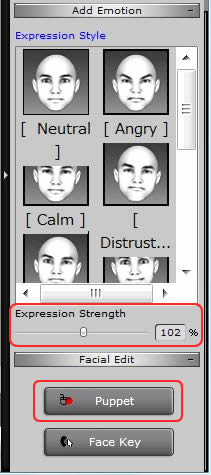
Adjust Strength of Expression by the Slider above the Facial Edit bar.
This affects to all of Expressions.
 |
|
| |
5) Push Record button to record the Expression, this motion is added to the timeline as 'PuppetClip'. |
| |
|
7 |
Using MotionPlus at iClone5.5 |
7-1 |
Practice of Adding Motion |
|
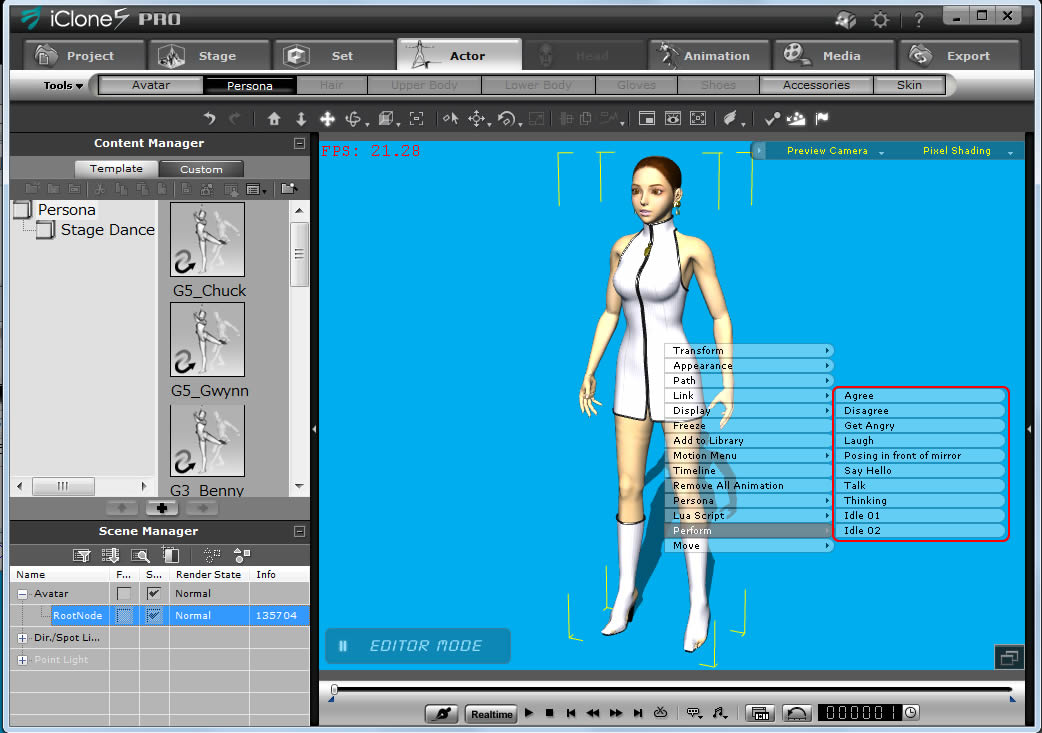
1) Apply G5_Gwynn Persona by Actor/Pesona/Template, right click on the TY2 to open Perform. |
| |
|
| |
2) Open Motion Template, select 'Talk 01' in Charming Girl to examine the movement. |
| |
3) Open Edit Motion Layer and adjust the body part to fit to the speech. |
| |
|
7-2 |
Apply Free Motion for FBX Export test |
| |
1) Replace the motion with 'Agree' motion in the Persona to the top of the speech. |
| |
2) Background can be added to enhance the demo. |
| |
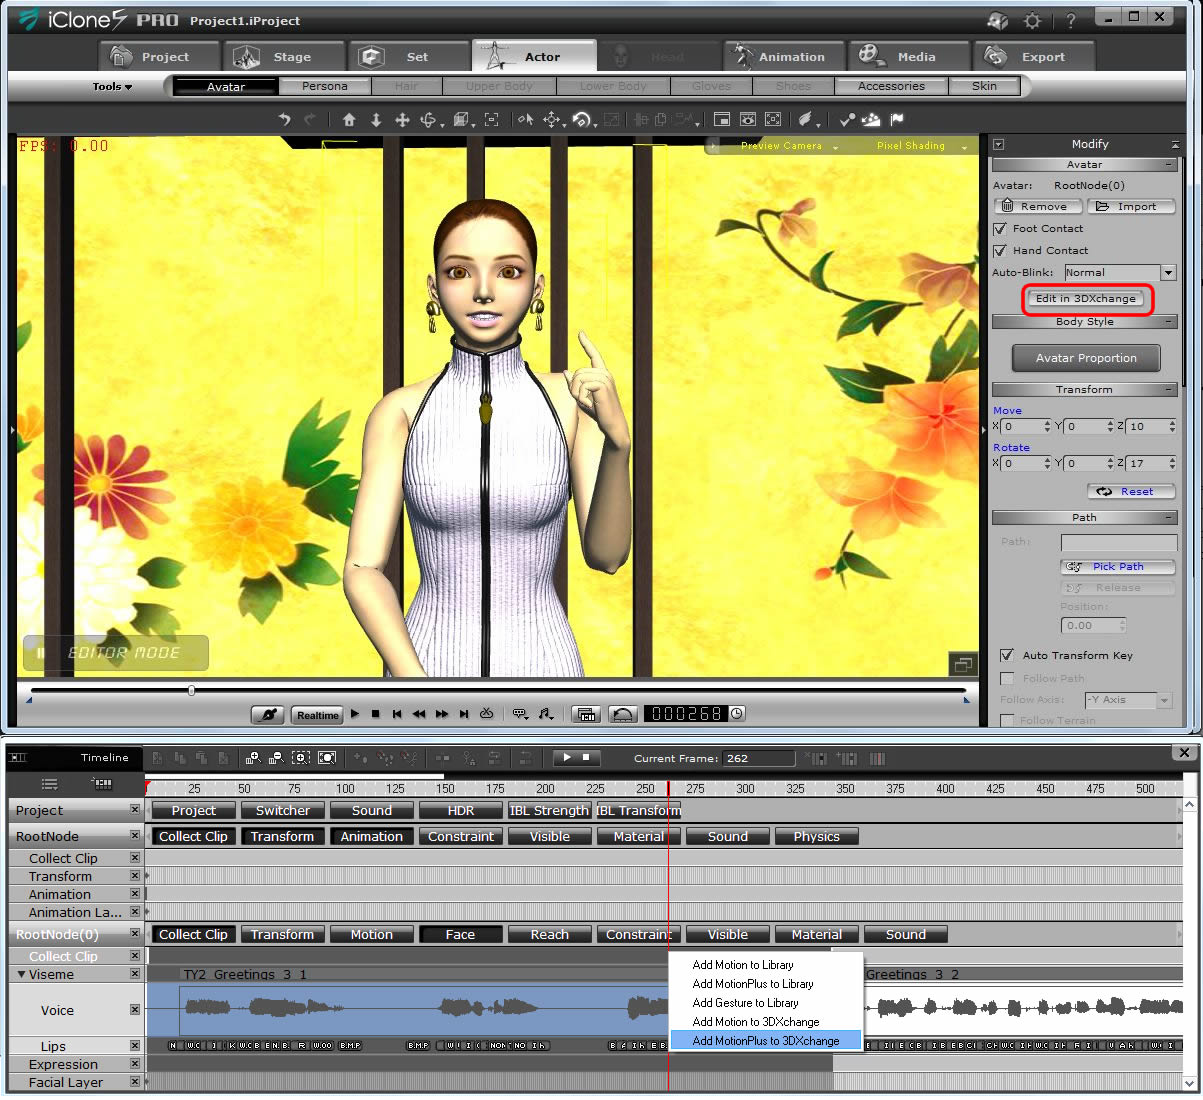
3) At Actor/Avatar, Click on 'Edit on 3DXchange' Button, then, TY2 model is shown on the 3DView in 3DX5.
(Note) If you forget this step, iClone Standard Character Chuck will be shown there) |
|
| |
4) At Timeline, Left button click on the 'Collect Clip' bar, drag until all the area to be included for the test. |
| |
|
| |
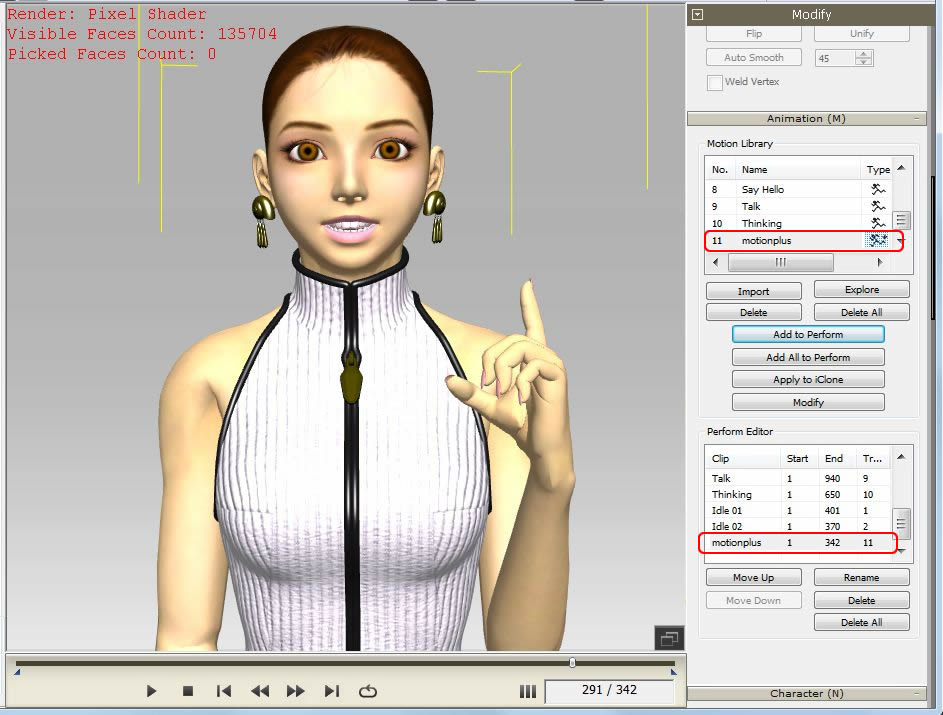
5) Right Click on the area and select 'Add MotionPlus to 3DXChange'. |
| |
6) MotionPlus data is safely added to the Motion Library in 3DXchange. |
| |
TY2 FULL:135,704 Poligons
 |
8 |
FBX Export Test from 3DX5.5 for TY and TY2 |
8-1 |
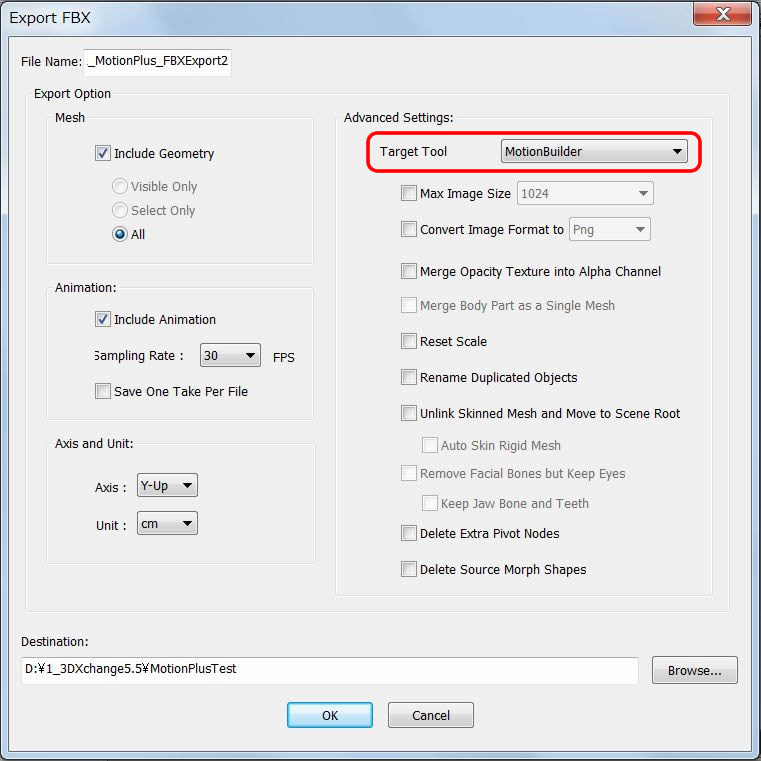
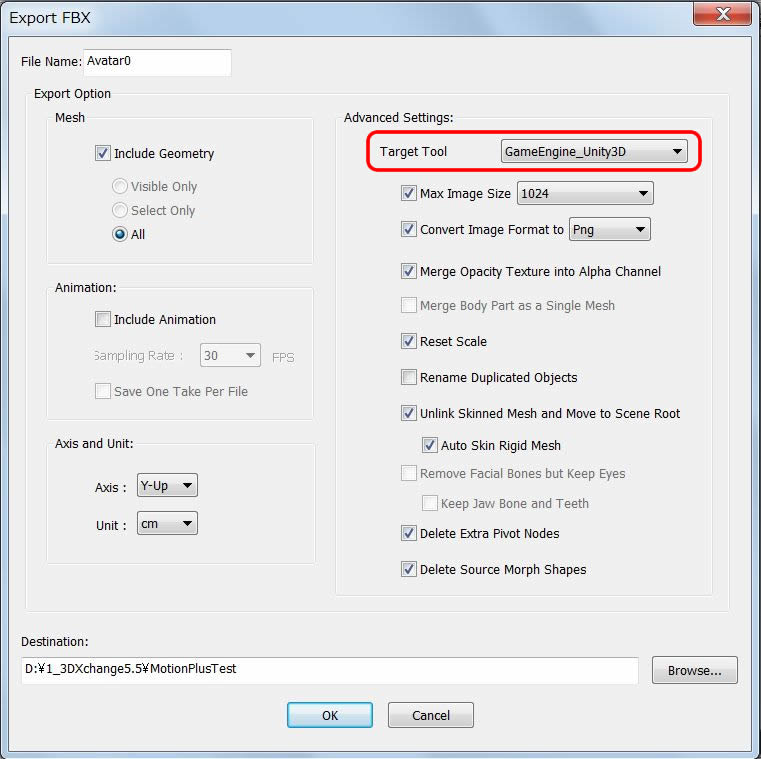
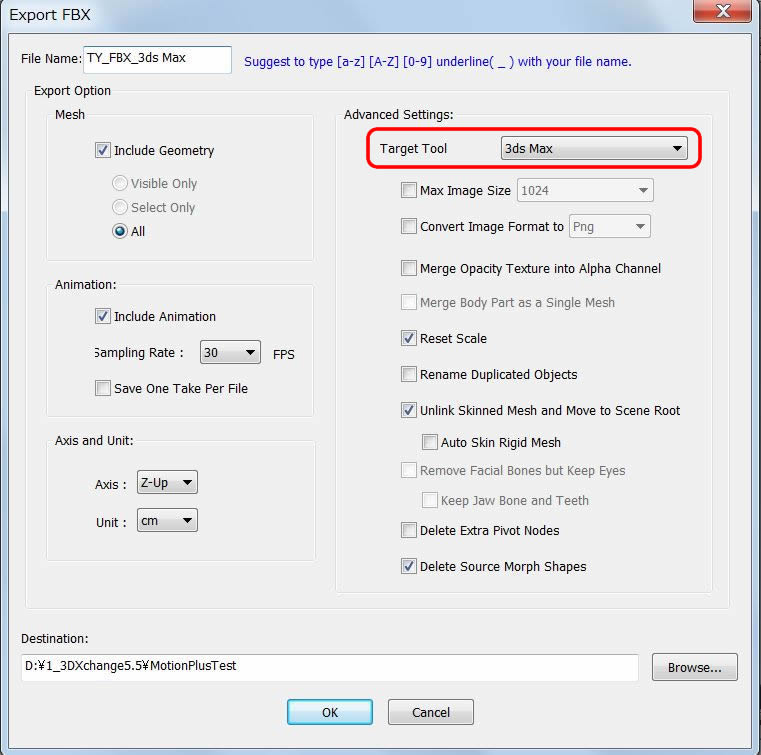
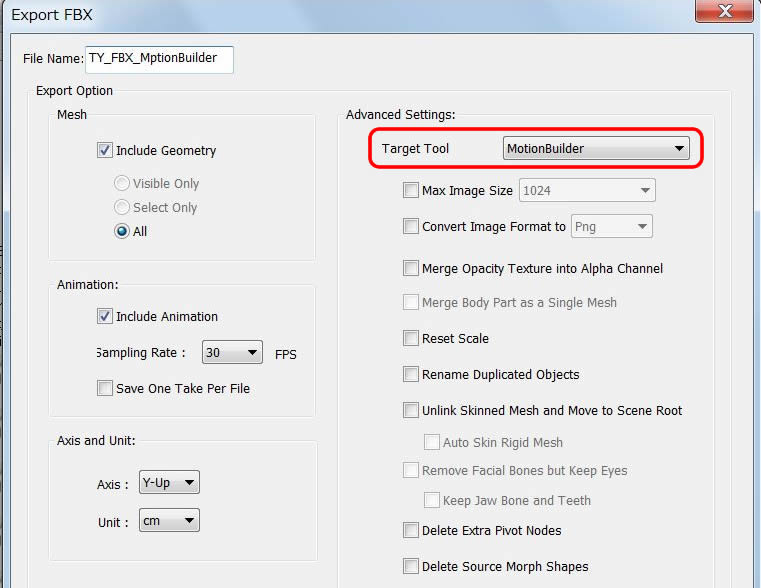
Go to File/Export to other 3D Format/Export FBX and select Target Tools. |
| |
TY2_3ds Max : Failed with 3DX5.5 Stopped
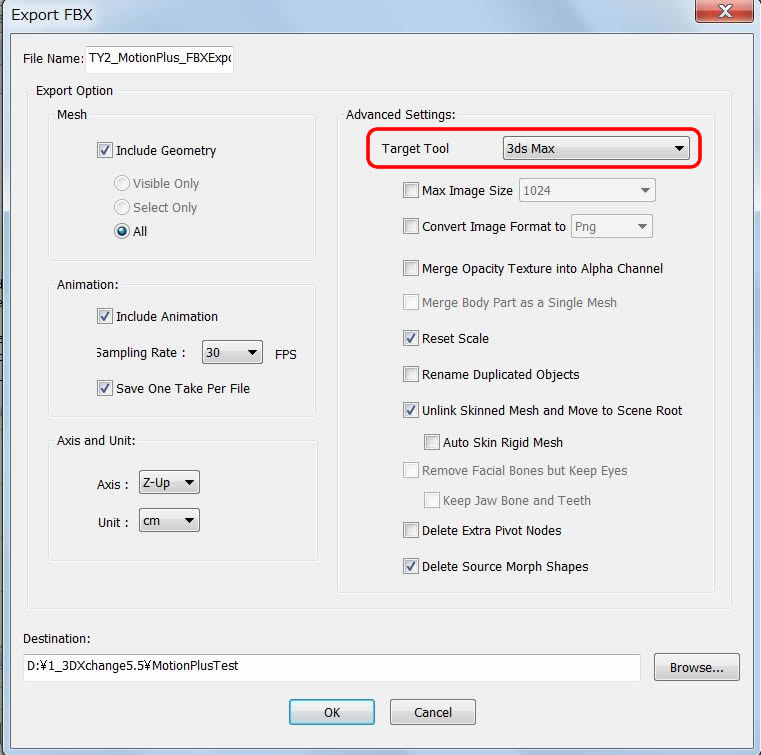 |
TY2(3ds Max) → 3ds Max
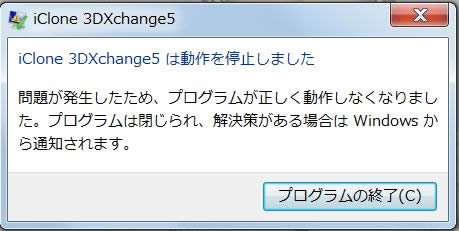 |
3DX5.5 stopped operation
for this Target. |
|
|
| |
TY2 Full_MotionBuilder : Succeeded but FBX file does not open
|
TY2 (MotionBuilder) → 3ds Max
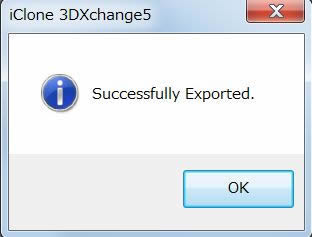 |
Exported FBX file does not open in 3ds max. |
|
|
| |
TY2 FULL_Unity(Animation Excluded) : Scceeded but no expression
|
TY2 (Unity) → 3ds Max
 |
Exported FBX file opened on
3ds max but no animation. |
|
|
8-2 |
Replace Poser model from high poly 'TY2 FULL' to low poly 'TY Set'. |
| |
|
|
TY Set : 37,628 Polygon Counts, MotionPlus applied
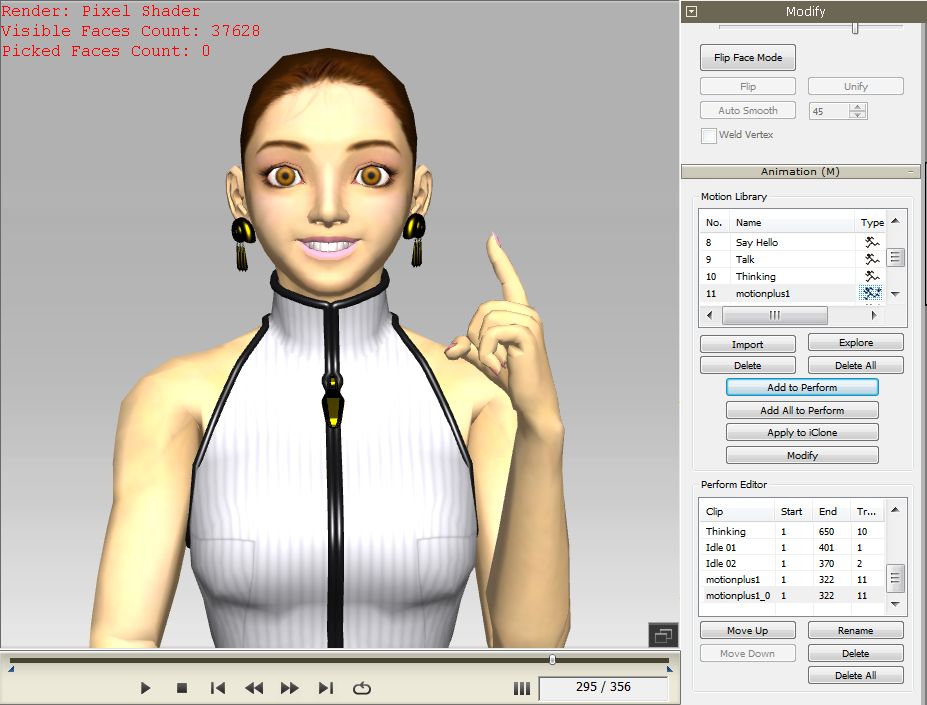 |
8-3 |
Go to Export FBX and select Target Tool again. The Result is shown as follows. |
| |
TY Set_3ds Max: Failed with 3DX5.5 Stopped
|
TY (3ds Max) → 3ds Max
 |
3DXchange stopped operation
for this Target.
|
|
|
| |
TY Set_MotionBuilder : Succeeded
|
TY2 (MotionBuilder) → 3ds Max
 |
Exported FBX file opened on
3ds max.
Body and Facial motion is previewed.
No Voice Sound. |
|
|
| |
TY Set_Maya : Succceeded
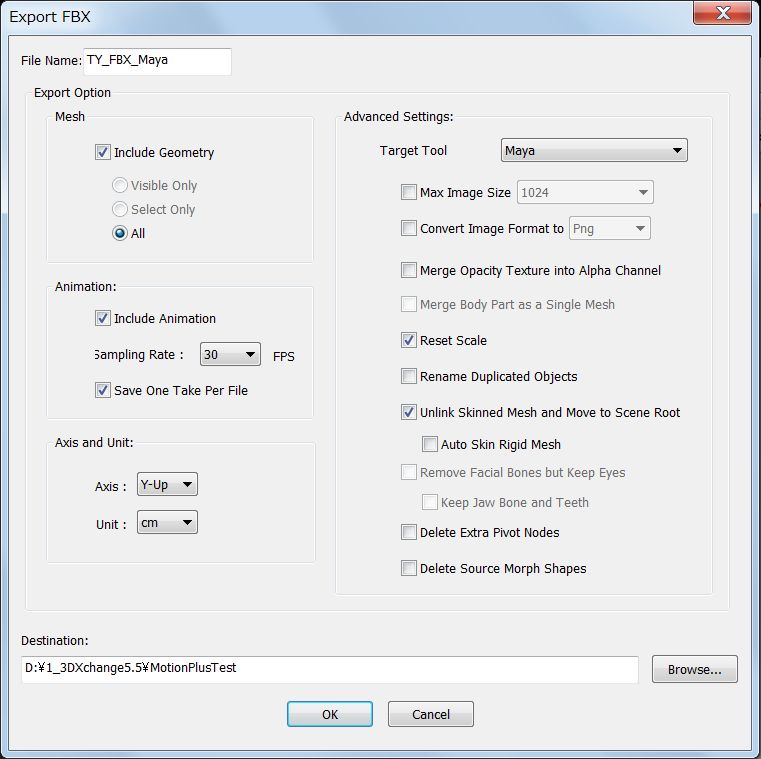 |
TY2 (Maya) →
 |
|
| |
TY Set_Custom : Succeeded
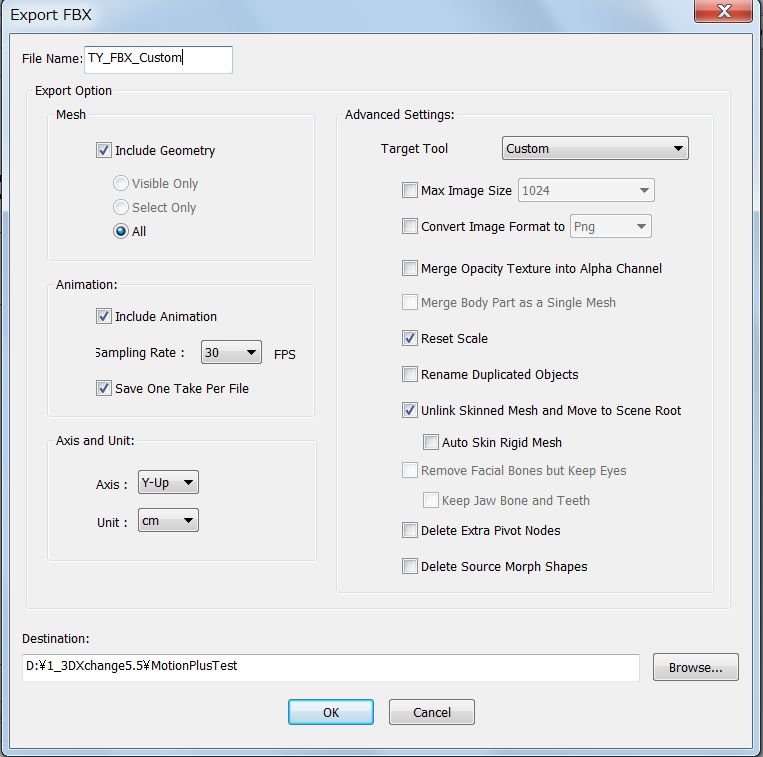 |
TY2 (Custom) →
 |
|
9 |
Test1: TY Set FBX Import into 3ds Max |
9-1 |
TY Set is imported into 3ds Max with Motion Plus movement. |
| |
3dsmax Time Configuration: Frame Count 180 for 356 frames on 3DX5.
Preview Image (Hair material is not shown)
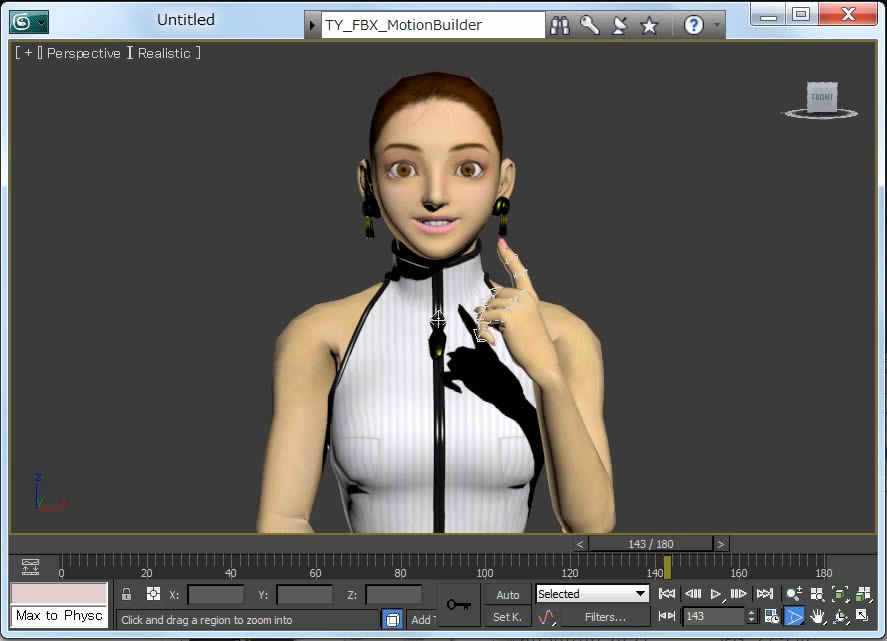
|
9-2 |
To add Voice Sound, click on 'Open Mini Curve Editor' icon, left click on Sound.
|
| |
Open Properties, and import the voice file.
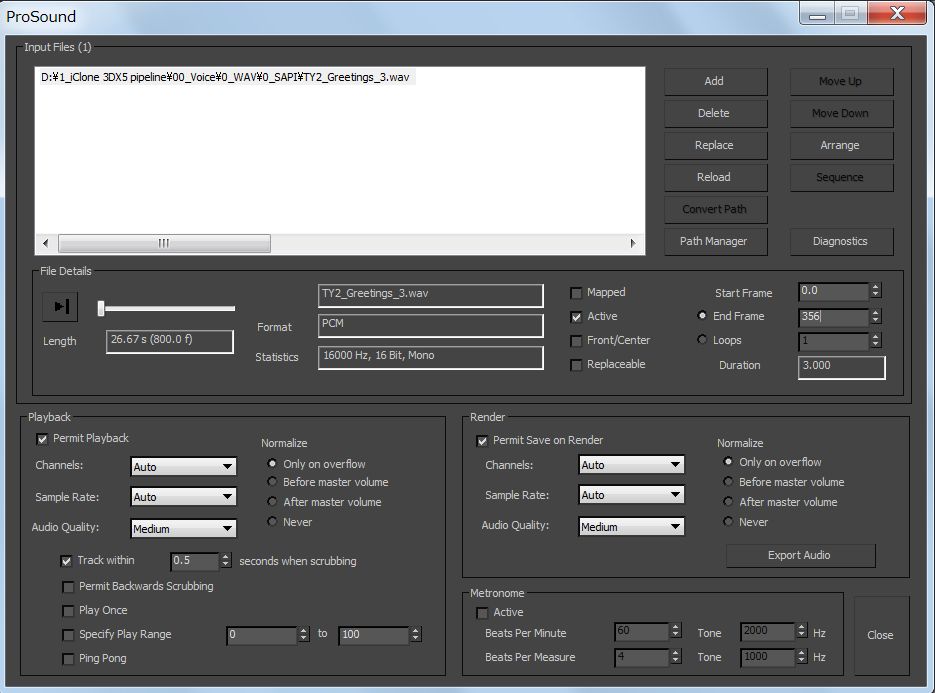 |
Set TimeConfiguration
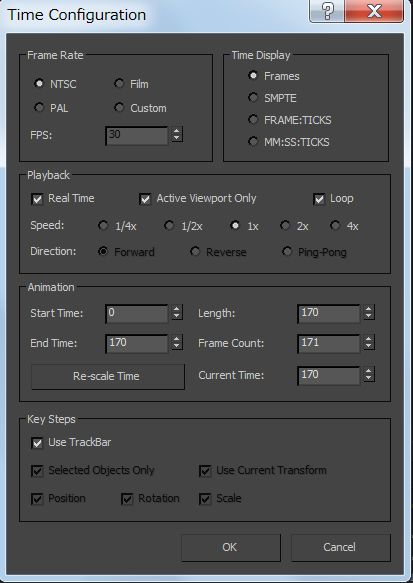 |
|
9-3 |
TY Set has Face Expression with Persona motion, Voice added at 3ds Max. |
| |
Preview Image
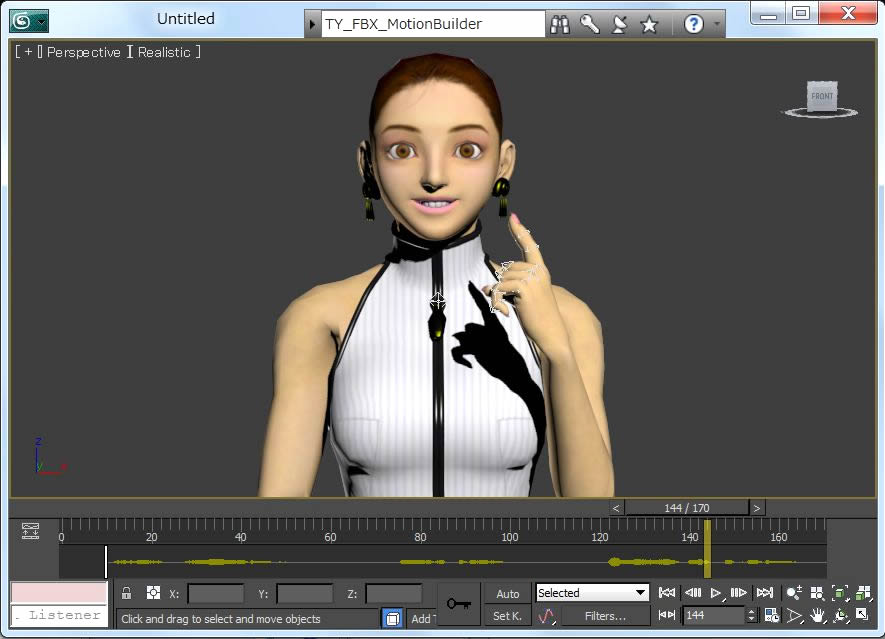 |
|
Test2: TY Set FBX Import into Unity
|
| |
Exported FBX file (TY Set_MotionBuilder) opened on Unity with MotionPlus file. |
| |
1) Create TY_5.5 folder in the Assets, locate the Exported TY\MotionBuilder.fbx file in there. |
| |
The motionplus file is shown in the Project |
| |
2) When the motionplus file dragged into the Animator folder, NewController.controller file is created. |
| |
Hair mesh was deleted in this test.
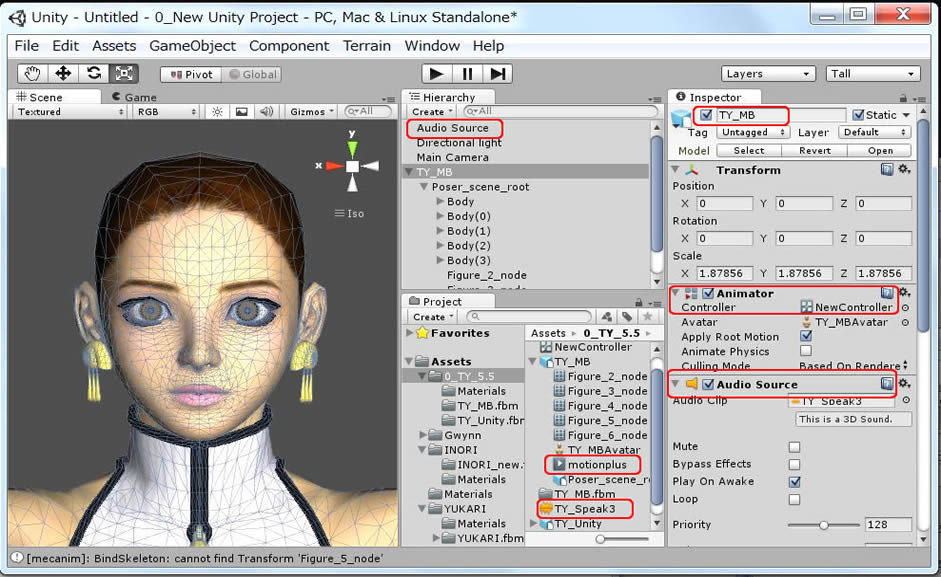
|
| |
3) Create 'Audio Source' in the Hierarchy Panel to import a Voice file. |
| |
Go to GameObject/Create Empty, find 'Game Object' in the Hierarchy panel and rename it to 'Audio Source'.
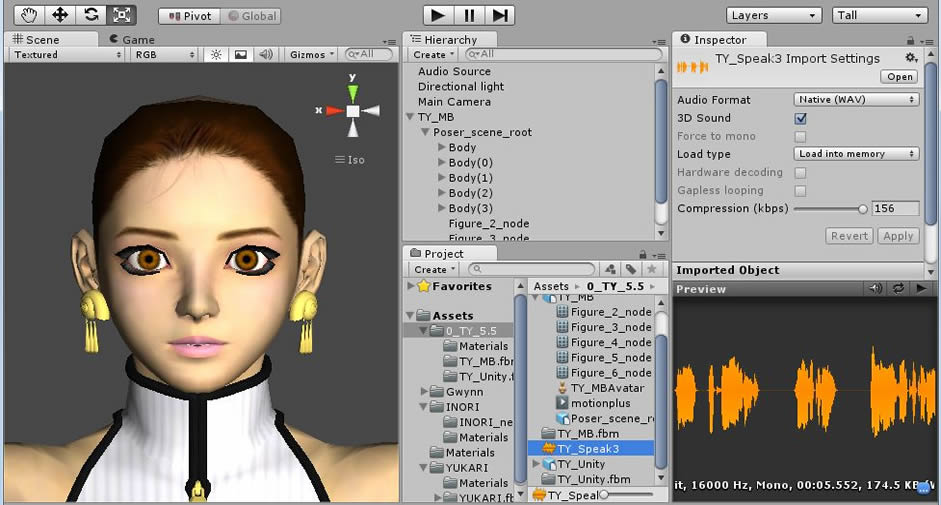 |
| |
4) Body Motion is confirmed but no Facial Expression is observed on the Unity Scene. |
| |
5) For more test, need to get a Plugin MegaFires for Lipsynching (Morphed talk) and a Max Exporter.
| MegaFires |
Access to MEGA-FIRES, STORE: Download 'MegaFiersv2.44.rar'.
Install 'Mega-Fiers.unitypackage' into Unity Standard packages folder |
| Max Exporter |
Generate .MOR files for Unity in 3ds Max
Send a e-mail to megafiers@west-racing.com with order info and request a Max Exporter.
'MorphExport_201264a.dlo' is sent by e-mail.
|
|
| |
(to be continued) |
| |
|
| 10 |
Demo Video Creation |
| |
A part of TY greeting is shown on PoserPro, iClone, 3ds Max and Unity which uses new Motion Plus function. |
| |
|
3DX5.5/iClone5.5 Test Report 2013.8.12 Hirospot (Personal Site) |
Revised 2014.6.24 |
